Unleash Your Inner Cookie Monster with These Irresistible Blue Stuffed Cookies
Get ready for a treat that’s as fun to make as it is to eat! Our easy Cookie Monster Cookies recipe is a delightful explosion of flavor and texture, featuring an abundance of milk chocolate chips, white chocolate chips, and chopped chocolate chip cookies. But the real surprise lies within: a whole Oreo cookie nestled in the center of each vibrant blue masterpiece. Inspired by the viral TikTok trend, this enhanced version takes the fun to a whole new level, promising an unforgettable baking experience and a truly crave-worthy result. We’ll guide you through achieving that iconic bold blue Cookie Monster cookie dough, share essential baking tips, and provide a clear, easy-to-follow recipe to ensure your cookies are perfect every time.

The Ultimate Blue Chocolate Chip Cookie Experience
Imagine soft, chewy chocolate chip cookies, but amplified! These Cookie Monster Cookies are essentially blue chocolate chip cookies on a delicious cookie overload – in the absolute best way possible. While the original TikTok sensation often featured just chocolate chips and a gooey chocolate bar center, we’ve elevated this recipe by incorporating even more cookie goodness directly into the dough. Each bite delivers a symphony of textures and flavors, from the classic chewiness of the cookie base to the melt-in-your-mouth chocolate chips and the satisfying crunch of chopped cookies. And then, there’s the grand finale: a full Oreo cookie surprise in the very heart of each treat.
These whimsical cookies are more than just a dessert; they’re an experience! They are absolutely perfect for birthday parties, school bake sales, holiday gatherings, or simply when you need a joyful pick-me-up that brings smiles to everyone’s faces. Their vibrant color and decadent flavor make them a standout treat that will surely impress.
🍪 Cookie Monster Cookies Ingredients
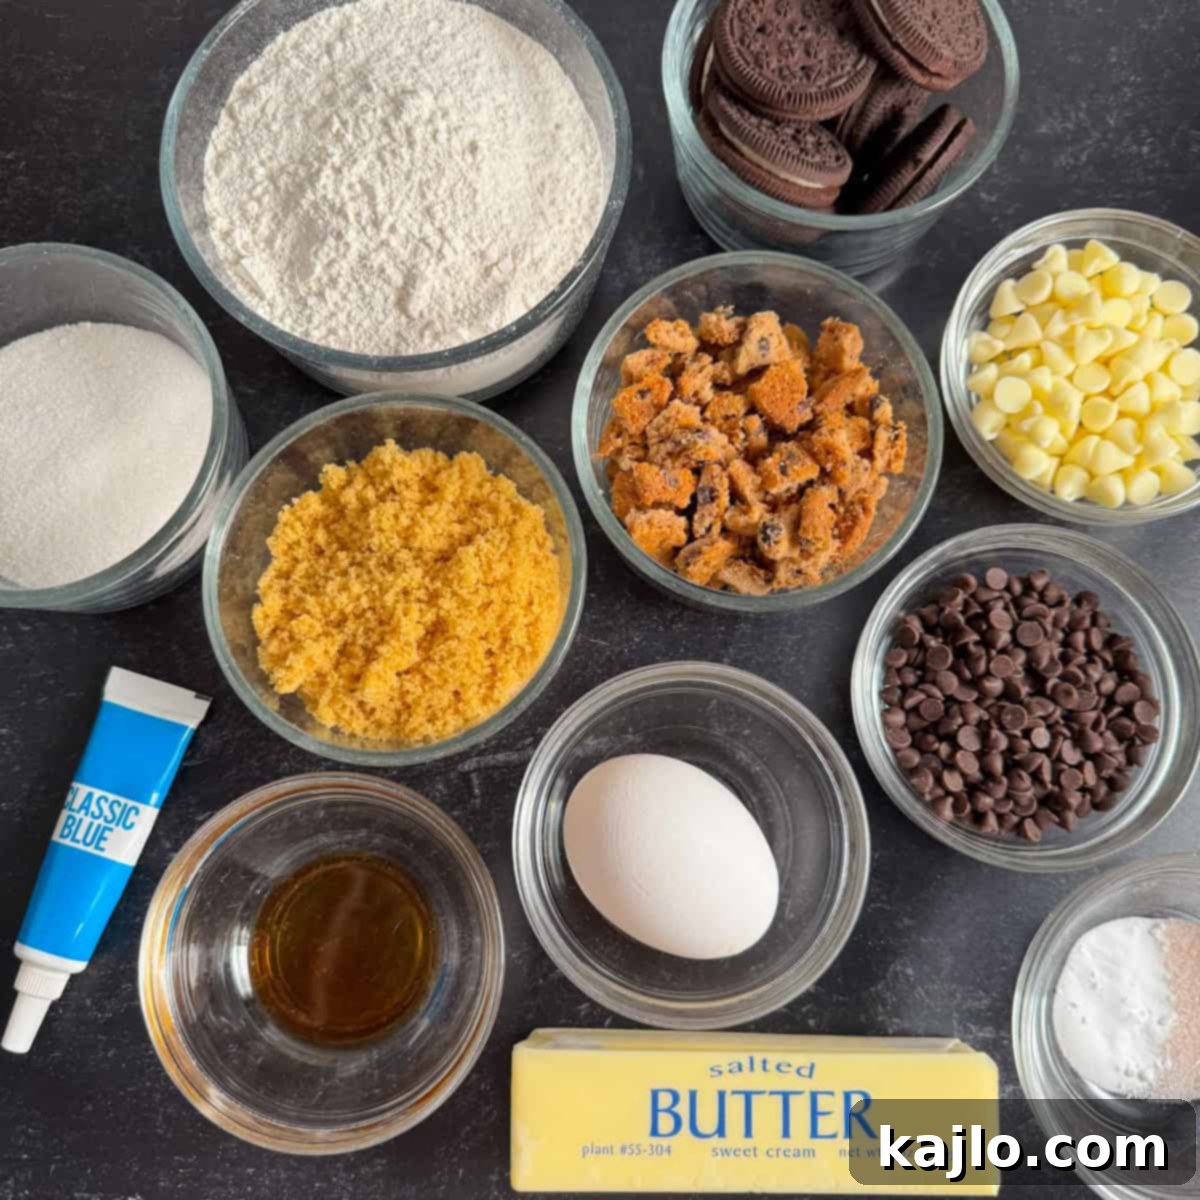
Crafting these legendary blue cookies requires a few simple, yet key, ingredients. Quality matters, so choose your components carefully for the best flavor and texture. Here’s a detailed look at what you’ll need:
- All-Purpose Flour: 1¼ cups (150 grams). We recommend weighing your flour for accuracy, as volume measurements can vary.
- Baking Soda: ½ teaspoon. This leavening agent helps achieve that perfect soft and chewy texture.
- Salt: ½ teaspoon. A touch of salt balances the sweetness and enhances all the other flavors.
- Unsalted Butter: 8 tablespoons (1 stick). Ensure your butter is at room temperature for optimal creaming with the sugars.
- Granulated Sugar: 6 tablespoons (72 grams). Provides sweetness and contributes to the cookie’s spread.
- Light Brown Sugar: 6 tablespoons (72 grams). Adds moisture, depth of flavor, and chewiness to the cookies.
- Large Egg: 1. Ideally at room temperature for better emulsion with the wet ingredients.
- Vanilla Extract: ½ teaspoon. A classic flavor enhancer for any cookie.
- Blue Gel Food Coloring: ½ tube (or adjust as needed). This is crucial for achieving that signature vibrant blue hue. More on this below!
- Whole Oreo Cookies: 10-12. These are the delightful surprise centers of your Cookie Monster cookies.
- Chopped Chocolate Chip Cookies: ½ cup (57 grams). Chips Ahoy or similar crispy chocolate chip cookies work perfectly. Chop them into small pieces for even distribution.
- Milk Chocolate Chips: ¼ cup (60 grams). Use your favorite brand, whether standard or mini chips.
- White Chocolate Chips: ¼ cup (60 grams). Adds another layer of sweetness and visual contrast.
- Additional Chopped Cookies and Chocolate Chips: (Optional, for topping). These are great for decorating your freshly baked cookies.
Achieving the Perfect Blue: The Secret to Vibrant Cookie Monster Cookies
The hallmark of a true Cookie Monster cookie is its stunning, bold blue color. To achieve this eye-catching shade, gel food coloring is your best friend. Unlike liquid food coloring, which can dilute your dough and struggle to deliver intense pigmentation, gel colors are highly concentrated. This means you’ll get that bright, vibrant Cookie Monster blue without altering the cookie dough’s consistency too much.
For truly striking results, you’ll need to use a generous amount of gel color. In this recipe, we recommend starting with about half a tube to achieve a fun and appealing shade. Remember, you can always add more until you reach your desired vibrancy. Food coloring paste is another excellent option; it’s also super concentrated and yields similarly vivid colors.
If you prefer to use natural food coloring, such as blue butterfly pea flower powder, it can certainly be used in this recipe. However, be aware that natural options may not produce a color as intensely vibrant as artificial gel food coloring. The hue might be a more subtle, earthy blue, which can still be beautiful in its own right.
➕ How to Make Cookie Monster Cookies: Step-by-Step Guide
Follow these detailed steps to bake your very own batch of scrumptious Cookie Monster cookies:
Prepare Your Dry Ingredients and Mix-Ins
Using a food scale, accurately measure your all-purpose flour, granulated sugar, light brown sugar, chocolate chips, and chopped chocolate chip cookies. Precision in baking helps ensure consistent results. Take your Chips Ahoy (or similar) cookies and chop them into small, crumbly pieces. These bits will add delightful texture throughout your blue cookies.
Whisk Dry Ingredients
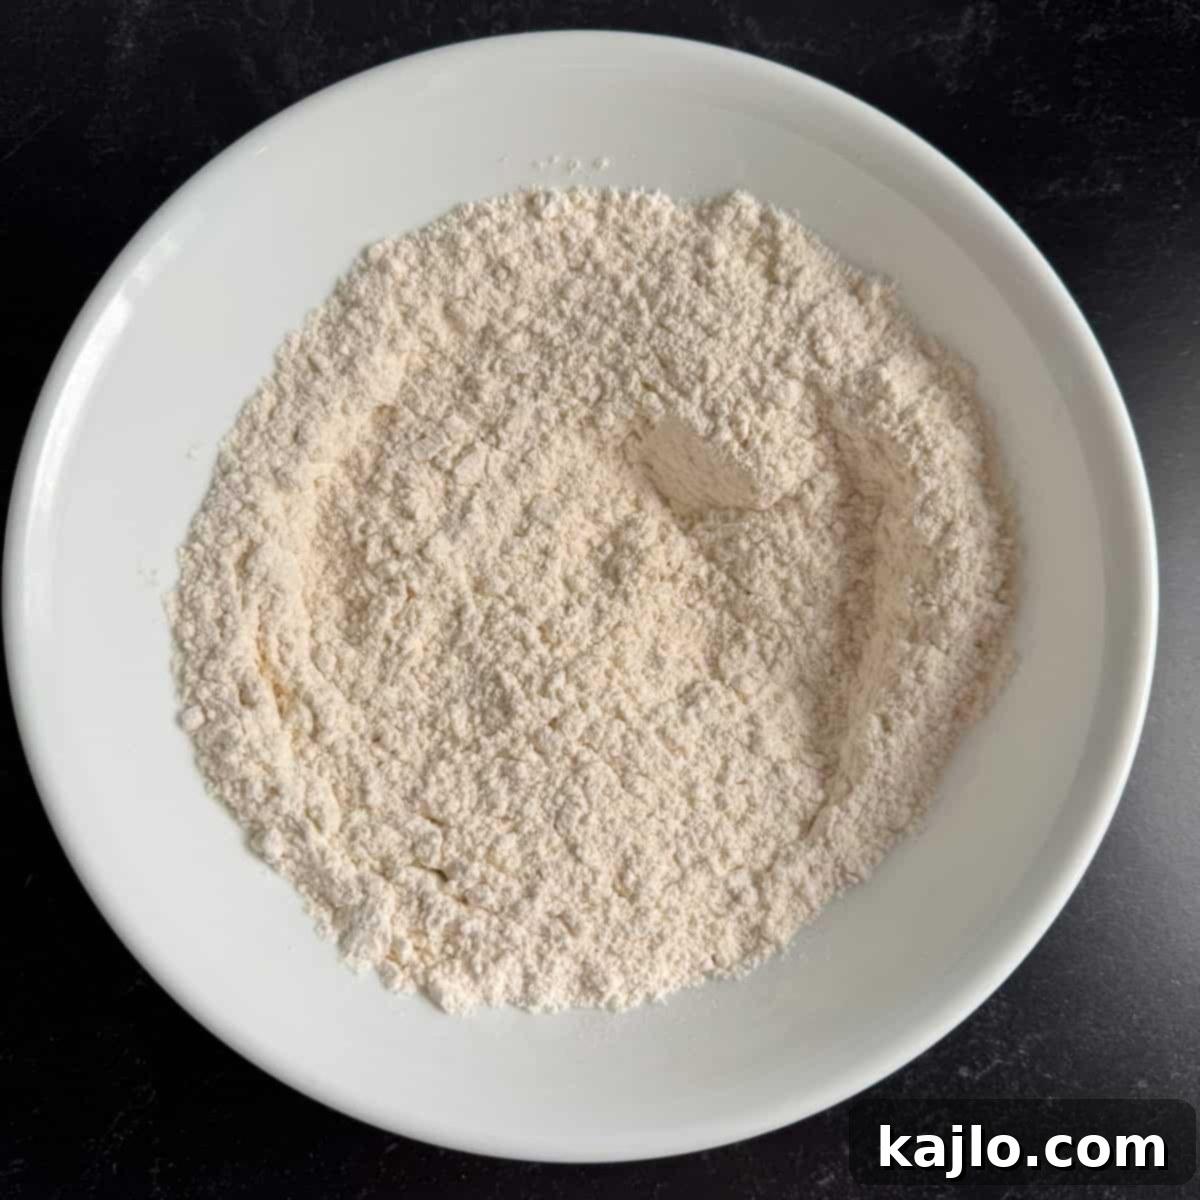
In a medium-sized bowl, combine the measured flour, baking soda, and salt. Whisk these dry ingredients together thoroughly to ensure they are well distributed. This step prevents pockets of leavening agents or salt in your final cookie. Set this bowl aside for later use.
Cream Butter and Sugars
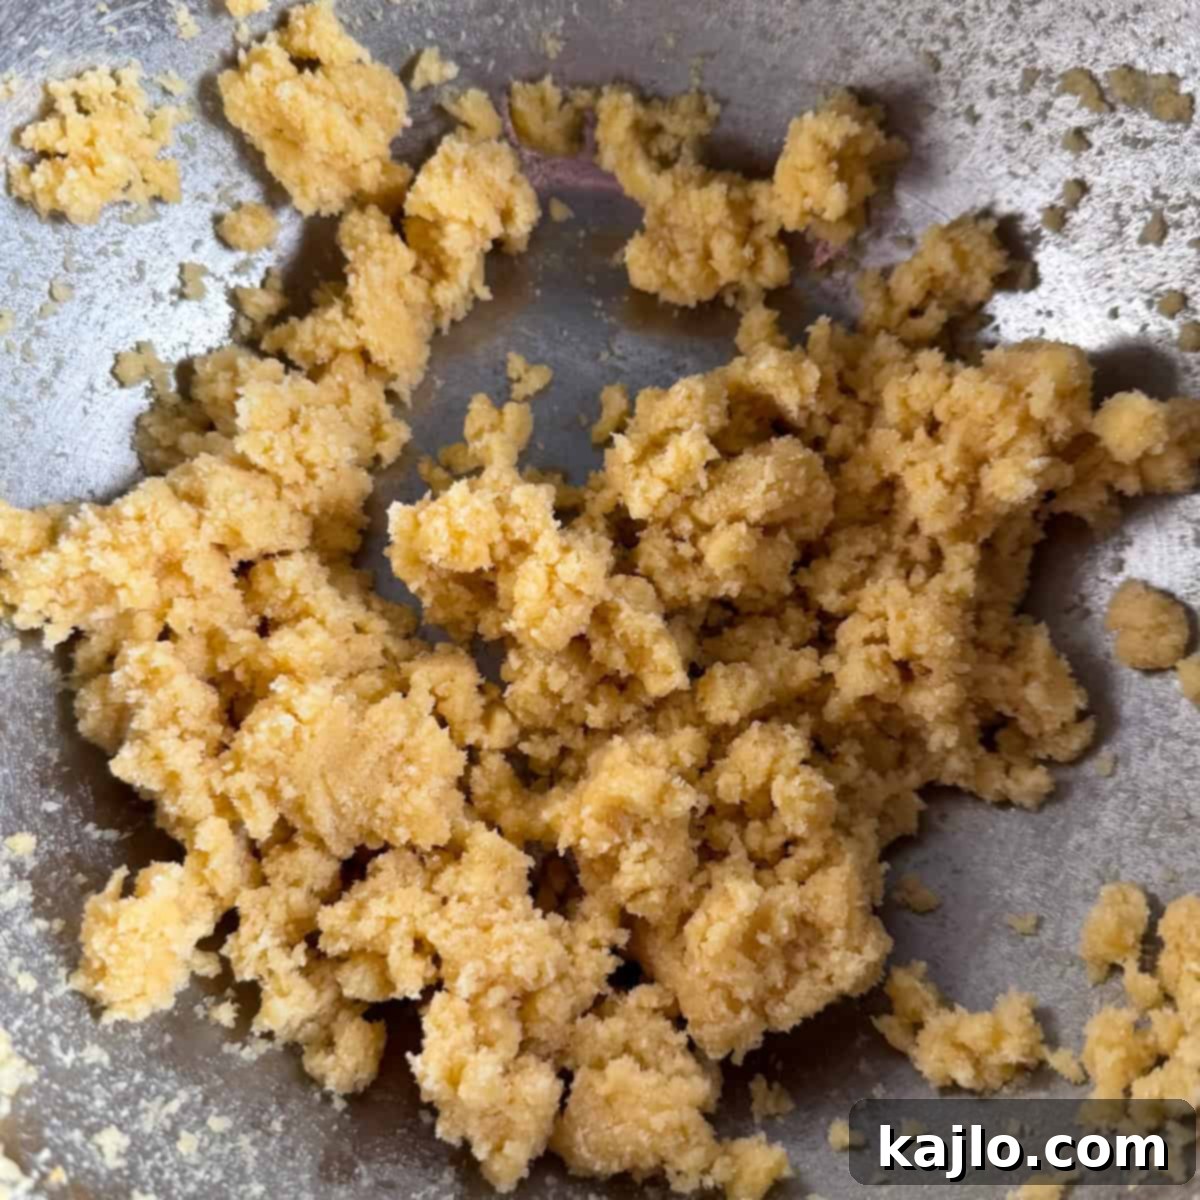
In a large mixing bowl, add the softened butter, granulated sugar, light brown sugar, and vanilla extract. Using an electric hand mixer (or a stand mixer with a paddle attachment), beat these ingredients together on medium speed until the mixture becomes light, fluffy, and creamy. This process incorporates air, which is crucial for a tender cookie texture. Be careful not to overmix; 1-2 minutes is typically sufficient. Overmixing can develop too much gluten, leading to tougher cookies.
Incorporate Egg, Coloring, and Dry Mix-Ins
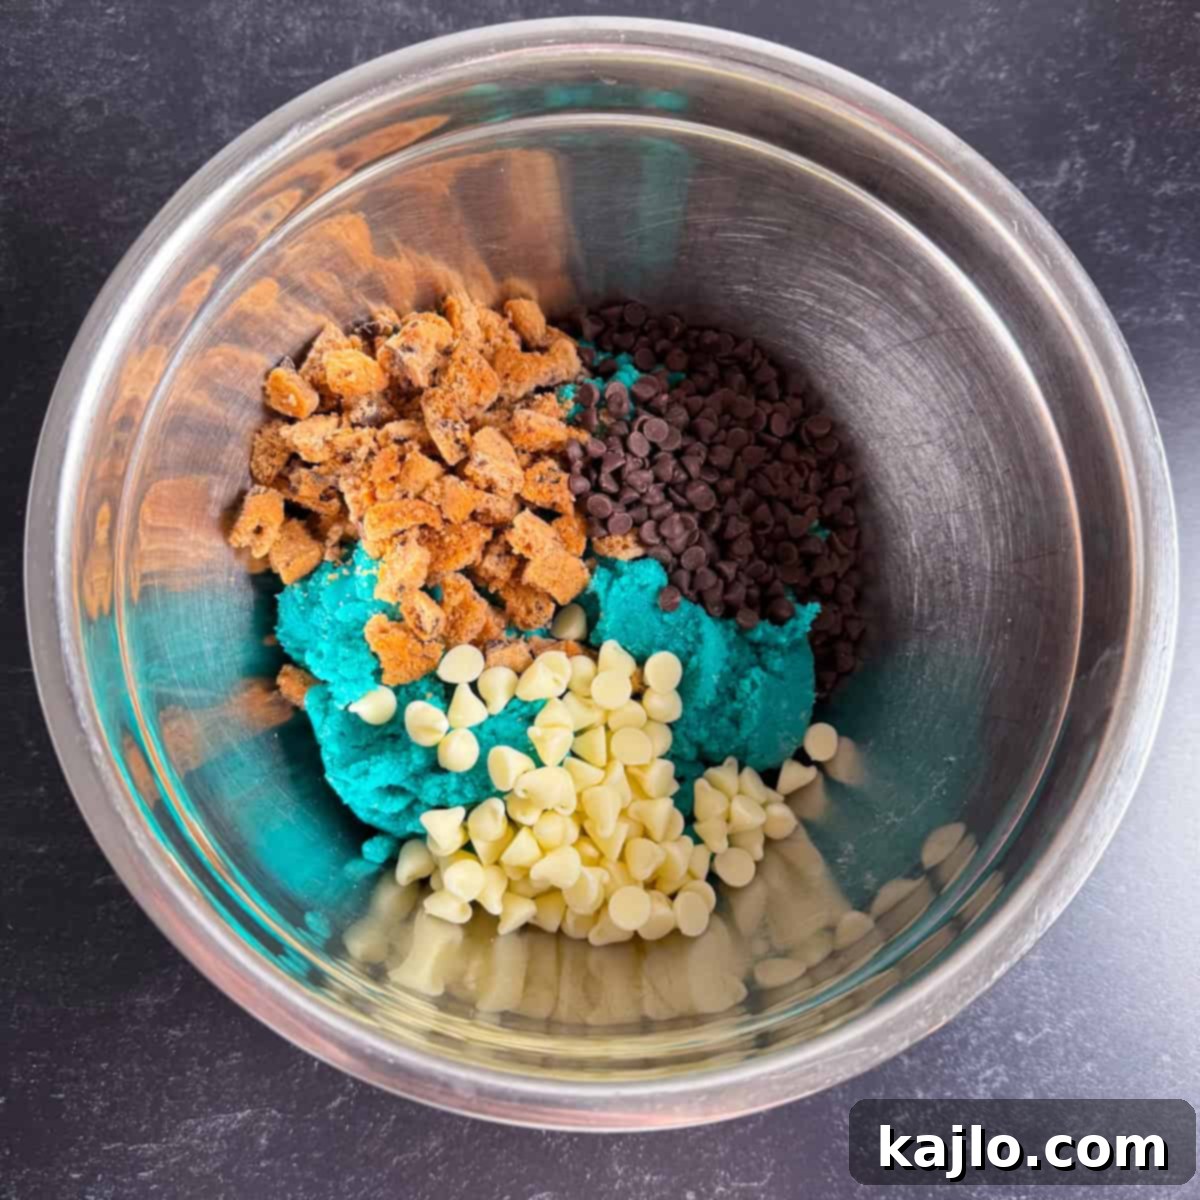
Add the large egg and the blue gel food coloring to the creamed butter and sugar mixture. Beat with the electric mixer until the egg is fully incorporated and the dough turns a uniform blue color. Once achieved, gradually add the flour mixture into the blue dough, mixing on low speed until just combined. Be careful not to overmix at this stage. Finally, switch to a spatula or wooden spoon and gently stir in the milk chocolate chips, white chocolate chips, and chopped chocolate chip cookie pieces by hand. This ensures the mix-ins are evenly distributed without overworking the dough.
Chill the Cookie Dough
Cover the bowl containing your blue cookie dough with plastic wrap and place it in the refrigerator to chill for at least one hour. Do not skip this crucial step! Chilling the dough solidifies the butter, which prevents the cookies from spreading too much during baking, resulting in thicker, chewier cookies. It also allows the flavors to meld together, enhancing the overall taste.
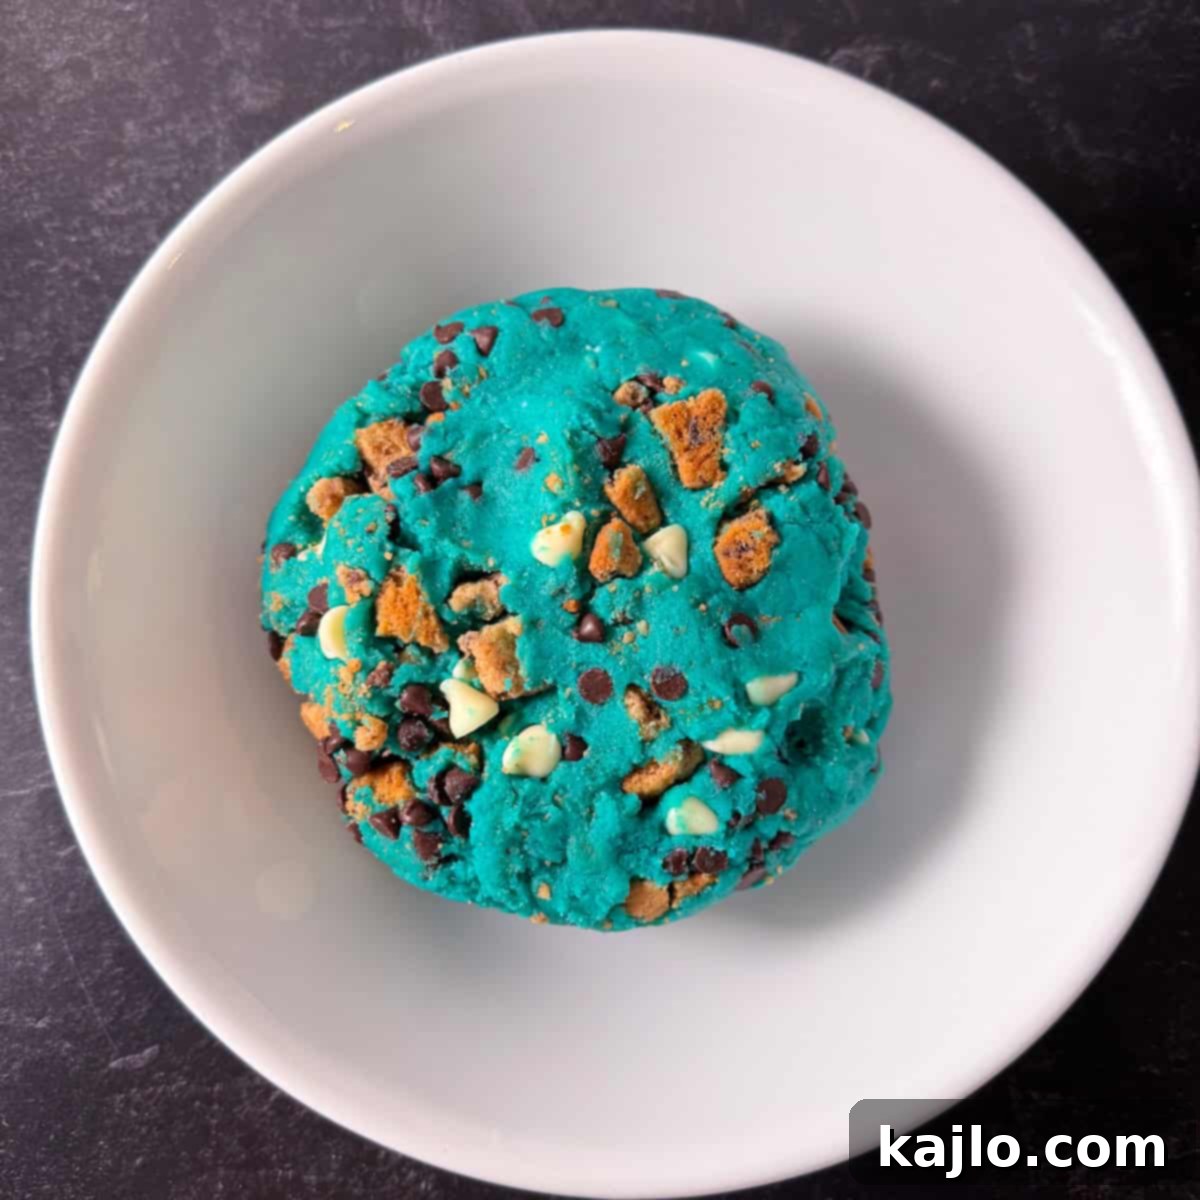
Preheat Oven and Prepare Baking Sheet
Towards the end of the chilling time, preheat your oven to 375°F (190°C). Line a large, light-colored baking sheet with parchment paper. Parchment paper prevents sticking and helps ensure even baking and easy cleanup. A light-colored baking sheet helps prevent the bottoms of the cookies from browning too quickly.
Assemble Stuffed Cookies
Remove the chilled cookie dough from the fridge. Take approximately tablespoon-sized balls of dough and place them on the prepared baking sheet. You will use about half of the dough for this initial layer, aiming for 10-12 evenly spaced balls. Gently press each dough ball down to flatten it slightly, then place one whole Oreo cookie on top of each flattened dough ball.
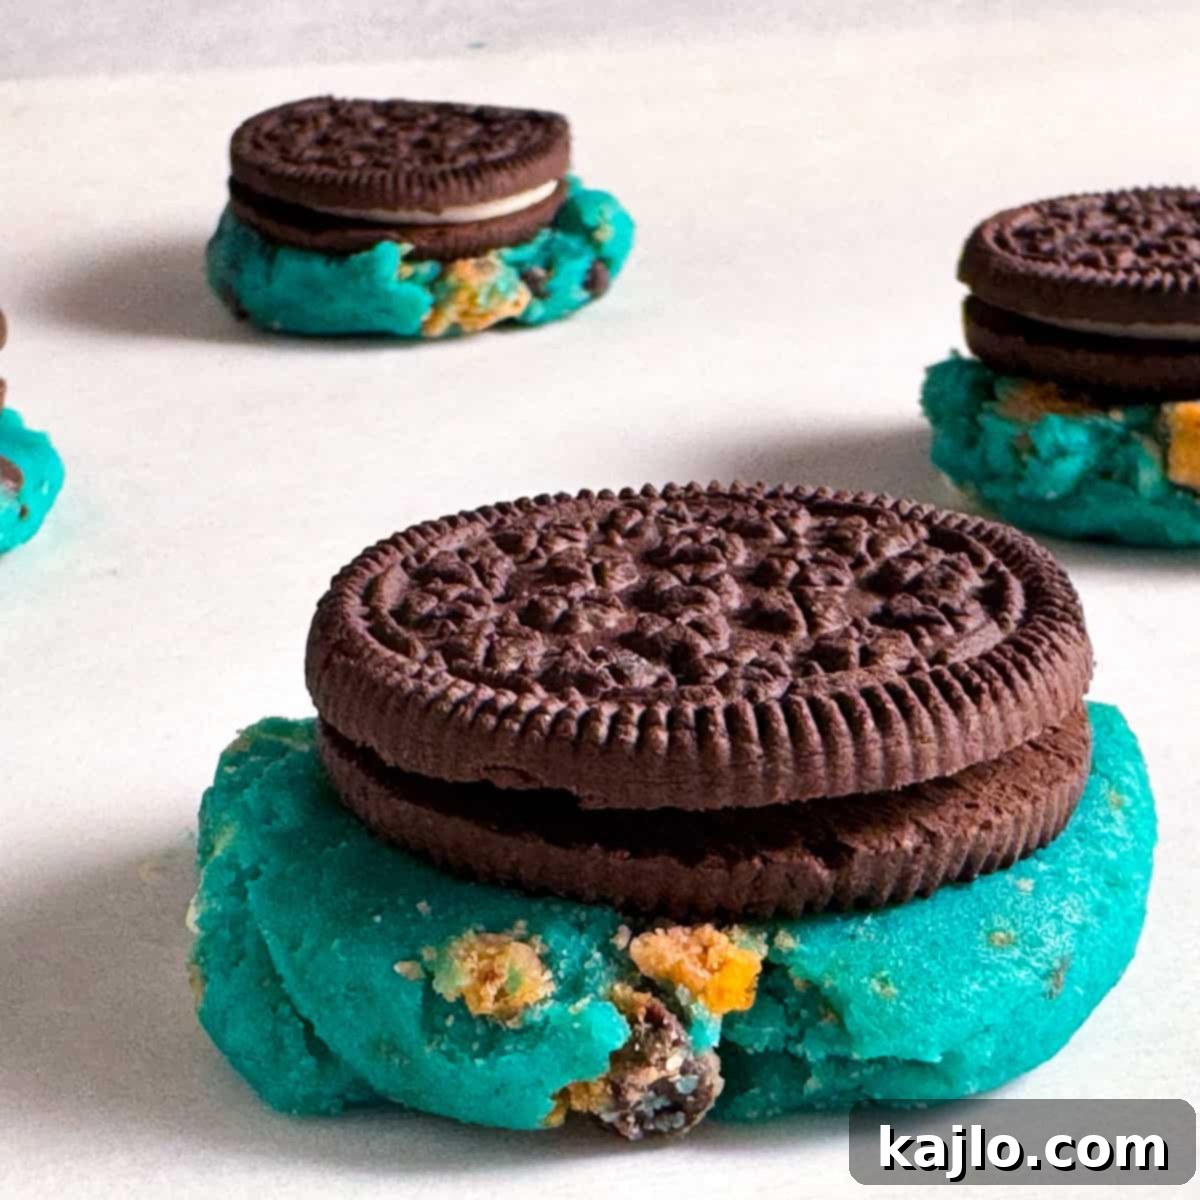
Seal the Oreo Surprise
Take another tablespoon-sized ball of cookie dough and carefully place it on top of each Oreo cookie, covering it completely. Gently mold and seal the dough around the edges, ensuring the Oreo cookie is fully enclosed and hidden inside the blue dough ball. This creates the “stuffed” effect that makes these cookies so special.
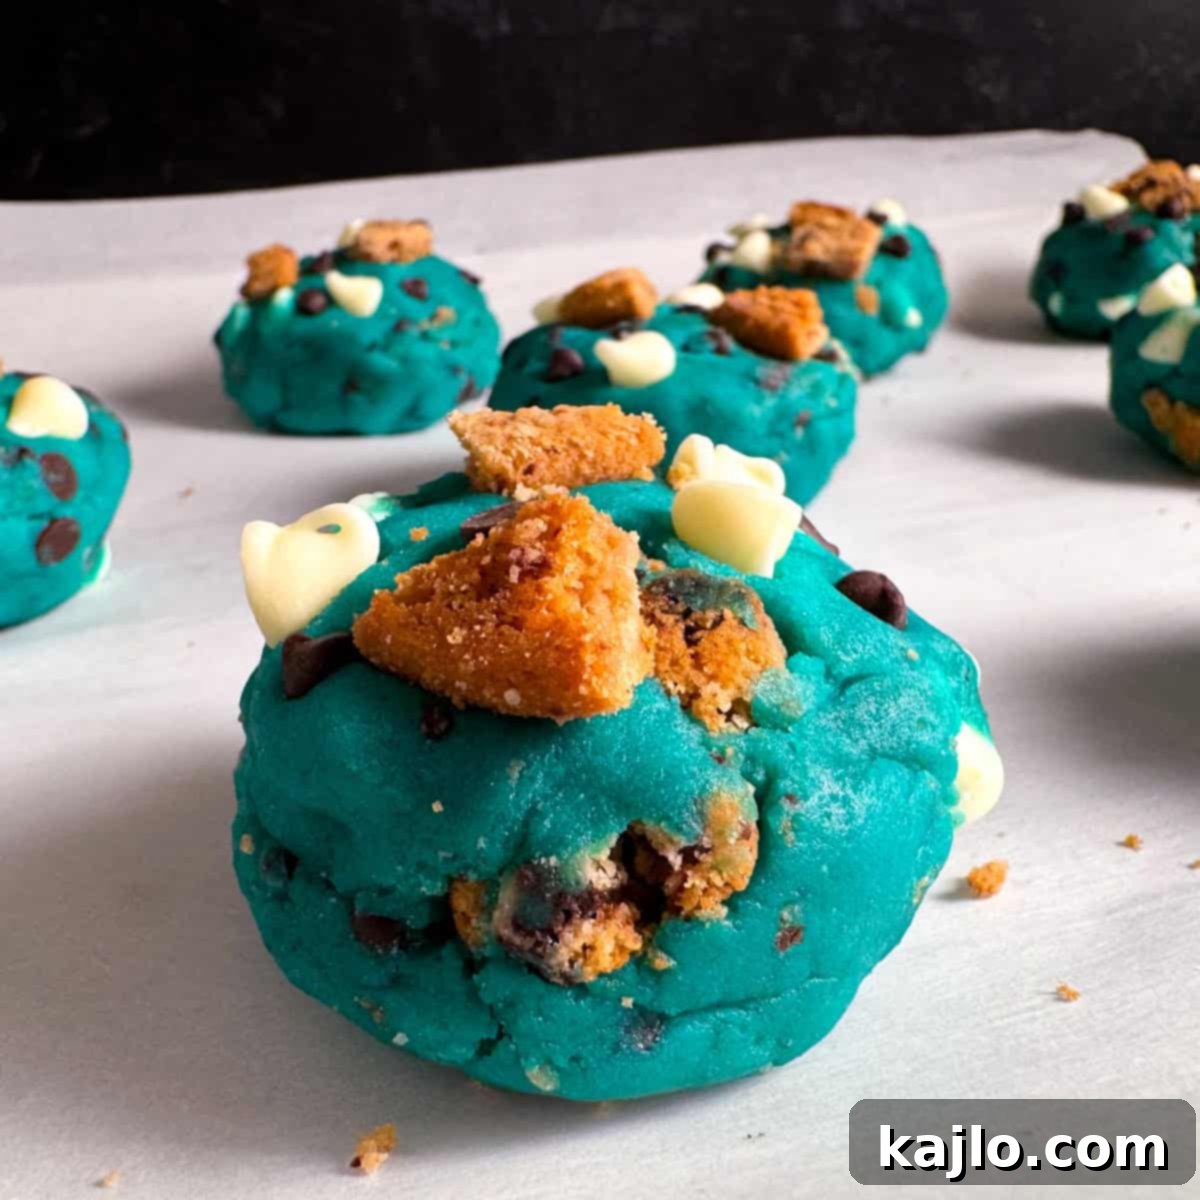
Bake to Perfection
Place the baking sheet in the preheated oven, ideally on a rack positioned about halfway down from the top. Bake the cookies for 9-10 minutes. It’s crucial not to overbake them! The cookies should still look a little underdone, soft, and slightly puffy when you remove them from the oven. The edges might be lightly golden, but the centers should appear very soft. They will continue to set as they cool, leading to that perfect chewy texture.
Add Optional Toppings
Immediately after removing the cookies from the oven, while they are still hot and soft, you can gently press additional chopped cookies and chocolate chips onto their tops (if desired). This adds extra visual appeal and a delightful crunch to each cookie.
Cool and Enjoy
Allow the freshly baked cookies to cool on the baking sheet for 10-15 minutes. This initial cooling period allows them to firm up enough to be transferred without breaking. After this time, carefully move the cookies to a wire rack to finish cooling completely. Resist the urge to eat them all at once! The flavors and textures will fully develop as they cool.

Expert Tips & Troubleshooting for Your Cookie Monster Creations
How to Know When Your Cookies are Perfectly Done
Achieving the ideal doneness is crucial for soft and chewy chocolate chip cookies. They can often look a little underbaked when they are, in fact, just right! Look for cookie bottoms that are lightly golden – not deeply browned. The tops may still appear soft and slightly puffed in the center, and that’s perfectly fine. A slight jiggle when you gently tap the baking sheet is also a good indicator. It’s always better to slightly underbake your cookies; you can always pop them back in the oven for another minute or two if needed. But once they’re overbaked, there’s no saving them from becoming dry and crumbly!
Why Do My Cookies Turn Hard After Cooling?
If your cookies start out soft and delicious but become hard and brittle after cooling, it’s a common sign of overbaking. Many cookie recipes, including this one, are designed to appear slightly too soft and underdone when they first come out of the oven. This is because they continue to cook and set on the hot baking sheet even after removal. As they cool completely, they will firm up to that wonderfully chewy texture you desire. If they come out of the oven looking perfectly golden and set, chances are they’ll be hard once fully cooled. Trust the process and aim for that slightly underbaked look!

Tips for Achieving Perfectly Round Cookies
Want your Cookie Monster cookies to look as picture-perfect as they taste? You can gently nudge the edges into a rounder shape immediately after they come out of the oven. While the cookies are still warm and soft, use the back of a spoon or the edge of a spatula to push the sides inwards, creating a more uniform circular shape. Work quickly, as they will set in place as they cool. Another trick is to use a slightly larger round cookie cutter (or a glass rim) to “scoot” around the warm cookies on the baking sheet right after baking. That said, a little bit of rustic charm is part of the appeal! Cookie Monster cookies are meant to look a bit wild, fun, and delightfully imperfect – just like their namesake!

How to Store Your Cookie Monster Cookies
To keep your Cookie Monster cookies fresh and delicious, store them in an airtight container in the refrigerator for up to 3-4 days. While they are still tasty, they are truly at their best within the first day or two after baking. For longer storage, these cookies freeze beautifully! Simply place them in a single layer in an airtight container or a freezer-safe bag, ensuring as much air as possible is pressed out to prevent freezer burn. They can be frozen for up to 2-3 months.
When you’re ready to enjoy a frozen treat, you can thaw individual cookies in the refrigerator for a few hours, or gently warm them in the microwave for 15-20 seconds. While you *can* eat them straight from the freezer for a different texture, warming them slightly truly brings out their soft, chewy best.
Cookie Monster Cookies Recipe
My easy Cookie Monster Cookies recipe is bursting with all the good stuff—milk chocolate chips, white chocolate chips, chopped chocolate chip cookies, and they even have a surprise Oreo stuffed inside!
Watch How to Make It!
If the video does not play, you can often find a visual guide on the original website.

Prep Time: 15 mins
Cook Time: 10 mins
Total Time: 25 mins
Course: Snack
Cuisine: American
Servings: 11 cookies
Calories: 312 kcal per cookie
Ingredients
- 1¼ cups all-purpose flour (150 grams)
- ½ teaspoon baking soda
- ½ teaspoon salt
- 8 tablespoons butter (unsalted, softened)
- 6 tablespoons sugar (72 grams)
- 6 tablespoons light brown sugar (72 grams)
- 1 large egg (room temperature)
- ½ teaspoon vanilla extract
- ½ tube blue gel food coloring (adjust for desired color)
- 10-12 whole Oreo cookies
- ½ cup Chips Ahoy cookies, chopped (57 grams; or other crispy chocolate chip cookies)
- ¼ cup milk chocolate chips (60 grams)
- ¼ cup white chocolate chips (60 grams)
- Additional chopped cookies and chocolate chips (optional, for topping)
Instructions
- Measure flour, sugars, chopped chocolate chip cookies, and chocolate chips using a food scale. Chop the chocolate chip cookies into small pieces.
- In a small bowl, whisk together the flour, baking soda, and salt. Set aside.
- In a large mixing bowl, beat the softened butter, granulated sugar, light brown sugar, and vanilla extract with an electric mixer until creamy (about 1-2 minutes). Do not overmix.
- Add the egg and blue gel food coloring to the sugar mixture. Beat until the egg is fully incorporated and the dough is uniformly blue. Gradually add the flour mixture and mix on low speed until just combined. Stir in the chocolate chips and chopped chocolate chip cookie pieces by hand.
- Cover the bowl with the cookie dough and chill in the fridge for at least one hour. This prevents spreading.
- Preheat your oven to 375°F (190°C). Line a large, light-colored baking sheet with parchment paper.
- Scoop tablespoon-sized balls of chilled dough onto the baking sheet (you should get 10-12 balls for the first layer). Press each ball down to flatten it slightly, then place one whole Oreo cookie on top.
- Cover each Oreo cookie with an additional tablespoon of dough. Carefully seal the dough around the edges to completely hide the Oreo inside.
- Bake for 9-10 minutes. The cookies should look slightly underdone and soft when removed from the oven.
- If desired, gently press additional chopped cookies and chocolate chips into the hot cookies immediately after baking.
- Let the cookies cool on the baking sheet for 10-15 minutes before transferring them to a wire rack to finish cooling completely.
Equipment
- Food Scale
- Hand Mixer (or stand mixer)
- Parchment Paper
- Light Baking Sheet
- Cookie Scoop (optional, but recommended for uniform size)
- Cooling Rack
Dietitian’s Notes from Summer Yule
This is a level 3 recipe (suitable for weight maintenance and active lifestyles). Let’s be real—cookies, like many delicious desserts, are typically loaded with white flour, added sugar, and added fat. While they’re not a “health food” in the traditional sense, there’s absolutely room for a cookie (or two!) in most balanced dietary patterns. Enjoying treats in moderation is key to a sustainable and enjoyable eating approach.
That said, if you find yourself channeling Cookie Monster on a regular basis, it might be a gentle reminder to ensure you’re also incorporating plenty of veggies and whole foods into your diet. Balance is everything! 😉
The great news is that these Cookie Monster Cookies freeze beautifully and make fantastic gifts. If you don’t have a bustling crowd at home to enjoy them all, your friends, neighbors, and coworkers will happily help you share the sweet rewards of your baking. So go ahead and spread the joy – whether they’re little kids or just kids at heart, all your fellow Cookie Monster fans will adore this special treat.
Nutrition information is an estimate for one cookie.
Nutrition Info Disclaimer
All recipes on this website may or may not be appropriate for you, depending on your medical needs and personal preferences. Consult with a registered dietitian or your physician if you need help determining the dietary pattern that may be best for you.
The nutrition information provided is an estimate offered as a courtesy. It will differ depending on the specific brands and ingredients that you use. Calorie information on food labels may be inaccurate, so please don’t sweat the numbers too much. Enjoy your treats mindfully!
“To taste” refers to your personal preferences, which may sometimes need to be visual to follow food safety rules. Please don’t consume undercooked food.
Nutrition Facts (per cookie)
- Calories: 312 kcal
- Carbohydrates: 42.1g
- Protein: 2.8g
- Fat: 15.3g
- Saturated Fat: 8.5g
- Fiber: 1g
- Vitamin A: 6.4% DV
- Calcium: 1.6% DV
- Iron: 3.1% DV
Keywords
cookie monster cookies, cookie monster cookies recipe, blue chocolate chip cookies, Oreo stuffed cookies, viral cookie recipe, easy cookie recipe, homemade Cookie Monster cookies, dessert ideas, kid-friendly cookies
👩🏻🍳 More Irresistible Cookie Recipes
If you loved these playful Cookie Monster cookies, you’re in for a treat! Explore more delicious cookie creations perfect for any occasion:
- Dairy-Free Chocolate Chip Cookies: A classic favorite, reimagined for those with dietary restrictions without sacrificing flavor.
- Air Fryer Peanut Butter Cookies: Quick, easy, and perfectly chewy peanut butter cookies made in your air fryer.
- Kodiak Cake Cookies: A healthier twist on cookies, using protein-packed Kodiak Cake mix.
- Air Fryer Sugar Cookies: Delightfully simple sugar cookies, baked efficiently in the air fryer.
- Biscoff Cookie Recipe: Indulge in the rich, caramel-like flavor of homemade Biscoff cookies.
Join our baking community! Subscribe for all the latest and greatest recipes, exclusive tips, and baking inspiration delivered straight to your inbox. Follow us on social media for daily dose of deliciousness: Facebook, Pinterest, Instagram, and YouTube! Let’s bake something amazing together!
