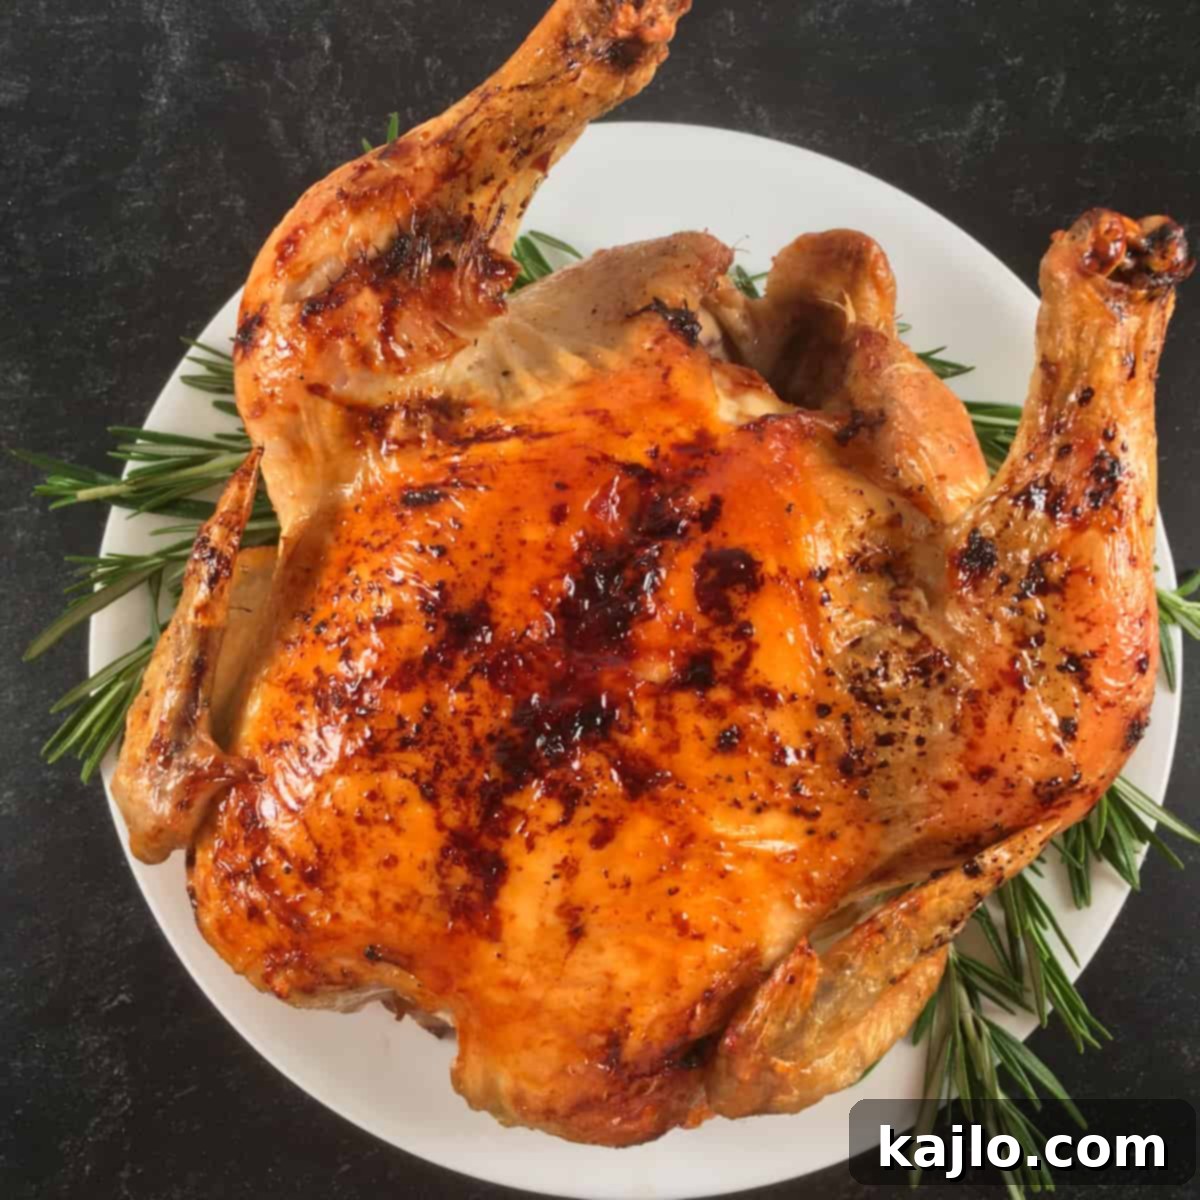
Discover the ultimate guide to making a succulent Ninja Foodi whole chicken! This meticulously crafted Ninja Foodi roast chicken recipe promises to deliver a roast that far surpasses any grocery store rotisserie chicken you’ve ever tasted. The best part? It’s incredibly simple to prepare, requiring neither a dedicated pressure cooker function nor a rotisserie spit. Get ready to impress your family with a perfectly moist and tender Ninja Foodi roasted whole chicken, beautifully complemented by a rich, homemade gravy. This dish is destined to become a beloved centerpiece for your Sunday dinners and special family gatherings.
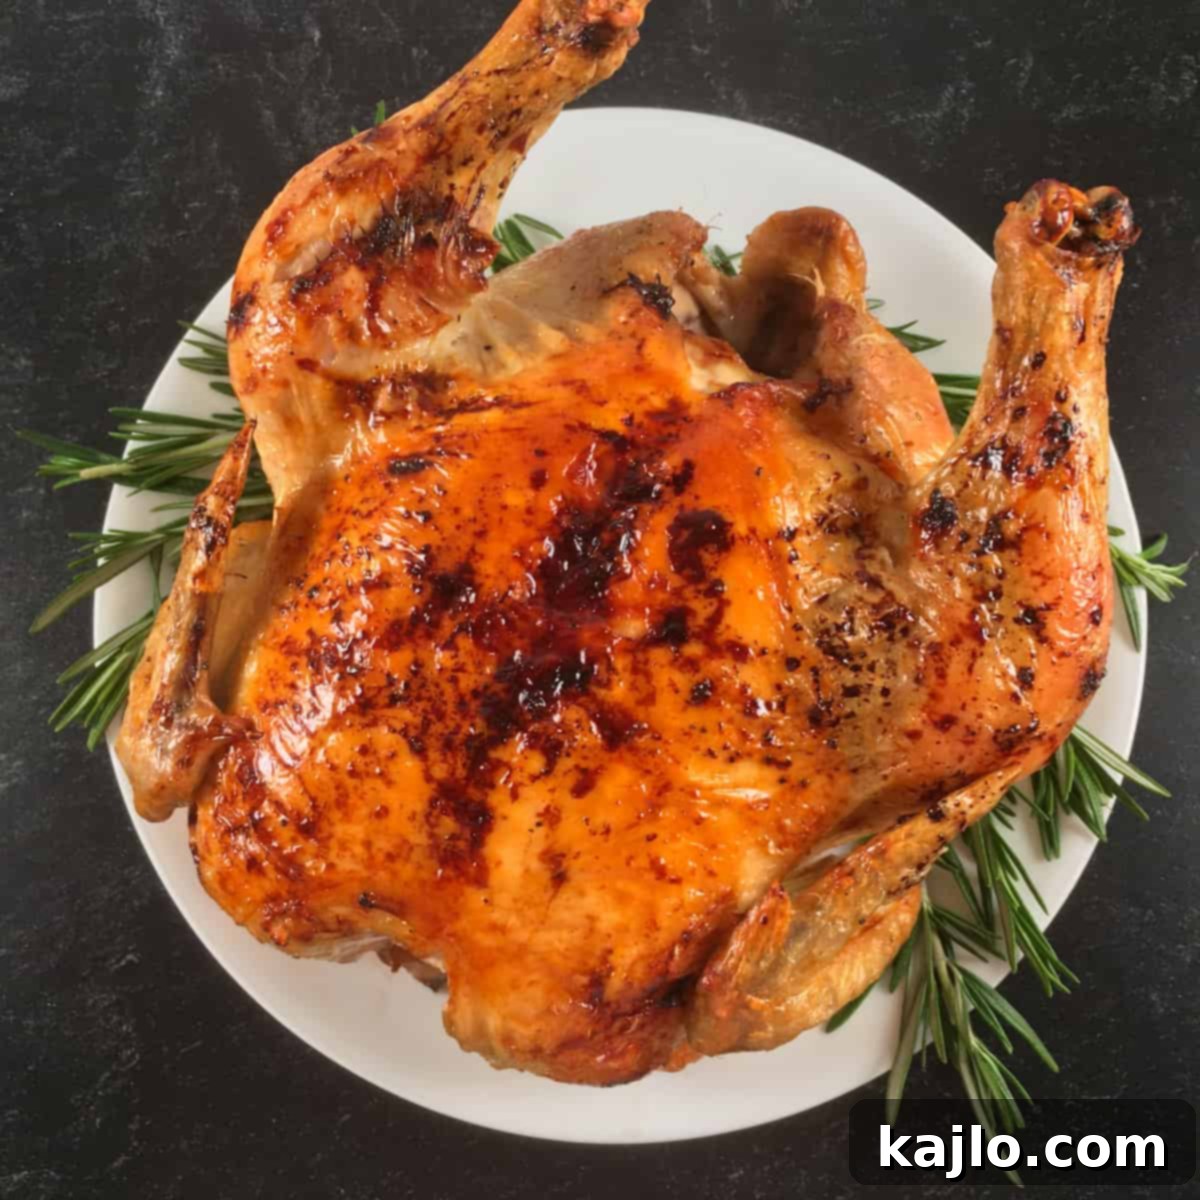
“I will be doing this from now on! Thanks so much for the instructions!”
– Laura
Unleashing the Power of Your Ninja Foodi for Perfect Roast Chicken
While my air fryer rotisserie chicken has consistently been a fan favorite, many home cooks are discovering the unparalleled convenience and delicious results of preparing a Ninja Foodi rotisserie chicken. The Ninja Foodi, with its multi-functional capabilities, simplifies the roasting process, making it accessible to everyone, regardless of their culinary expertise.
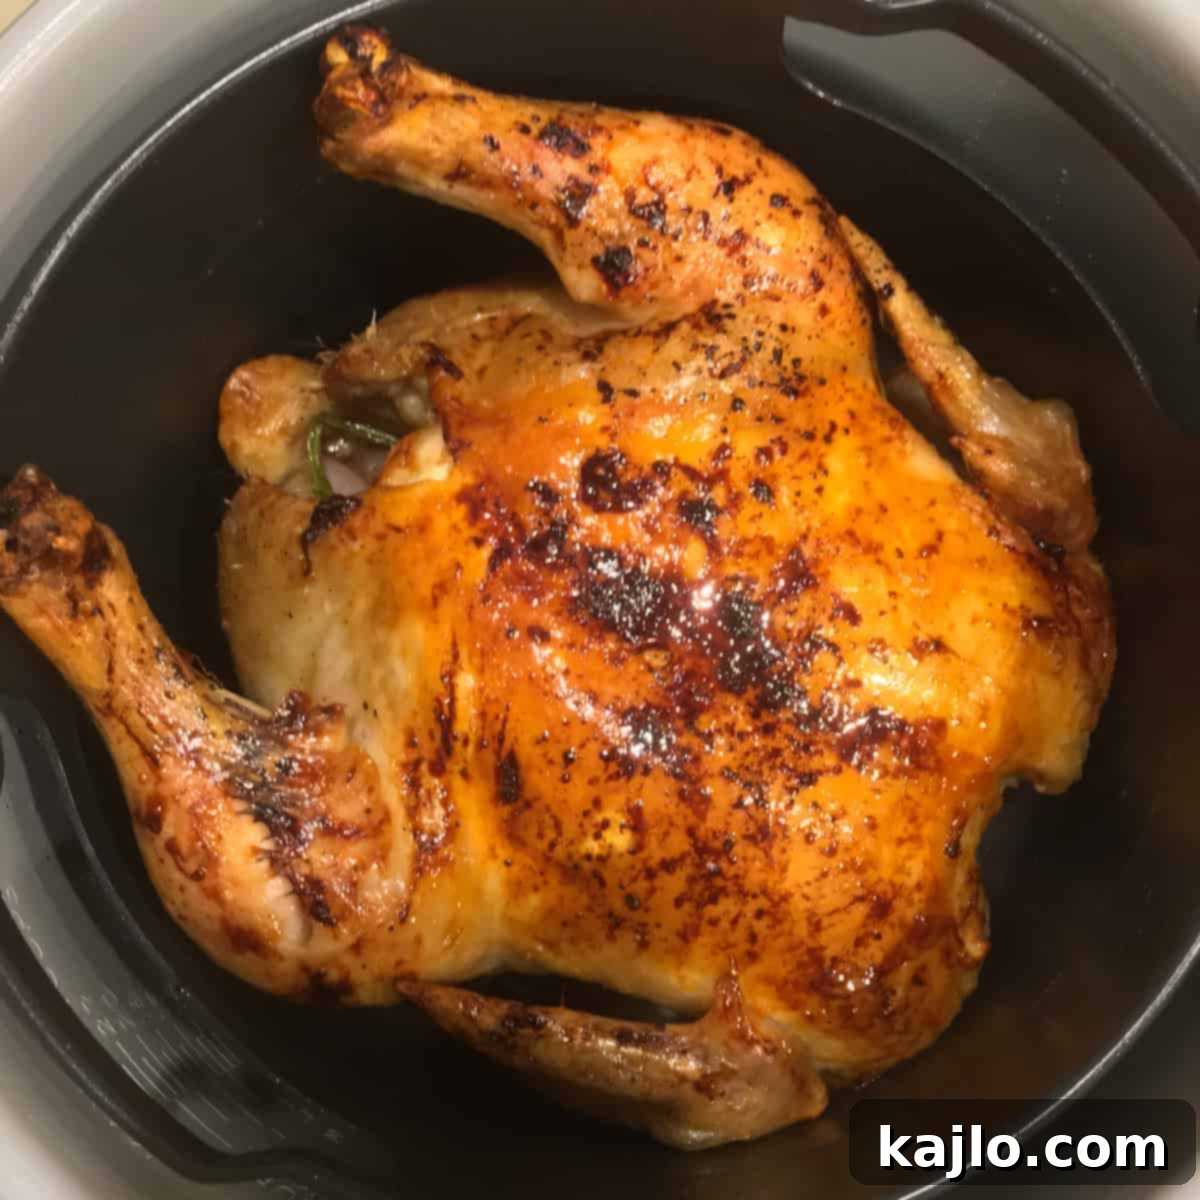
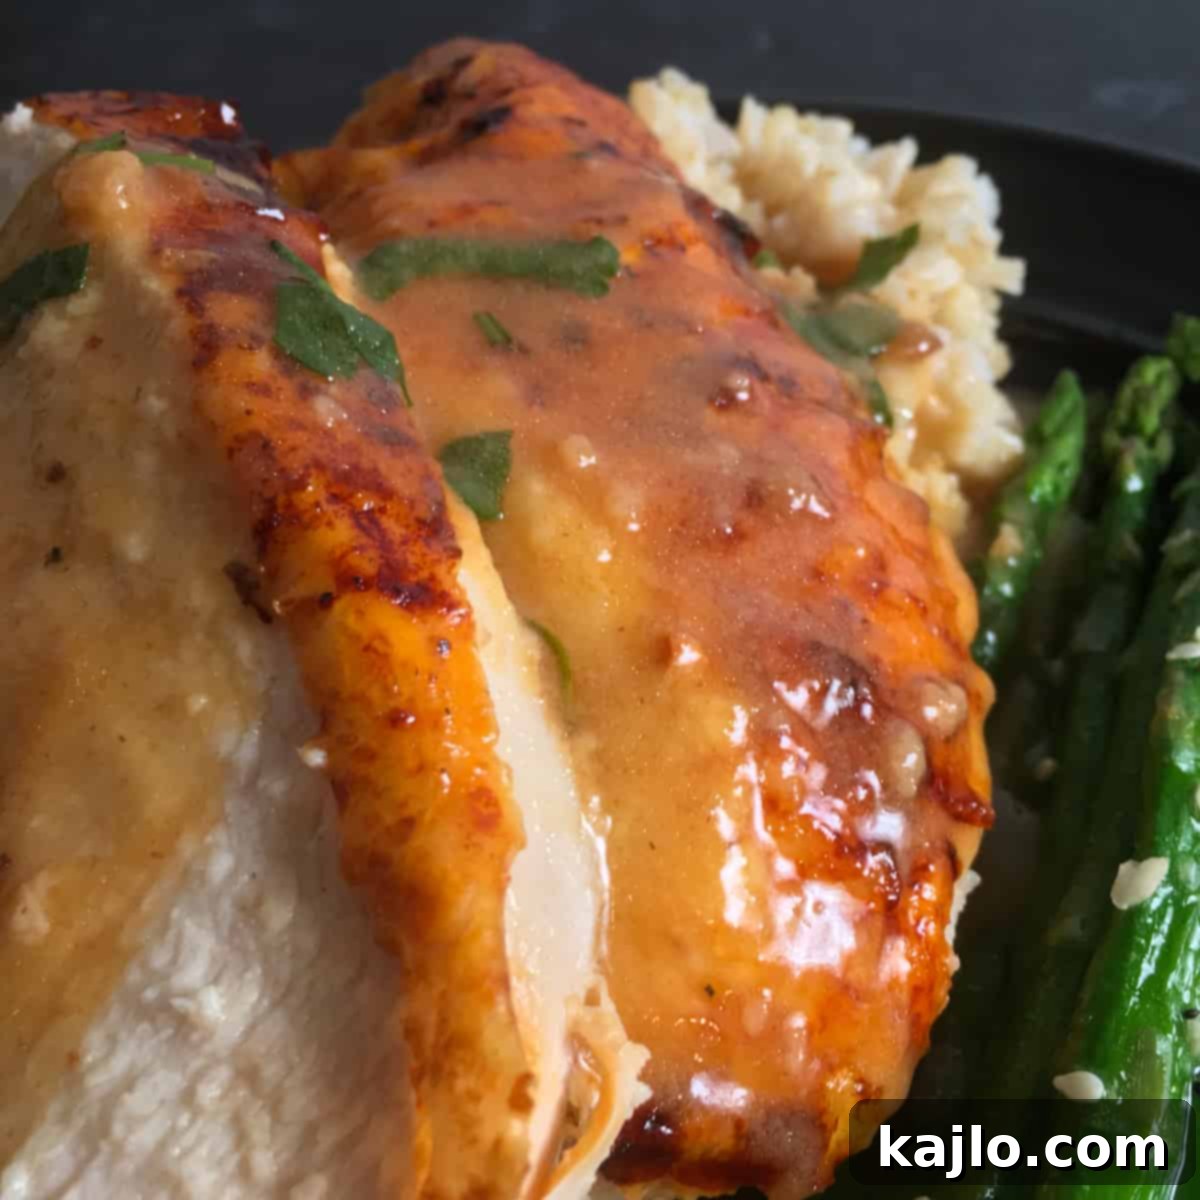
A significant advantage of this whole chicken Ninja Foodi recipe lies in its ingenious design. As the chicken roasts to golden perfection, all those flavorful drippings collect conveniently at the bottom of the pot. These precious juices are gold, forming the base for an unbelievably rich and savory gravy. Of course, you can skip the gravy if you prefer to keep the meal low-carb and gluten-free, but seriously, why let such incredible flavor go to waste?
Furthermore, this recipe stands out because it doesn’t require an air fryer spit, making it an excellent choice if your Ninja Foodi model doesn’t feature this specific attachment. It’s all about leveraging the powerful air crisping technology to achieve that coveted crispy skin and tender, juicy meat.
Choosing the Right Chicken for Your Ninja Foodi
One of the most crucial steps for a successful roast is selecting a whole chicken that perfectly fits into your Ninja Foodi’s air fryer basket. You might dream of a grand 6 lb Ninja Foodi whole chicken, but it’s essential to perform a quick fitting test before you begin any prep work. An oversized chicken won’t cook evenly and might prevent the lid from closing properly, compromising the cooking process.
If your chosen chicken is too large for your Foodi, don’t fret! I’ve included comprehensive oven directions, ensuring you can still enjoy a fantastic roasted chicken, even if your Ninja Foodi is busy with another culinary task or if you simply prefer traditional roasting.
⭐ Why Make Whole Chicken in the Ninja Foodi?
Preparing a whole chicken in the Ninja Foodi offers a multitude of advantages that make it a favorite for busy weeknights and special occasions alike:
- Cost-Effective: Purchasing a whole chicken is often more economical per pound than buying individual chicken pieces. Plus, you can maximize your savings by using the leftover carcass to make nutrient-rich bone broth, perfect for soups and stews.
- Effortless Meal Prep: A perfectly roasted chicken provides a versatile base for countless meals throughout the week. The tender, flavorful meat can be shredded or chopped and used in salads, wraps, sandwiches, casseroles, or incorporated into various other dishes, much like a store-bought rotisserie chicken. Its plain, savory flavor makes it an incredibly adaptable ingredient.
- Simplified Cleanup: Say goodbye to the dreaded scrubbing of greasy roasting pans! The Ninja Foodi’s non-stick surfaces ensure that cleanup is quick and hassle-free, giving you more time to enjoy your meal and less time at the sink.
- Nutritional Powerhouse: When prepared without the gravy, roast chicken is naturally low-carb, keto-friendly, and gluten-free. It’s an excellent source of high-quality protein, essential for muscle repair and growth, and provides vital nutrients such as niacin and vitamin B12, supporting overall health.
- Irresistibly Delicious: Chicken is a universally loved protein, often a hit even with the pickiest eaters. This recipe yields a simple, wholesome, and incredibly comforting meal that satisfies both body and soul. The crispy skin and juicy interior are simply divine!
- Faster Cooking: Compared to traditional oven roasting, the Ninja Foodi’s air crisp technology significantly reduces cooking time, getting a delicious whole chicken on your table much faster.
🥘 Essential Ingredients for Ninja Foodi Roast Chicken
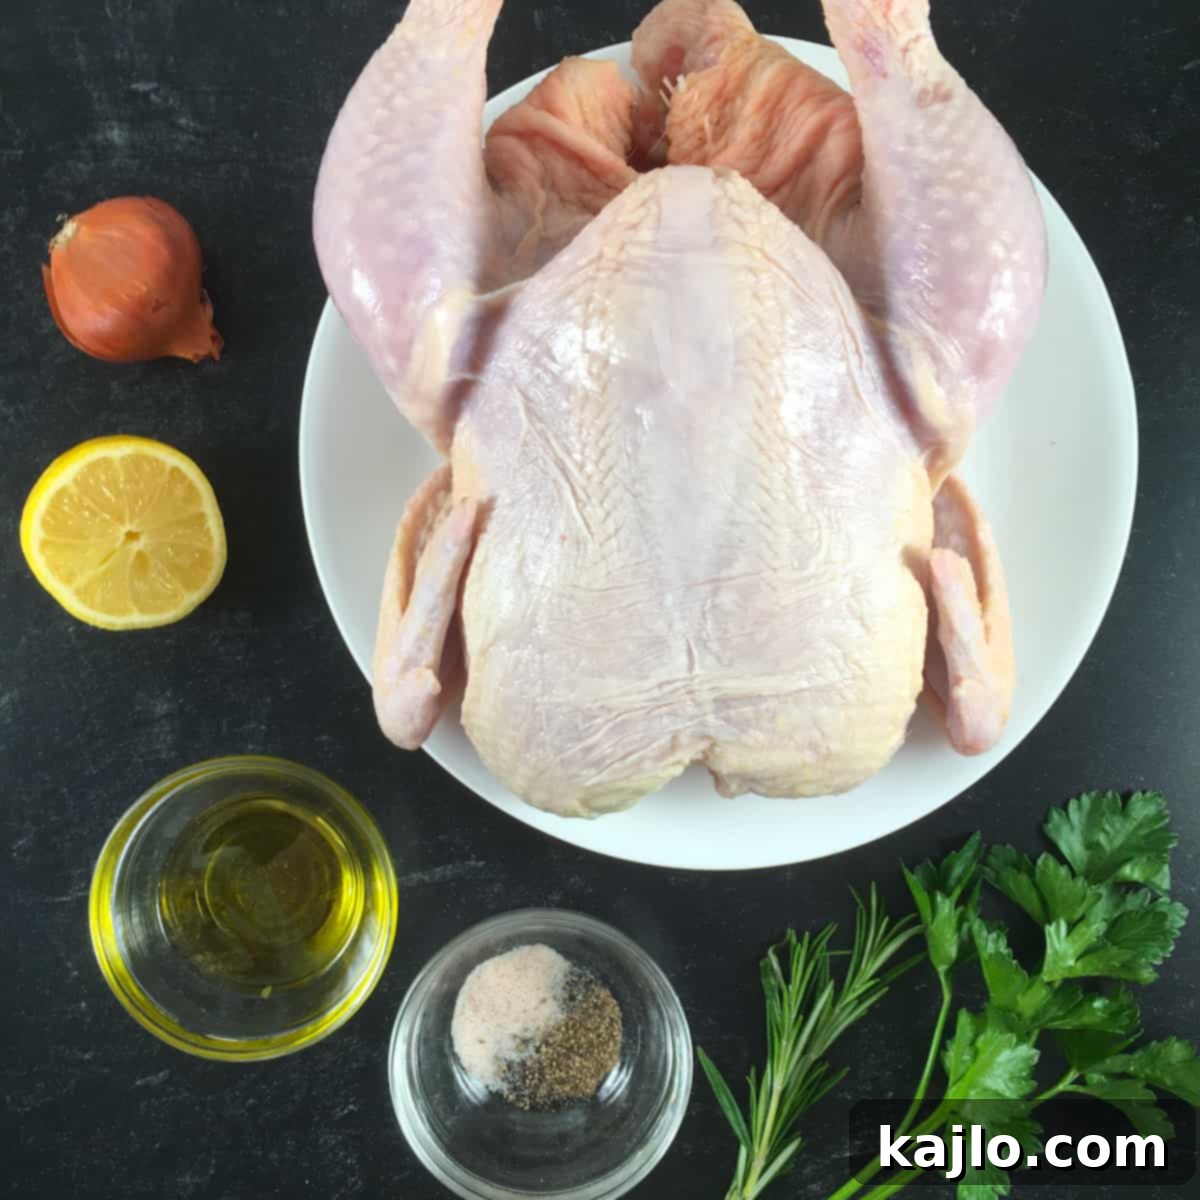
To create this magnificent roasted chicken in your Ninja Foodi, gather these fresh and flavorful ingredients:
- One Fresh Whole Chicken: Aim for a chicken weighing 4-5 lbs (1.8-2.3 kg) to ensure it fits comfortably in most Ninja Foodi models.
- Fresh Rosemary Sprig: Adds an aromatic, piney note.
- Fresh Parsley Sprig: Contributes a fresh, herbaceous flavor.
- 1 Tablespoon Olive Oil: Helps the skin crisp up beautifully and provides a base for seasoning.
- 1 Small Shallot: Quartered, it infuses the chicken cavity with a delicate onion flavor.
- ½ Lemon: Both juice for the basting sauce and rind for the cavity will brighten the flavors.
- Salt and Pepper: Essential seasonings to enhance the chicken’s natural taste.
For the Irresistible Baste and Optional Gravy:
- 1 Cup Apple Cider: Provides a subtle sweetness and tang to the basting liquid.
- 2½ Tablespoons Butter: Divided; used for the baste and the rich gravy.
- 2 Tablespoons Whole Wheat Flour: For thickening the gravy.
- 1 Cup Chicken Broth: The liquid base for a flavorful gravy.
You’ll also want to have the right tools on hand: a good knife for prep, a pastry brush for basting, tongs for easy flipping, and an instant-read meat thermometer for ensuring perfect doneness. Of course, the star of the show is your Ninja Foodi! Ensure your model is large enough to comfortably accommodate the chicken and has air frying capabilities. I personally use a Ninja Foodi Deluxe XL 8-quart pressure cooker, which comes with an air fryer crisping lid (also known as a Tendercrisp lid).
The chicken will be roasted in the air fryer basket, which is strategically placed inside the ceramic pot typically used for pressure cooking. This setup is crucial; it keeps the chicken elevated, allowing hot air to circulate all around it for even crisping, while simultaneously collecting those invaluable drippings below.
🔪 Step-by-Step: How to Make Whole Chicken in Ninja Foodi
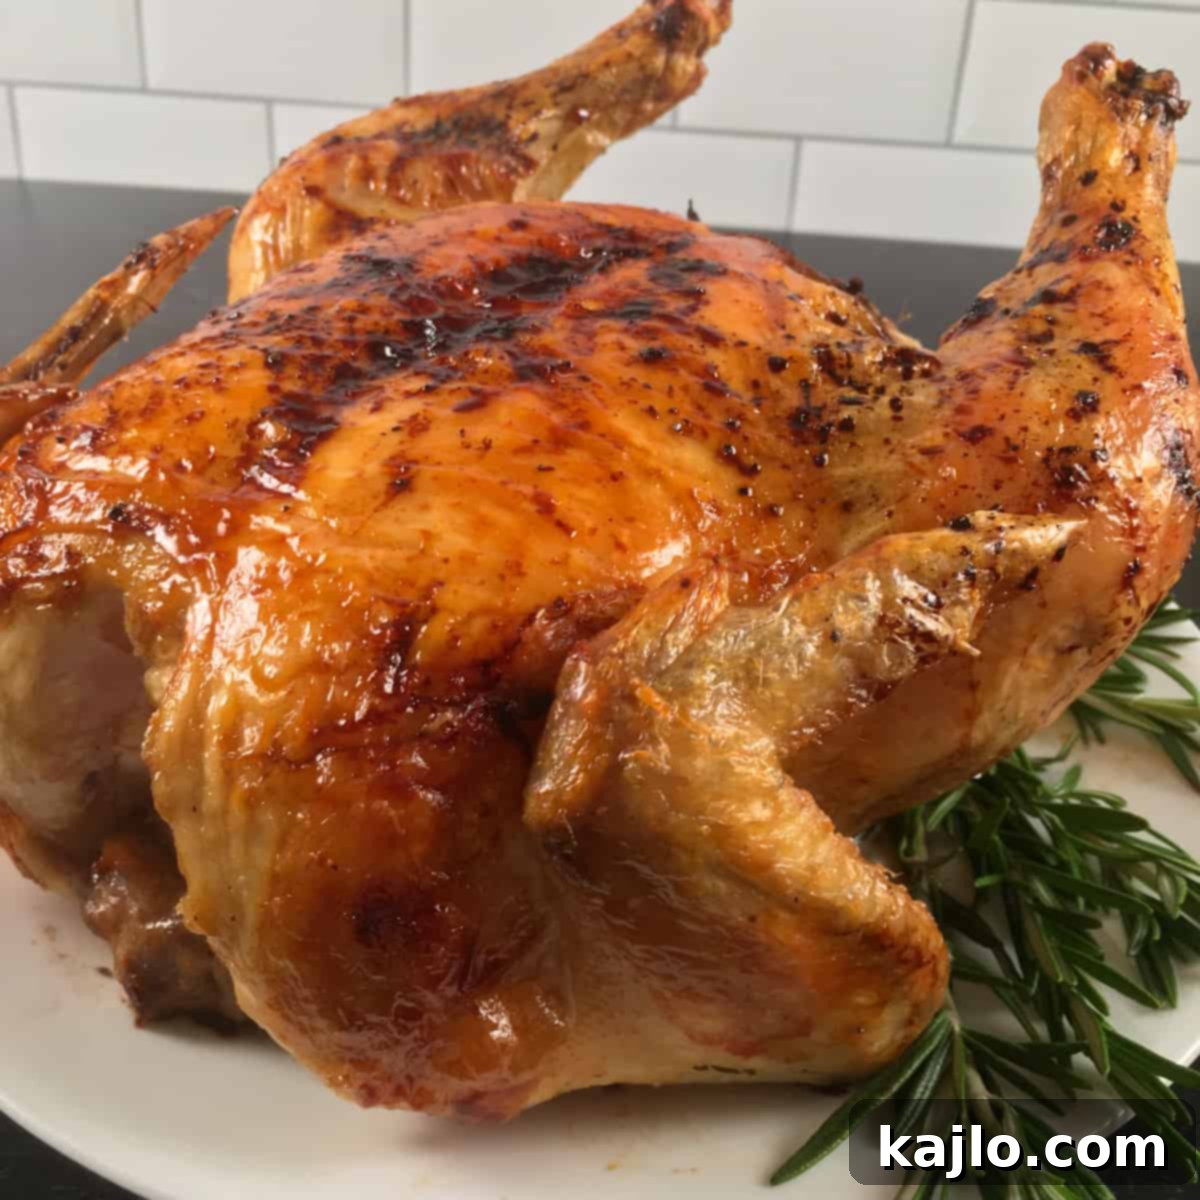
Begin by carefully removing any giblets from the chicken cavity. Pat the entire chicken thoroughly dry on both sides with paper towels. This step is essential for achieving wonderfully crispy skin. There’s no need to truss the chicken; leaving it untrussed allows for better air circulation and more even browning, especially between the legs.
Take half of your lemon and squeeze out its juice, setting both the juice and the remaining rind aside for later use. Next, strip the fragrant leaves from the rosemary and parsley sprigs. Keep the bare stems for stuffing the chicken and finely chop the leaves, reserving them for the optional gravy.
Generously rub the entire surface of the chicken with olive oil, ensuring it’s evenly coated. Season liberally with salt and freshly ground black pepper. Then, gently stuff the lemon rind, the reserved rosemary and parsley stems, and the quartered shallot into the chicken’s cavity. These aromatics will infuse the meat with wonderful flavor as it cooks.
Carefully place the prepared chicken, breast side down, into the Ninja Foodi air fryer basket. Ensure the basket is properly seated inside the ceramic pot. Lower the air fryer crisping lid (Tendercrisp lid) onto the Foodi, ensuring it is securely closed and ready for cooking.
⏲️ Ninja Foodi Whole Chicken: Optimal Cooking Time and Temperature
The total air frying time for your whole chicken will be approximately 60 minutes at 350 degrees Fahrenheit (177°C).
Initiate the cooking process by air frying the chicken for the first 30 minutes. While your chicken is roasting, prepare the exquisite basting sauce. In a small pan on your stovetop, combine the apple cider, ½ tablespoon of butter, and the reserved lemon juice. Allow this mixture to reduce over medium-low heat for about 30 minutes, stirring occasionally. This will create a concentrated, flavorful glaze.
After the initial 30 minutes of air frying, it’s time to flip the chicken. Carefully remove the lid and, using tongs or by gently tipping it onto a plate and then back into the Foodi, turn the chicken so it’s now breast side up. Close the lid once more and continue to air fry for an additional 20 minutes. This two-stage cooking ensures even browning and thorough cooking.
With 10 minutes remaining in the total cooking time, it’s time to apply the delicious baste. Open the Foodi lid and generously brush half of the reduced cider mixture over the top of the chicken. Close the lid and air fry for 5 minutes. Then, open the lid again, brush with the remaining cider reduction, and air fry for a final 5 minutes. This layering of the baste creates a rich, glazed skin.
Food safety is paramount. Once the cooking time is complete, use an instant-read meat thermometer to verify the internal temperature of the chicken. Insert the thermometer into the thickest part of the thigh, ensuring it doesn’t touch any bone. The safe minimum internal temperature for cooked chicken is 165°F (74°C). If your chicken hasn’t reached this temperature, continue air frying in 5-minute increments until it does.
Once perfectly cooked, carefully remove the chicken from the Ninja Foodi and transfer it to a cutting board or platter. Tent it loosely with foil and allow it to rest for at least 15 minutes before carving and serving. This resting period is crucial; it allows the juices to redistribute throughout the meat, ensuring a wonderfully moist and tender result. While the chicken rests, you can proceed with making the optional, but highly recommended, homemade gravy.
😋 How to Make Rich Ninja Foodi Gravy
To craft the perfect Ninja Foodi chicken gravy, start by carefully removing the air fryer basket from the ceramic pot. Gently pour out all the rich chicken drippings that have collected at the bottom of the pot into a separate heatproof container. Set these precious drippings aside; they are the foundation of your incredible gravy.
In the now empty ceramic pot of your Ninja Foodi, melt 2 tablespoons of butter using the medium saute function. Once melted, stir in 2 tablespoons of whole wheat flour, whisking continuously to form a smooth roux (a flour paste). This roux will be the thickening agent for your gravy. Gradually whisk in the reserved chicken drippings, 1 cup of chicken broth, and the finely chopped rosemary and parsley leaves you set aside earlier. Continue whisking constantly until the gravy thickens to your desired consistency. This usually takes about 5-10 minutes, potentially less if you have fewer drippings.
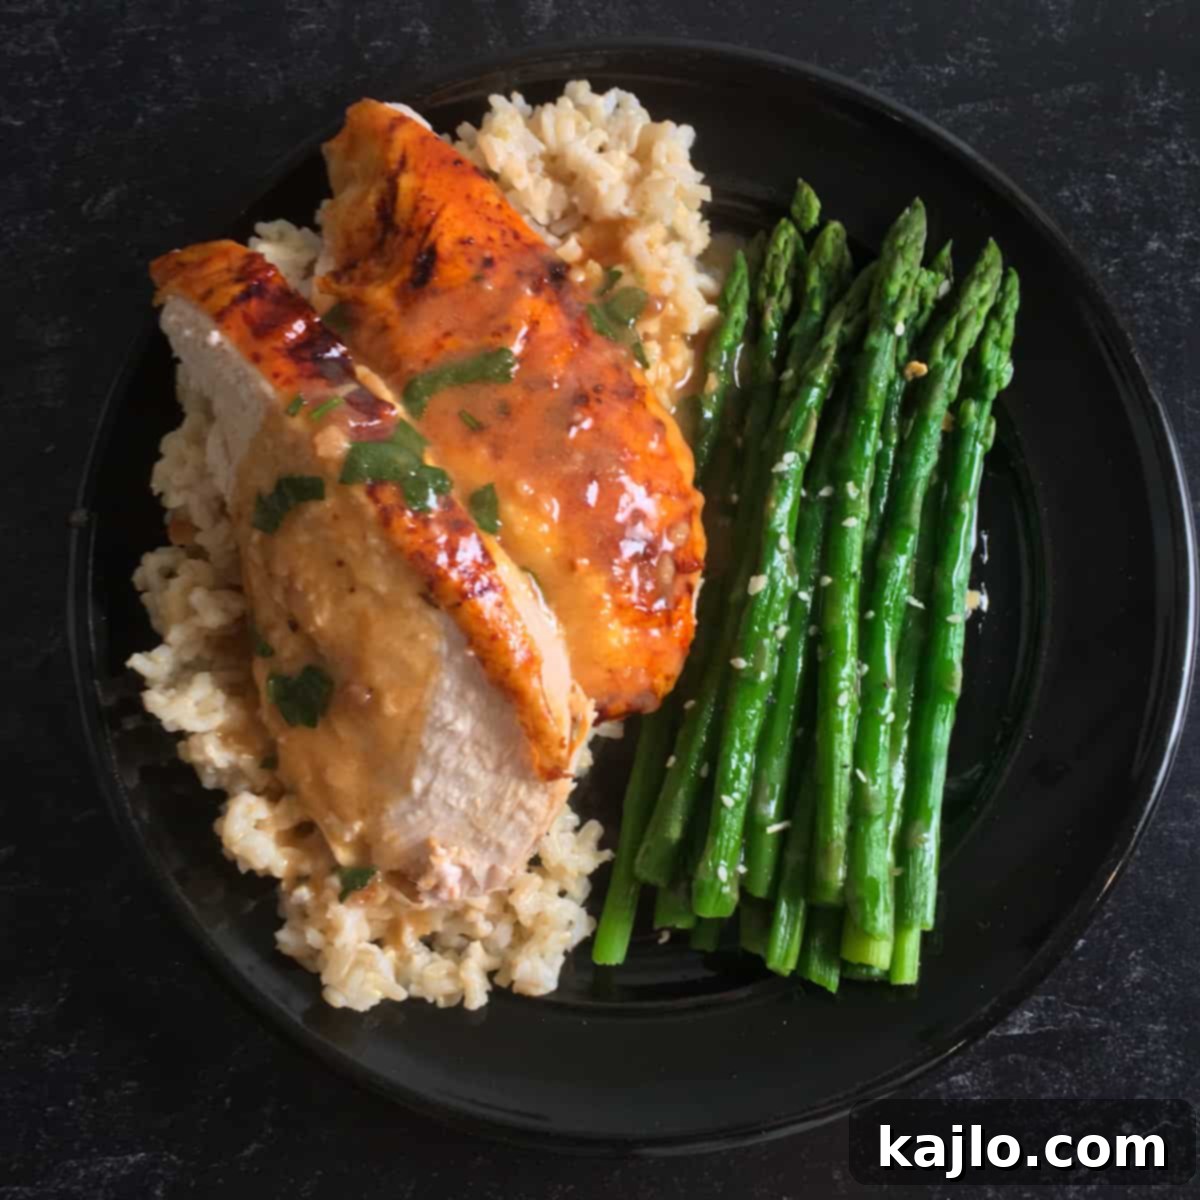
Once the chicken has rested and the gravy is ready, carve the chicken into desired portions. Serve immediately with generous drizzles of the warm, flavorful gravy. This combination is truly comforting and utterly delicious!
🔥 Classic Roasted Chicken: Oven Directions
Even without a Ninja Foodi, you can still achieve a wonderfully roasted whole chicken. Here’s how to adapt this recipe for traditional oven roasting:
Preheat your oven to 425°F (218°C). Prepare the chicken exactly as described in the Ninja Foodi instructions: remove giblets, pat dry, rub with olive oil, season with salt and pepper, and stuff the cavity with shallot, lemon rind, rosemary, and parsley stems.
Place the chicken breast-side up on a roasting rack set inside a roasting pan. This elevates the chicken, allowing for more even cooking and crisping. Tuck the wing tips underneath the chicken to prevent them from burning during the high-heat roasting process.
Roast the chicken for 35 minutes. While it roasts, prepare the cider basting glaze following the instructions mentioned earlier (combining apple cider, butter, and lemon juice and reducing on the stovetop). After 35 minutes, carefully remove the chicken from the oven, brush half of the cider reduction over its surface, and return it to the oven for another 5 minutes. Remove it again, apply the remaining baste, and bake for a final 5 minutes.
Just like with the Ninja Foodi method, always verify the internal temperature with a meat thermometer, ensuring it reaches a minimum of 165°F (74°C) in the thigh. Once done, remove the chicken from the oven, tent it with foil, and let it rest for 15 minutes. Make your delicious gravy on the stovetop using the collected drippings, rather than in the Ninja Foodi.
🐔 How to Cook Ninja Foodi Whole Chicken from Frozen
If you have a frozen whole chicken, your Ninja Foodi can still come to the rescue! The key is to utilize the pressure cooker function first to thaw and cook the chicken, then finish with air frying for that coveted crispy skin. For a 4-5 lb frozen chicken, place it on a trivet with 1-2 cups of water at the bottom of the pot. Pressure cook for 60-70 minutes. After a quick release of pressure, remove the lid and switch to the air crisp function. Air fry for about 5-10 minutes (or until desired crispness) at 350-375°F (177-190°C), ensuring the internal temperature reaches 165°F (74°C).
🌡️ Creative Ideas for Leftover Roast Chicken
Leftover roast chicken is a fantastic culinary asset! Store it in an airtight container in the refrigerator for up to 3-4 days. If you’re wondering how to revive it, check out how to reheat rotisserie chicken in the air fryer (the same method works perfectly for your Ninja Foodi roast chicken). Remember to add the gravy just before serving to maintain its ideal consistency.
Cooked leftover chicken also freezes exceptionally well. For best results, remove the skin and bones, then store the meat in freezer bags, pressing out as much air as possible. It will keep for up to 3 months. Here are some delightful recipes that make excellent use of cooked chicken:
- Wholesome Meal Prep Salads for Weight Loss
- Quick & Easy Instant Pot Chicken Stir Fry
- Refreshing Summer Berry Salad with Chicken
- Chicken Tacos or Burritos: Shredded chicken makes a perfect filling.
- Chicken Noodle Soup: A classic comfort food, especially with homemade bone broth.
- Chicken Pot Pie: Use diced chicken for a hearty, savory pie.
🥗 Perfect Pairings: What to Serve with Roasted Chicken
Looking for inspiration on what to serve with roasted chicken? A variety of side dishes can beautifully complement the rich flavors of your homemade roast. Here are some of my top recommendations:
- Crispy Air Fryer Baby Potatoes
- Flavorful Air Fryer Frozen Vegetables (like broccoli or green beans)
- Steamed or Roasted Asparagus: A simple, elegant green vegetable.
- Classic Rice: Whether white rice or brown rice, it’s a comforting and absorbent side for gravy.
- Creamy Mashed Potatoes: An all-time favorite that pairs wonderfully with rich gravy.
- Fresh Garden Salad: A light, refreshing counterpoint to the rich chicken.
- Quick Air Fryer Frozen Dumplings
Watch How to Make It!
A video demonstration for this recipe is available on our YouTube channel, linked in the footer section.
Ninja Foodi Whole Chicken Recipe (Perfect Roast Chicken)
By Summer Yule
Print Recipe
Pin Recipe
Ingredients
- 4-5 lb whole chicken (1.8-2.3 kg)
- 1 fresh rosemary sprig
- 1 fresh parsley sprig
- 1 tablespoon olive oil
- 1 small shallot, quartered
- ½ lemon rind
- salt and pepper (to taste)
For Basting Sauce:
- 1 cup apple cider
- ½ tablespoons butter
- ½ lemon, juiced
Instructions
- Remove the giblets from the chicken and pat it dry on both sides with paper towels. Juice half a lemon; set the juice and rind aside.
- Strip the leaves from the rosemary and parsley sprigs. Set the stems aside for stuffing the chicken and chop the leaves finely, reserving them for the gravy.
- Rub the chicken all over with olive oil and sprinkle generously with salt and pepper. Place the lemon rind, rosemary and parsley stems, and a quartered shallot in the chicken cavity.
- Place the chicken (breast side down) in the Ninja Foodi air fryer basket, ensuring it is seated inside the ceramic pot. Close the air fryer crisping lid (Tendercrisp lid).
- Air fry the chicken for 30 minutes at 350°F (177°C). While the chicken roasts, combine the cider, ½ tablespoon butter, and lemon juice in a pan on the stovetop. Let it reduce for 30 minutes over medium-low heat, stirring occasionally, to create your basting sauce.
- After the chicken has air fried for 30 minutes, carefully flip it so it is breast side up and place it back in the Foodi. Close the lid and air fry for an additional 20 minutes.
- With 10 minutes of cooking time remaining, open the lid and brush the top of the chicken with half of the cider reduction. Air fry for 5 minutes. Then, brush with the rest of the cider reduction and air fry for an additional 5 minutes.
- Check the internal temperature of the chicken by inserting an instant-read meat thermometer between the thigh and body, avoiding the bone. The safe minimum internal temperature for chicken is 165°F (74°C). Add additional air frying time as needed in 5-minute increments until this temperature is reached.
- Remove the chicken from the Ninja Foodi and tent it loosely in foil. Let it rest for 15 minutes before carving and serving. You can prepare the gravy (if desired) while the chicken rests.
Equipment
- Ninja Foodi (8-quart Deluxe XL with air fryer crisping lid recommended)
- Sharp Knife
- Silicone Pastry Brush
- Tongs
- Instant-Read Kitchen Thermometer
Notes
💭 Expert Tips from Dietitian Summer Yule
This is a level 3 recipe (suitable for weight maintenance and active lifestyles). Plain chicken without the skin is a low-calorie and protein-dense food. When served with the delicious chicken skin and with gravy, we’re naturally adding a significant amount of fat and calories.
If you’re aiming for a level 1 recipe (focused on lean protein and lower calories), I recommend skipping the gravy entirely and enjoying the chicken breast without the skin. This approach allows you to easily create a satisfying chicken dinner under 500 calories by pairing it with low-oil, non-starchy vegetables. This chicken is incredibly moist and flavorful; even without the gravy, you’ll find it utterly delicious.
The chicken, especially with gravy, provides an abundance of protein and healthy fats. To make it a more balanced and filling meal, remember to incorporate fluid- and fiber-filled vegetables. You can choose a low-carb route with generous side salads or add some healthy complex carbohydrates like a baked potato or quinoa.
😋 How to Make Ninja Foodi Gravy (Detailed)
To make your delectable Ninja Foodi chicken gravy, begin by removing the air fryer basket from the ceramic pot. Carefully pour out all the rich chicken drippings and set them aside. (These flavorful juices are essential for the gravy.)
In the Ninja Foodi’s ceramic pot, melt 2 tablespoons of butter using the medium saute function. Once melted, add 2 tablespoons of whole wheat flour and whisk continuously to create a smooth roux (a flour paste). Next, gradually whisk in the reserved chicken drippings, 1 cup of chicken broth, and the finely chopped rosemary and parsley leaves from the recipe.
Continue whisking the mixture over medium saute until it thickens to your desired consistency. This process typically takes about 5-10 minutes, though it might be quicker if you have fewer chicken drippings.
Slice the perfectly roasted chicken and serve it generously drizzled with this warm, comforting gravy. It’s a truly flavorful and satisfying meal!
Nutrition information provided is for a 4-ounce cooked portion (113g) including meat and skin, and it does not include the gravy or cider-based baste. (The basting liquid is mostly not consumed unless it’s incorporated into the gravy.)
Nutrition Information Disclaimer
All recipes and nutritional information provided on this website are for general informational purposes only and may not be suitable for everyone, depending on individual medical needs and dietary preferences. It is always recommended to consult with a registered dietitian or your physician to determine the most appropriate dietary pattern for your specific health requirements.
The nutrition information presented is an estimated courtesy. It can vary significantly based on the specific brands, ingredients, and preparation methods you use. Please be aware that calorie information on food labels can sometimes be inaccurate, so try not to stress too much about the exact numbers.
When a recipe specifies “to taste,” it refers to adjusting seasonings according to your personal preferences. Always ensure food is cooked to safe internal temperatures to adhere to food safety guidelines; never consume undercooked food.
Nutrition Facts
Calories: 253 kcal
Protein: 27 g
Fat: 15 g
Saturated Fat: 4 g
Potassium: 239 mg
Vitamin A: 1.9% DV
Calcium: 1.4% DV
Iron: 7.9% DV
🤔 Frequently Asked Questions About Ninja Foodi Chicken
How to make Ninja Foodi chicken wings?
You can effortlessly make crispy Ninja Foodi air fryer chicken wings using almost any standard air fryer recipe. Just keep in mind that the Ninja Foodi often cooks a bit faster than other air fryers, so it’s a good idea to check on your food a few minutes earlier than suggested. For an incredibly delicious appetizer or meal, try this fantastic recipe to make Ninja Foodi Buffalo wings.
How to make Ninja Foodi chicken breast?
Preparing chicken breast in your Ninja Foodi is straightforward and versatile. Simply adapt any of your favorite air fryer chicken breast recipes. As with wings, the Foodi might cook a bit quicker, so begin checking for doneness a little ahead of the recipe’s recommended time. Here’s a flavorful BBQ chicken Ninja Foodi recipe, and for a different twist, you might enjoy this recipe for Ninja Foodi marinated chicken.
How to make Ninja Foodi Grill roast chicken?
If you own a Ninja Foodi Grill, you have even more options for perfectly roasted chicken. For a quick and delicious alternative when roasting a whole chicken isn’t feasible, check out this Ninja Foodi Grill chicken breast recipe from Wendy Polisi. It’s an easy and flavorful way to get dinner on the table!
How to make Ninja Foodi whole chicken soup?
Utilizing a whole chicken in your Ninja Foodi is an excellent way to prepare a rich and comforting soup. Simply Recipes offers a fantastic pressure cooker chicken soup recipe using a whole chicken that looks absolutely amazing. This is a perfect way to use up any leftover chicken or start from scratch for a hearty meal.
How long to pressure cook whole chicken in Ninja Foodi?
To pressure cook a whole chicken in the Ninja Foodi or Instant Pot, a general guideline is about 15 minutes per pound for a fresh chicken. Always place the chicken on a trivet above water (1-2 cups are usually sufficient). After the pressure cooking cycle is complete, perform a quick release of the pressure valve. Then, use the air crisp function to crisp up the skin to your desired level of golden perfection. Always check the internal temperature to ensure it reaches 165°F (74°C).
👨🏾🍳 More Delicious Ninja Foodi Chicken Recipes
If you’re loving the versatility and convenience of cooking chicken in your Ninja Foodi, you’re in luck! Here are even more fantastic air fryer chicken recipes to try:
- Perfectly Cooked Air Fryer Frozen Chicken Thighs
- Crispy Air Fryer Chicken Schnitzel
- Flavorful Ground Chicken Air Fryer Recipe
- Homemade Air Fryer Chicken Nuggets (great for kids!)
- Simple & Juicy Air Fryer Chicken Drumsticks
For an even wider array of culinary inspiration, explore my entire collection of Air Fryer Recipes! You’ll find everything from savory mains to delightful snacks, all designed for easy preparation in your favorite air fryer.
Join our community! Subscribe for all of the latest and greatest recipes, and follow me on Facebook, Pinterest, Instagram, and YouTube!
Thank you for choosing our recipe! We hope you enjoy your delicious Ninja Foodi Whole Chicken.
