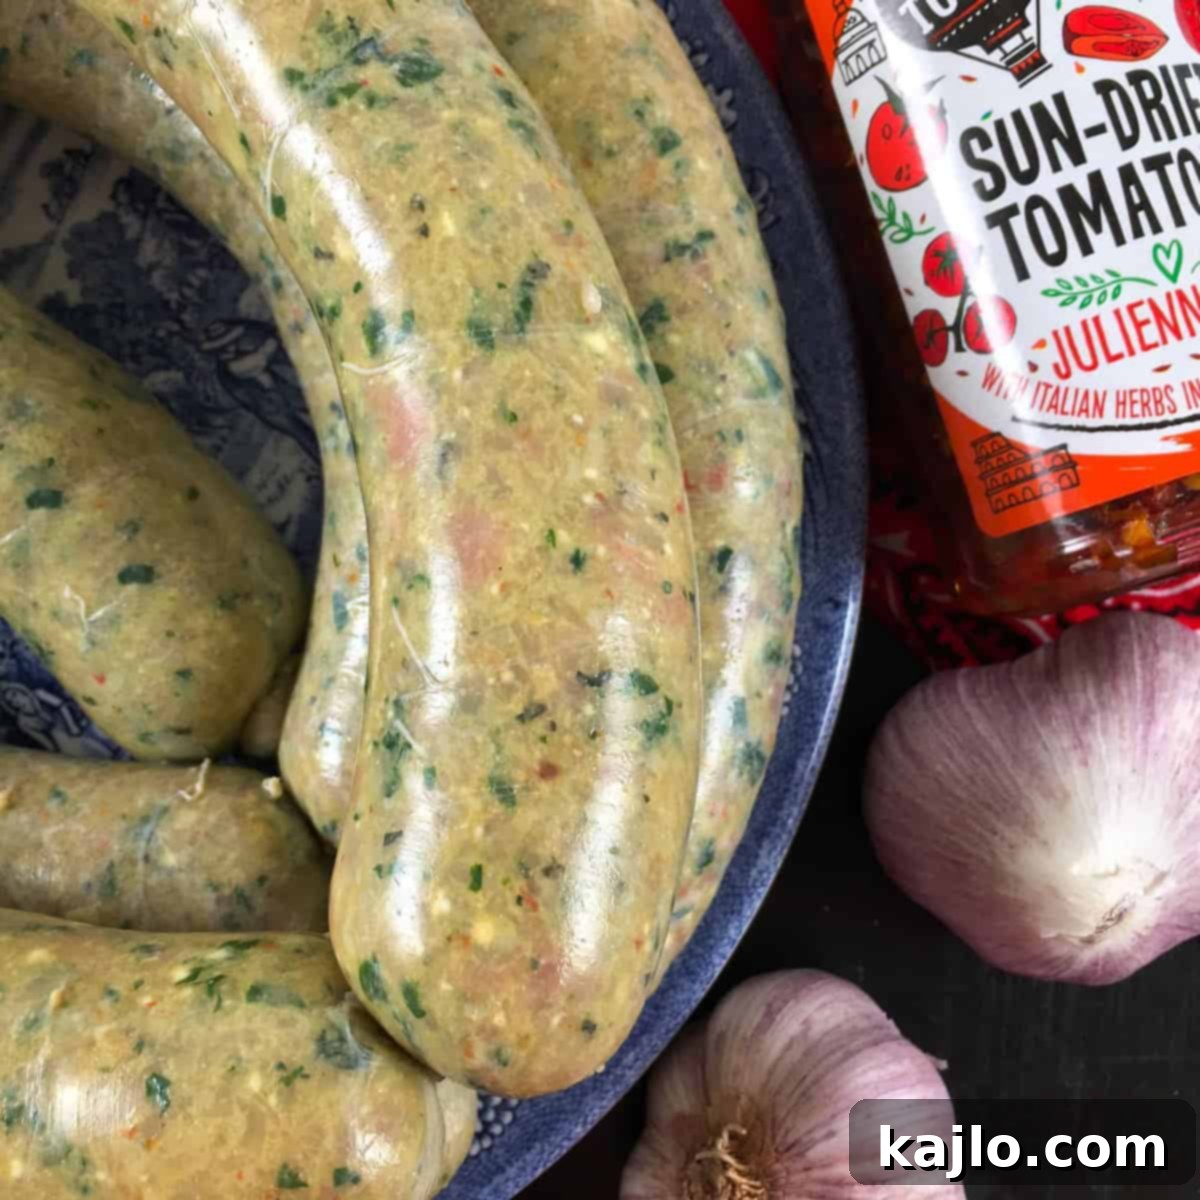
Homemade Chicken Feta Sausage: A Mediterranean Twist on a Classic
Embark on a culinary adventure and discover the joy of crafting your very own homemade sausage! This exquisite chicken feta sausage recipe offers a refreshing and lighter alternative to conventional pork sausages, brilliantly bypassing the additives often found in processed meats. Our unique take on homemade chicken sausage draws inspiration from the vibrant flavors of the Mediterranean, incorporating creamy feta cheese, tangy sun-dried tomatoes, nutrient-rich spinach, and a medley of aromatic herbs. This isn’t just a delicious standalone dish; it’s a versatile addition to your kitchen, whether you’re enhancing Italian pasta dishes or preparing a wholesome breakfast alongside eggs.
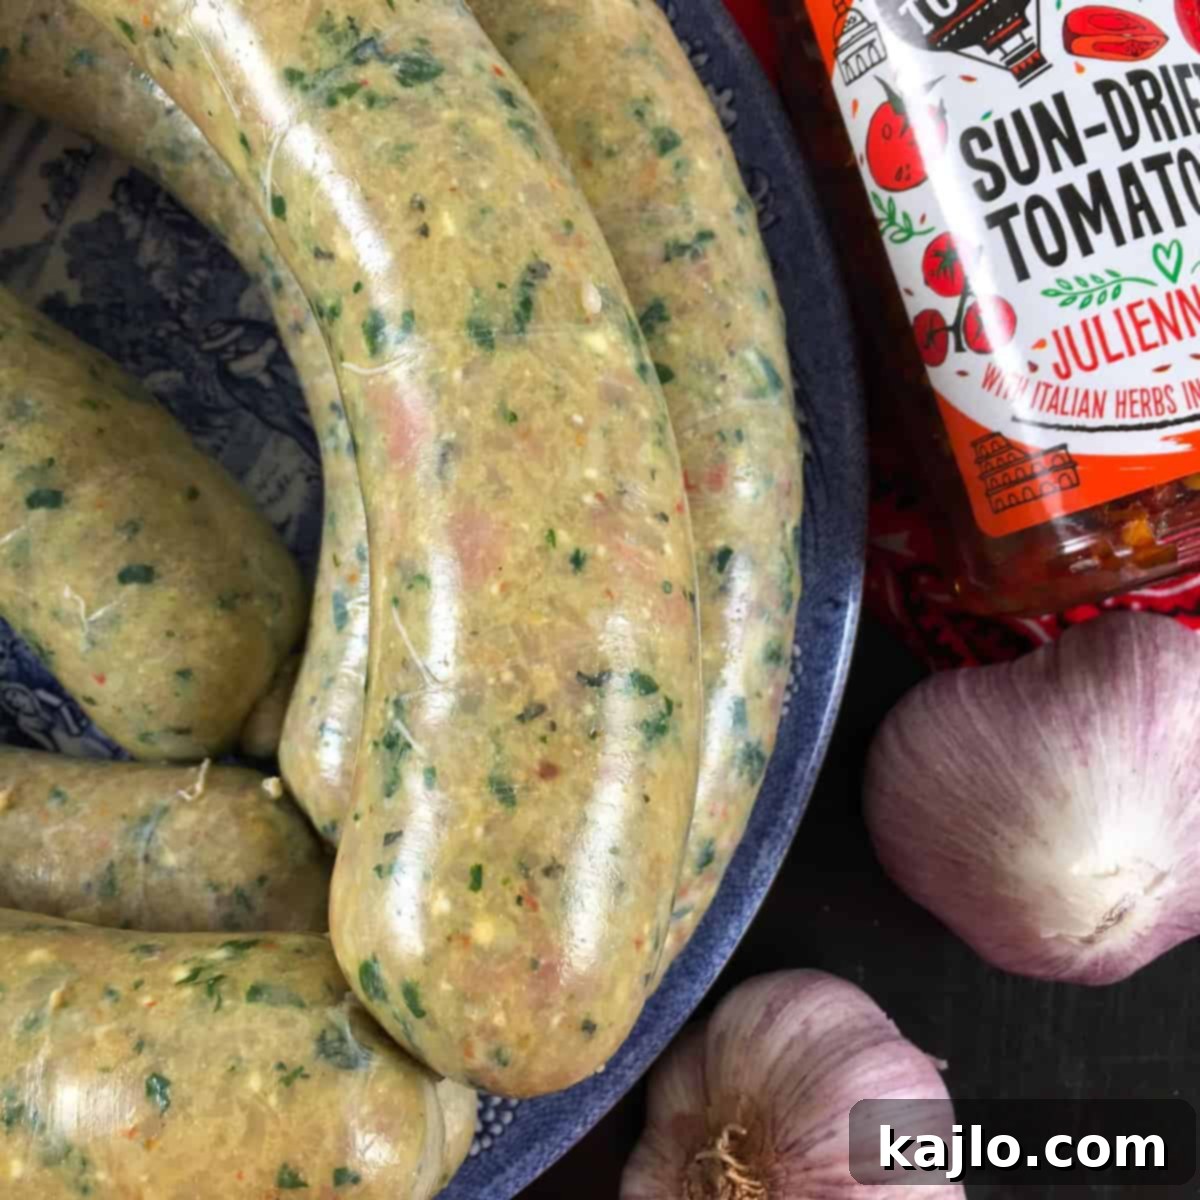
Homemade Sausage (Chicken Feta Sausage Recipe)
By Summer Yule
Learn how to make delicious homemade sausage from scratch! This chicken feta sausage recipe is a lighter, healthier version of classic pork sausage, free from common additives found in processed meats. It’s an ideal recipe for home cooks seeking fresh, flavorful, and customizable options.
Print Recipe
Pin Recipe
Prep Time: 3 hours
Total Time: 3 hours
Course: Slow Food DIY
Cuisine: Mediterranean
Servings: 18 (4-ounce servings)
Calories: 173 kcal
Ingredients
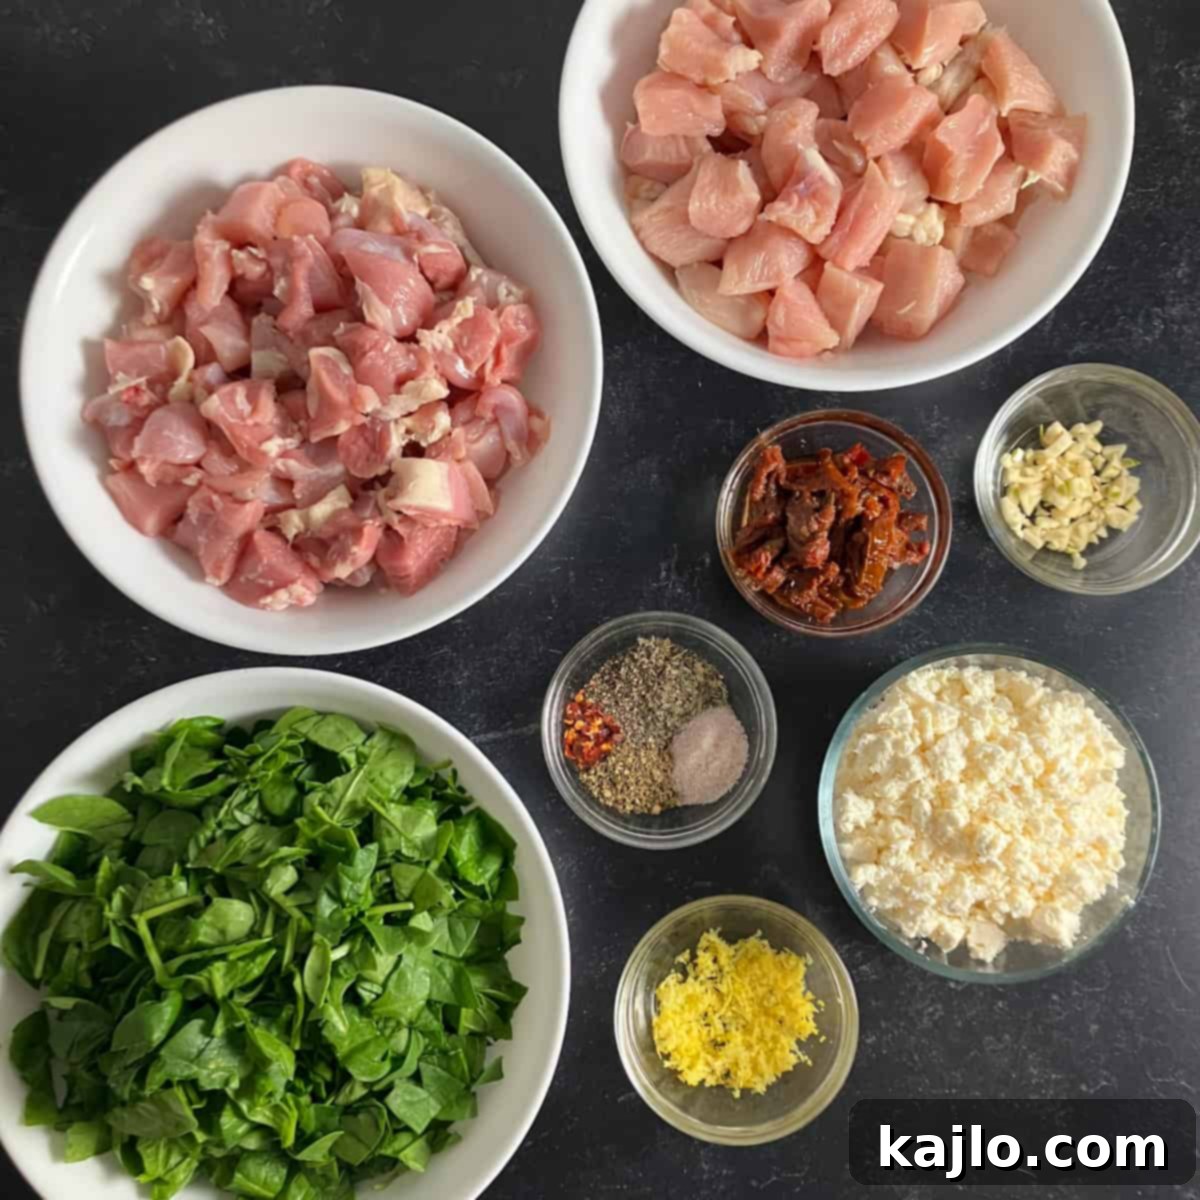
- 2 lbs chicken thighs (907 grams; boneless and skinless)
- 2 lbs chicken breasts (907 grams; boneless and skinless)
- 8 ounces feta cheese, crumbled (227 grams; use full-fat for best results)
- 3 tablespoons sun-dried tomatoes in olive oil, chopped small
- 3 cloves garlic, minced
- 2 teaspoons dried oregano
- 2 teaspoons dried basil
- 1 teaspoon lemon zest
- 1 teaspoon black pepper
- 1 teaspoon salt
- ¼ teaspoon red pepper flakes (adjust to your heat preference)
- 5 ounces baby spinach, shredded (142 grams)
- 1 package hog casings (optional, for making links)
- Olive oil (for cooking the sausage)
Love this recipe? Please leave a comment below 😊
Instructions
- **Preparation First:** Before starting, read through the entire article below for detailed equipment and technique guidance. Ensure all your ingredients are kept very cold (38-40°F/3.3-4.4°C, almost frozen) for easier and safer cutting and grinding. Cut the boneless, skinless chicken breasts and thighs into 1-inch (2.54 cm) cubes or smaller.
- **Combine Flavors:** In a large bowl, mix the cubed chicken, crumbled feta, chopped sun-dried tomatoes, minced garlic, dried oregano, dried basil, lemon zest, salt, black pepper, and red pepper flakes. Stir until all ingredients are well combined. Refrigerate this mixture while you prepare your meat grinder.
- **Grinding:** Once your meat grinder is ready, stir in the shredded baby spinach. Using a meat grinder with a coarse plate, slowly grind the mixture. Feed it through steadily to prevent jamming and ensure an even texture.
- **Patties or Links:** At this point, you can choose to shape the mixture into sausage patties if you prefer. If you desire traditional sausage links with casings, refrigerate the ground mixture again while you proceed with casing preparation.
- **Casing Setup:** Clean your meat grinder thoroughly and reconfigure it for sausage stuffing. For hog casings, you will typically need the largest stuffing funnel. Rubbing the outside of the stuffing funnel with a little olive oil can help the casing slide on more easily.
- **Prepare Hog Casings:** Remove the hog casings from their packaging and rinse them thoroughly under cool water. Follow the specific preparation instructions on your packaging. Generally, this involves soaking them in cool water for about 15 minutes, untangling them, and cutting them into manageable 2-foot (0.6 m) lengths. Open one end of each casing and run cool tap water through its entire length to rinse the interior. Repeat this internal rinsing three times for each casing. After rinsing, tie a knot in one end of each casing and place them on a paper towel near the grinder.
- **Loading Casings:** When you are ready to stuff, gather a casing like pantyhose and slide it over the end of the stuffing funnel. Most grinders recommend leaving about 2 inches (5 cm) of casing overhanging the funnel.
- **Stuffing Sausages:** Very slowly begin feeding your ground sausage mixture through the meat grinder. Use one hand with the stomper to push the mixture into the grinder, while your other hand gently guides the casing as it fills, ensuring it’s not too tight or too loose. You can create small links by frequently stopping the grinder and tying the casing with kitchen twine. For larger links (e.g., 1-lb/454 grams each), you’ll stop less often.
- **Finishing Links:** After filling a link, remove it from the machine. If you made a long link, twist it three times in the middle (creating two smaller links) and then tie off the open end. Slide a new casing onto the machine and continue the filling process. There’s no need to clean the machine between each casing.
- **Post-Stuffing Cleanup:** Once all the sausage mixture is used, turn off and unplug your meat grinder. Clean the grinder immediately. You can often salvage an additional ½-lb. (227 grams) of sausage mixture stuck in various parts inside the machine; press these leftovers into patties, pan-fry them, and enjoy them as a well-deserved snack!
- **Storage:** Homemade raw sausages do not last as long as store-bought cured varieties. Any sausages you don’t plan to cook within 24 hours should be double-wrapped tightly in plastic and frozen. For optimal freshness, a vacuum sealer can be used as an alternative.
- **Store Unused Casings:** Follow the instructions on your casing packaging for storing unused portions. Typically, unrinsed casings need to be dried, repacked in salt, and refrigerated for future use.
To cook your homemade sausages:
- **Preheat & Prepare:** Preheat your oven to 400°F (200°C). Line a rimmed metal baking pan with parchment paper. Place about 1 pound (454 grams) of sausage on the pan, ensuring space between them. Drizzle with 2 tablespoons of olive oil.
- **Roast:** Once the oven is heated, place the pan on the bottom rack. Roast for 15 minutes. Flip the sausages with tongs and roast for an additional 10-15 minutes. Be careful not to overcook them, as they can dry out quickly.
- **Check Temperature:** Chicken sausage must reach a minimum safe internal temperature of 165°F (74°C). Use a meat thermometer to check the center of the sausage to confirm it is thoroughly cooked.
Save this Recipe
Equipment
- Meat Grinder
- Large Mixing Bowls
- Sharp Knife
- Cutting Board
- Kitchen Twine (if making small links)
- Meat Thermometer
- Rimmed Baking Pan
- Parchment Paper
- Tongs
Notes
Expert Tips from Dietitian Summer Yule
This recipe is designed as a “level 1 recipe” which can support healthy eating goals like fat loss. It yields approximately 4 pounds (1.8 kg) of sausage, with an additional ½ pound (227 grams) often found as “leftovers” in the grinder after processing. This translates to roughly 18 convenient 4-ounce (113 gram) servings, each containing about 173 calories.
Many individuals opt for chicken sausage due to its tendency to be lower in saturated fat and calories compared to traditional pork varieties. It’s also an excellent choice for those who avoid pork for religious or dietary reasons. If finding high-quality chicken sausages locally is a challenge, crafting your own **homemade chicken sausages** is an empowering solution.
This recipe provides a leaner sausage option that doesn’t compromise on flavor or satiety. The inclusion of protein-rich chicken and wholesome spinach ensures a filling and nutritious meal. The unique Mediterranean blend of feta, sun-dried tomatoes, and herbs makes for an outstanding taste experience, proving that healthy can also be incredibly delicious.
Please note: The nutrition information provided is an estimate for one serving and does not include any additional oil used specifically for cooking the sausage after preparation.
Nutrition Info Disclaimer
All recipes on this website may or may not be appropriate for you, depending on your medical needs and personal preferences. Consult with a registered dietitian or your physician if you need help determining the dietary pattern that may be best for you.
The nutrition information is an estimate provided as a courtesy. It will differ depending on the specific brands and ingredients that you use. Calorie information on food labels may be inaccurate, so please don’t sweat the numbers too much.
“To taste” means to your preferences, which may have to be visual to follow food safety rules. Please don’t eat undercooked food.
Nutrition Facts
Calculated per serving (approximately 4 ounces / 113 grams):
- Calories: 173 kcal
- Carbohydrates: 3.6 g
- Protein: 24 g
- Fat: 6.7 g
- Saturated Fat: 2.5 g
- Sodium: 358 mg
- Fiber: 1 g
- Vitamin A: 3.1 % DV
- Vitamin C: 5.8 % DV
- Calcium: 5.8 % DV
- Iron: 8.5 % DV
Keywords: chicken feta sausage, chicken feta sausage recipe, chicken feta spinach sausage, chicken feta spinach sausage recipe, homemade chicken sausage, homemade chicken sausage recipe, homemade sausage, homemade sausage recipe, Mediterranean sausage, healthy sausage, slow food, DIY sausage, ground chicken sausage, no additive sausage, fresh sausage
Shop our cookbook! Easy Air Fryer Recipes for One
Burning your air fryer recipes? Here’s how to fix it!
The Art of Homemade Sausage Making
Have you ever considered venturing into the world of truly **homemade sausage**? Many home cooks, myself included, often begin by simply seasoning store-bought ground meats. However, integrating a proper meat grinder into your kitchen opens up a vast new universe of possibilities, allowing for unparalleled control over ingredients, textures, and flavor combinations! The difference between pre-seasoned ground meat and a freshly ground, custom-blended sausage is truly remarkable.
While the concept of “slow food” might suggest doing everything by hand, mincing all the ingredients for a batch of sausage manually would be an immensely laborious task. A quality meat grinder transforms this potentially overwhelming chore into an efficient and enjoyable part of the process. For this particular recipe, I utilize the Cabela’s Pro DC Grinder, which consistently delivers a perfectly ground mixture. This specific **spinach feta chicken sausage** recipe was inspired and adapted from a basic framework found in this grinder’s manual.
It’s worth noting that initial instructions from various sources, including some manuals, can be vague for beginners. For instance, the original manual didn’t specify whether to use a fine or coarse grind. Through experimentation and research, I found that there are differing opinions on the ideal grind for sausage. Ultimately, a coarse grind proved to be the superior choice for this recipe. Some experts suggest that finer grinds typically require a higher fat content to prevent dryness. Given that this is a relatively lean chicken sausage – though the feta does contribute a lovely creaminess and some additional fat – a coarse grind ensures a satisfying texture and moisture level without needing extra fatty components.
Deconstructing the Delicious Ingredients of Our Chicken Sausage
Every ingredient in this **homemade chicken sausage recipe** plays a crucial role in creating its distinctive Mediterranean profile. Understanding the function of each component can elevate your appreciation for the finished product:
- Chicken Thighs and Breasts: We use a balanced blend of both boneless, skinless chicken thighs and breasts. The thighs offer a slightly higher fat content, contributing to moisture and flavor, while the breasts keep the overall sausage lean and packed with protein. This combination ensures both tenderness and a firm texture.
- Feta Cheese, Crumbled: This Mediterranean staple is non-negotiable. Its salty, tangy, and creamy profile melts beautifully into the sausage, creating pockets of intense flavor. Using full-fat feta is highly recommended for optimal texture and taste.
- Sun-Dried Tomatoes in Olive Oil, Chopped Small: These concentrated bursts of tomato flavor add a wonderful sweetness and umami depth. Preserved in olive oil, they also contribute a subtle richness. Ensure they are finely chopped for even distribution throughout the mixture.
- Chopped Fresh Garlic: The pungent and aromatic kick of fresh garlic is essential for a robust flavor base, complementing the other Mediterranean elements.
- Dried Oregano and Dried Basil: These classic dried herbs provide the quintessential Mediterranean aroma and taste, intertwining with the feta and tomatoes. Using dried versions ensures their flavors are potent and long-lasting.
- Lemon Zest: A bright, fragrant citrus note that cuts through the richness and adds a refreshing lift to the entire sausage profile. It’s a secret weapon for enhancing fresh flavors.
- Salt and Black Pepper: Fundamental seasonings that enhance all other flavors. Adjust to your personal preference, but remember they are crucial for a well-balanced taste.
- Red Pepper Flakes: For those who appreciate a touch of warmth and subtle heat. You can increase or decrease the amount based on your desired spice level.
- Baby Spinach, Shredded: This addition not only boosts the nutritional value with vitamins and minerals but also adds a delicate earthy flavor and a touch of color to the sausage.
- Hog Casings: These natural casings provide the traditional “snap” and shape for sausage links. They are optional, but highly recommended for an authentic experience.
- Olive Oil: Used primarily for cooking the finished sausages, it aids in achieving a golden crust and prevents sticking.
Navigating the World of Hog Casings
The prospect of working with sausage casings can sometimes feel intimidating, but it’s a straightforward process once you understand the basics. For this recipe, I opted for natural hog casings, specifically a popular brand available on Amazon. My selection was based on positive reviews that highlighted their durability during the stuffing process and the practical “ring” packaging, which simplifies untangling the casings after soaking.
I was specifically seeking larger-sized casings, suitable for hearty dinner links rather than smaller breakfast-style sausages. One common apprehension about hog casings is their initial smell. Allow me to offer an honest assessment: upon opening the package, there was a noticeable, but not offensive, aroma. Crucially, after the initial soaking and several thorough rinses of the casings’ interiors with cool water, the smell completely disappeared. If you ever encounter casings that are not dry upon opening or possess an overwhelmingly foul odor, it’s advisable to return them, as they might be rancid.
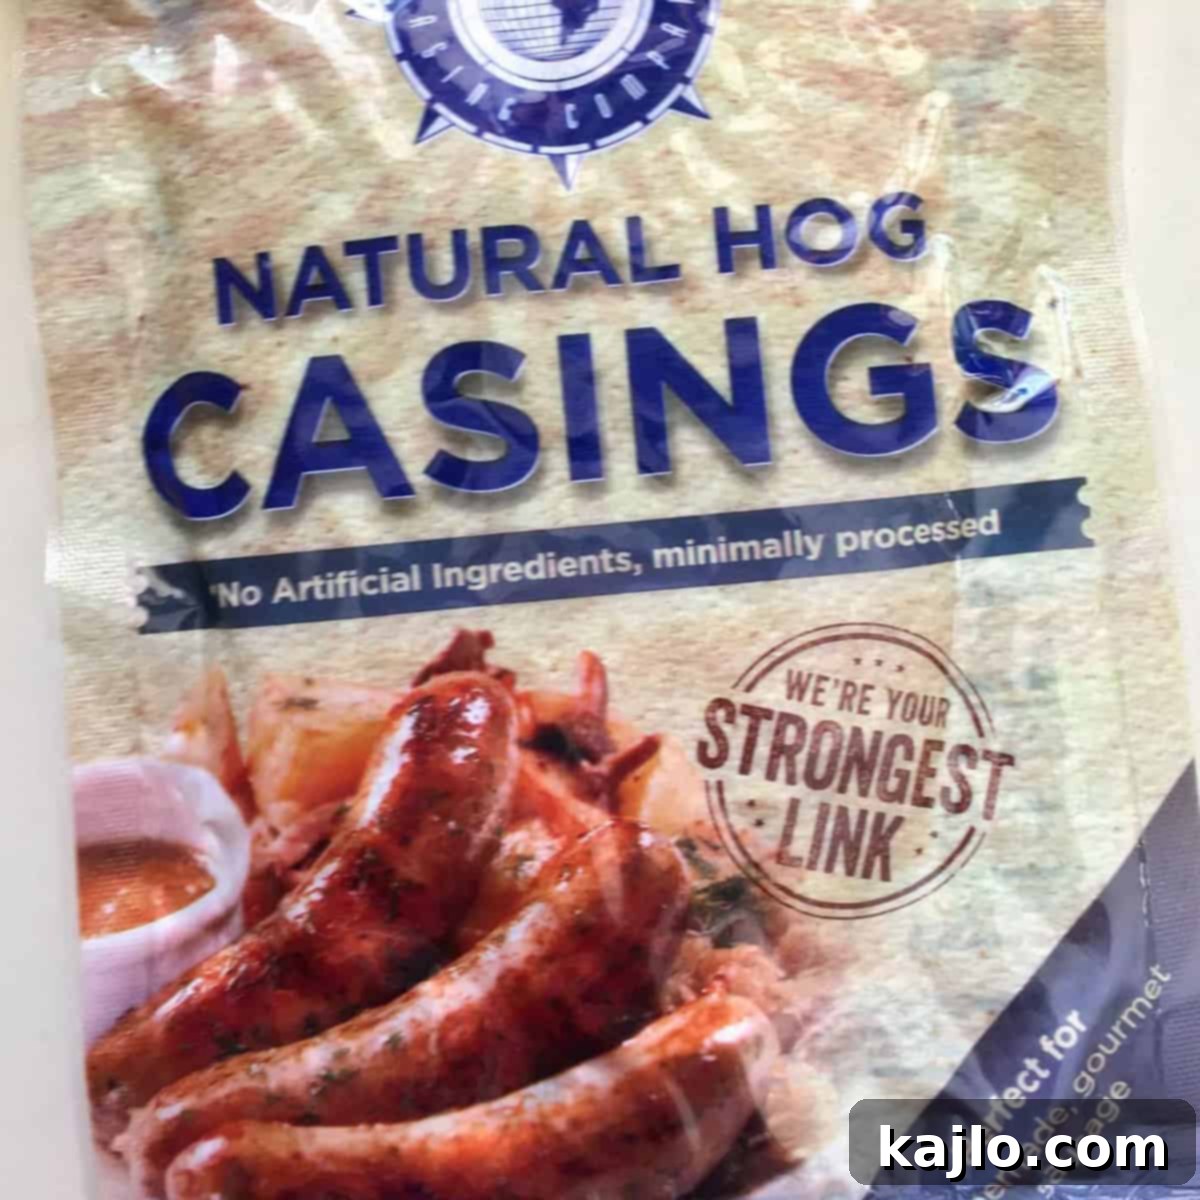
My experience reaffirmed the positive testimonials: I encountered no tearing issues during the stuffing process, and the ring design made untangling the casings remarkably easy. This made the entire sausage-making endeavor much smoother than I had initially anticipated.
Your Step-by-Step Guide to Crafting Perfect Chicken Sausage
Making **spinach and feta chicken sausage** from scratch is a rewarding experience. Follow these detailed instructions carefully to ensure a successful and delicious outcome:
The Grinding Process: Precision for Perfect Texture
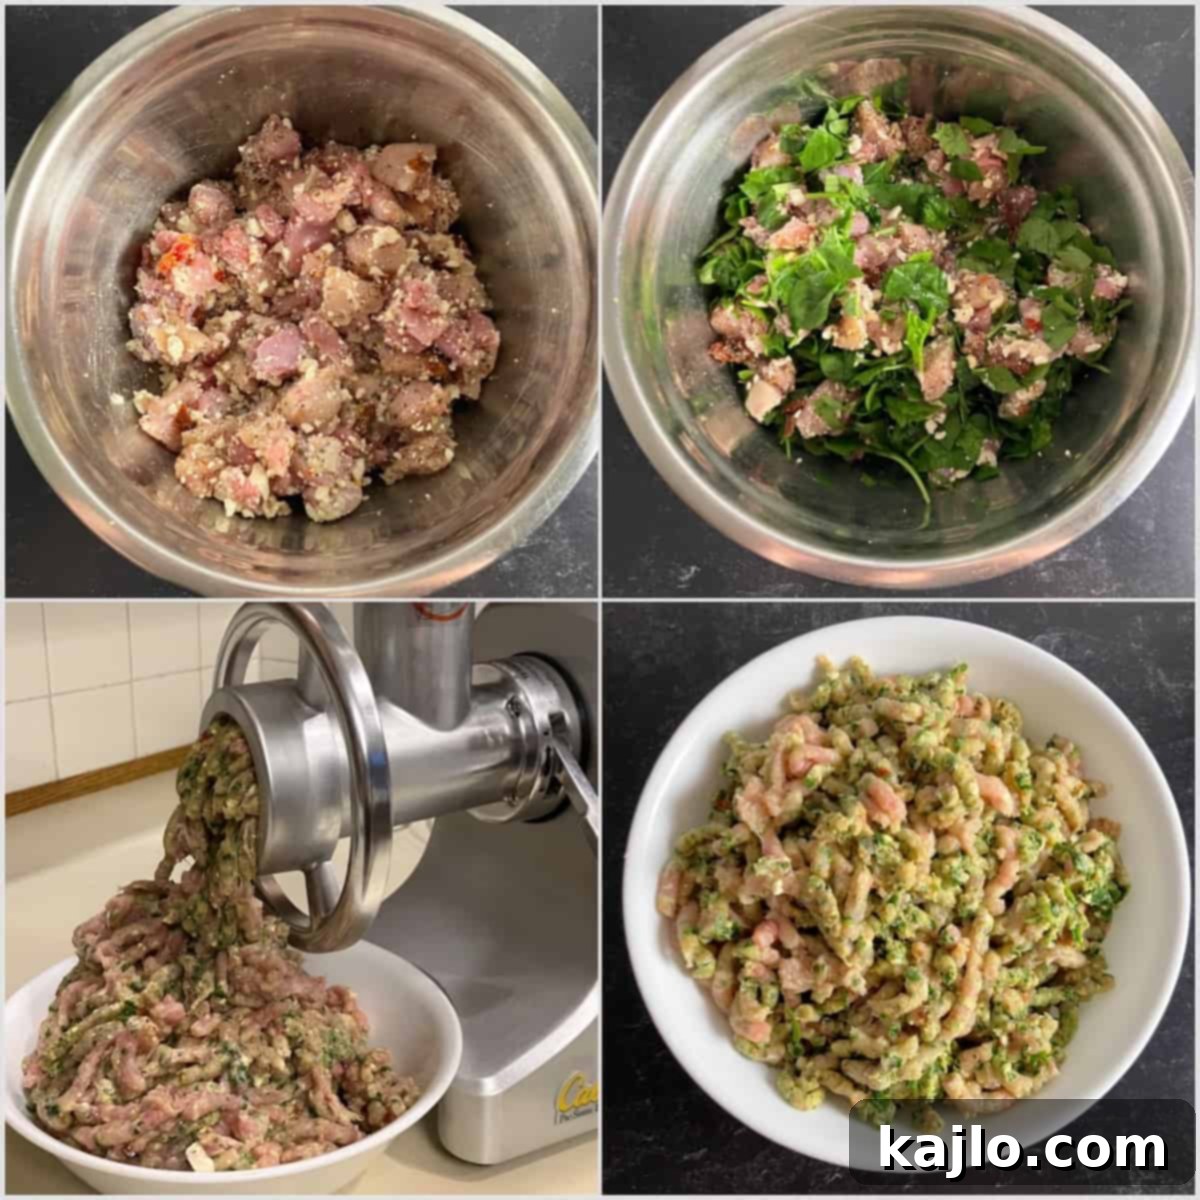
- **Optimal Chilling is Crucial:** The most important rule for easy and safe grinding is to keep all your meat and grinder parts extremely cold. Aim for a temperature of 38-40°F (3.3-4.4°C), where the chicken is almost frozen but not entirely solid. Cut the boneless, skinless chicken thighs and breasts into uniform 1-inch (2.54 cm) cubes or smaller. This ensures an even grind.
- **Flavor Marriage:** In a spacious mixing bowl, combine the cubed chicken with the crumbled feta cheese, finely chopped sun-dried tomatoes, minced garlic, dried oregano, dried basil, fresh lemon zest, salt, black pepper, and red pepper flakes. Mix thoroughly to ensure all these wonderful Mediterranean flavors are evenly distributed. Cover the bowl and place it back in the refrigerator while you set up your meat grinder. Keeping it cold is key to preventing bacterial growth and maintaining meat integrity.
- **Grind Gently:** Once your meat grinder is assembled with a coarse grinding plate, gently fold the shredded baby spinach into the cold chicken mixture. Begin feeding the mixture into the grinder slowly and steadily. A slow, consistent pace prevents the grinder from jamming and helps achieve a uniform coarse texture, which is ideal for this leaner chicken sausage.
- **Choose Your Format: Patties or Links:** After the grinding process, you have an immediate choice. If you prefer the simplicity of sausage patties, you can shape the ground mixture into your desired sizes now. These patties are ready for immediate cooking or freezing. If your goal is to create traditional sausage links, refrigerate the ground mixture once more. This keeps it cold and firm, which is essential for successful stuffing.
Mastering Chicken Sausage Links: The Stuffing Technique
Stuffing sausage into casings might seem like an advanced technique, but with a few pointers, you’ll be creating beautiful **chicken sausage links** like a pro. Patience and a steady hand are your best tools here.
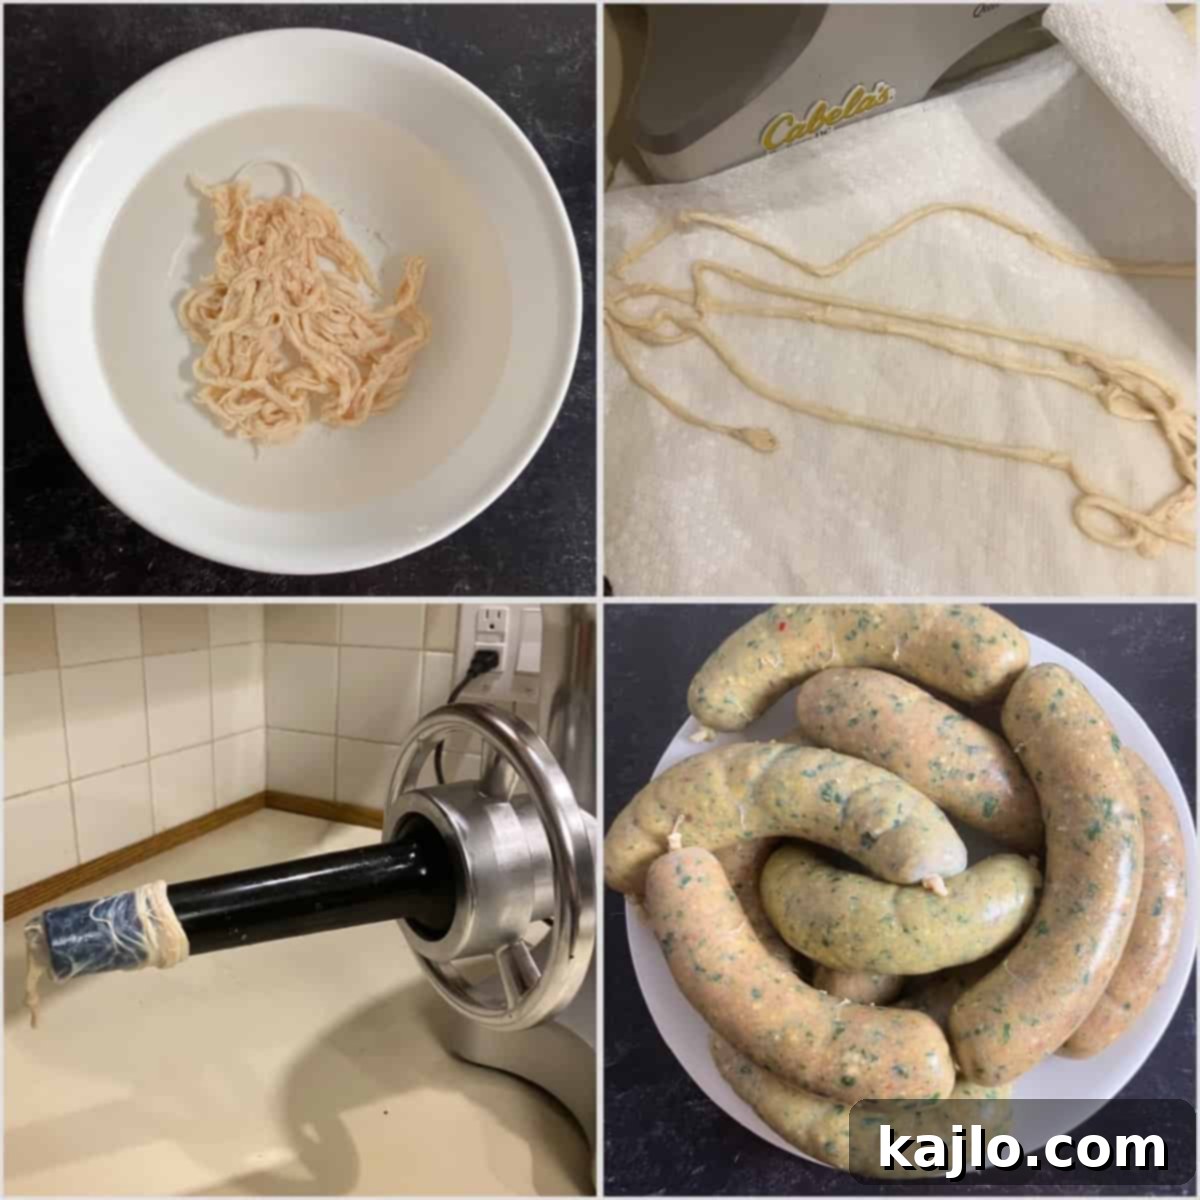
- **Meat Grinder Configuration for Stuffing:** After grinding, it’s vital to thoroughly clean your meat grinder before reconfiguring it for stuffing. Attach the largest available stuffing funnel; despite their appearance, hog casings expand considerably. A light coating of olive oil on the outside of the funnel will significantly help the casing slide on smoothly, reducing friction and potential tearing.
- **Detailed Casing Preparation:** This step is crucial for hygienic and successful stuffing. Begin by removing the hog casings from their packaging and rinsing them under cool, running water. My specific brand required a 15-minute soak in cool water, followed by careful untangling (the ring packaging helps immensely here) and cutting into more manageable 2-foot (0.6 m) lengths. The most important part: open one end of each casing and allow cool tap water to run through its entire length to thoroughly flush the inside. Repeat this internal rinsing at least three times for each casing you plan to use. After rinsing, securely tie a knot in one end of each casing and lay them neatly on a paper towel near your grinder, ready for use.
- **Loading the Casing onto the Funnel:** This can be the trickiest part, but there’s a simple trick. Gather the casing, much like you would gather a pair of pantyhose before putting them on your foot. This compresses the casing into a tidy bundle that then slips onto the end of the stuffing funnel with surprising ease. Most grinders recommend leaving about 2 inches (5 cm) of casing overhanging the end of the funnel; consult your specific grinder’s manual for precise recommendations.
- **The Stuffing Process: Steady and Guided:** With the grinder running on a very slow setting, gently feed the ground sausage mixture into the grinder using the stomper. Your other hand is essential here: it should be guiding the casing as it fills, ensuring the sausage is packed evenly. Avoid over-stuffing, which can cause the casing to burst, and under-stuffing, which creates undesirable air pockets. If you desire smaller links, stop the grinder periodically and tie off segments with kitchen twine. For larger, more rustic links, you can fill longer sections before tying.
- **Finishing and Repeating:** Once a section of casing is filled to your desired length and consistency, carefully remove it from the machine. If you’ve created a long, continuous link, you can twist it three times in the middle (essentially creating two individual links) and then securely tie off the open end. Then, simply slide a new prepared casing onto the funnel and continue the stuffing process until all your meat mixture is transformed into delicious sausages. You typically do not need to clean the machine between filling each casing, unless there’s significant buildup.
Valuable Homemade Chicken Sausage Recipe Tips: Learning from Experience
Through trial and error, I’ve gathered a few insights that can significantly smooth your homemade sausage-making journey, especially with this **homemade chicken feta sausage recipe**:
A crucial lesson I learned early on relates to choosing the correct stuffing funnel size. Even though rinsed casings appear incredibly narrow and delicate, they have remarkable elasticity and expand significantly once air and meat begin to fill them. My initial attempts with smaller funnels resulted in the casing ballooning off, causing frustration. Don’t hesitate to use the largest stuffing funnel provided with your grinder. The “pantyhose” gathering technique I mentioned earlier is an absolute game-changer. What seems like an impossible task – fitting a large casing onto a large funnel – becomes surprisingly simple and efficient, minimizing tears and frustrations.
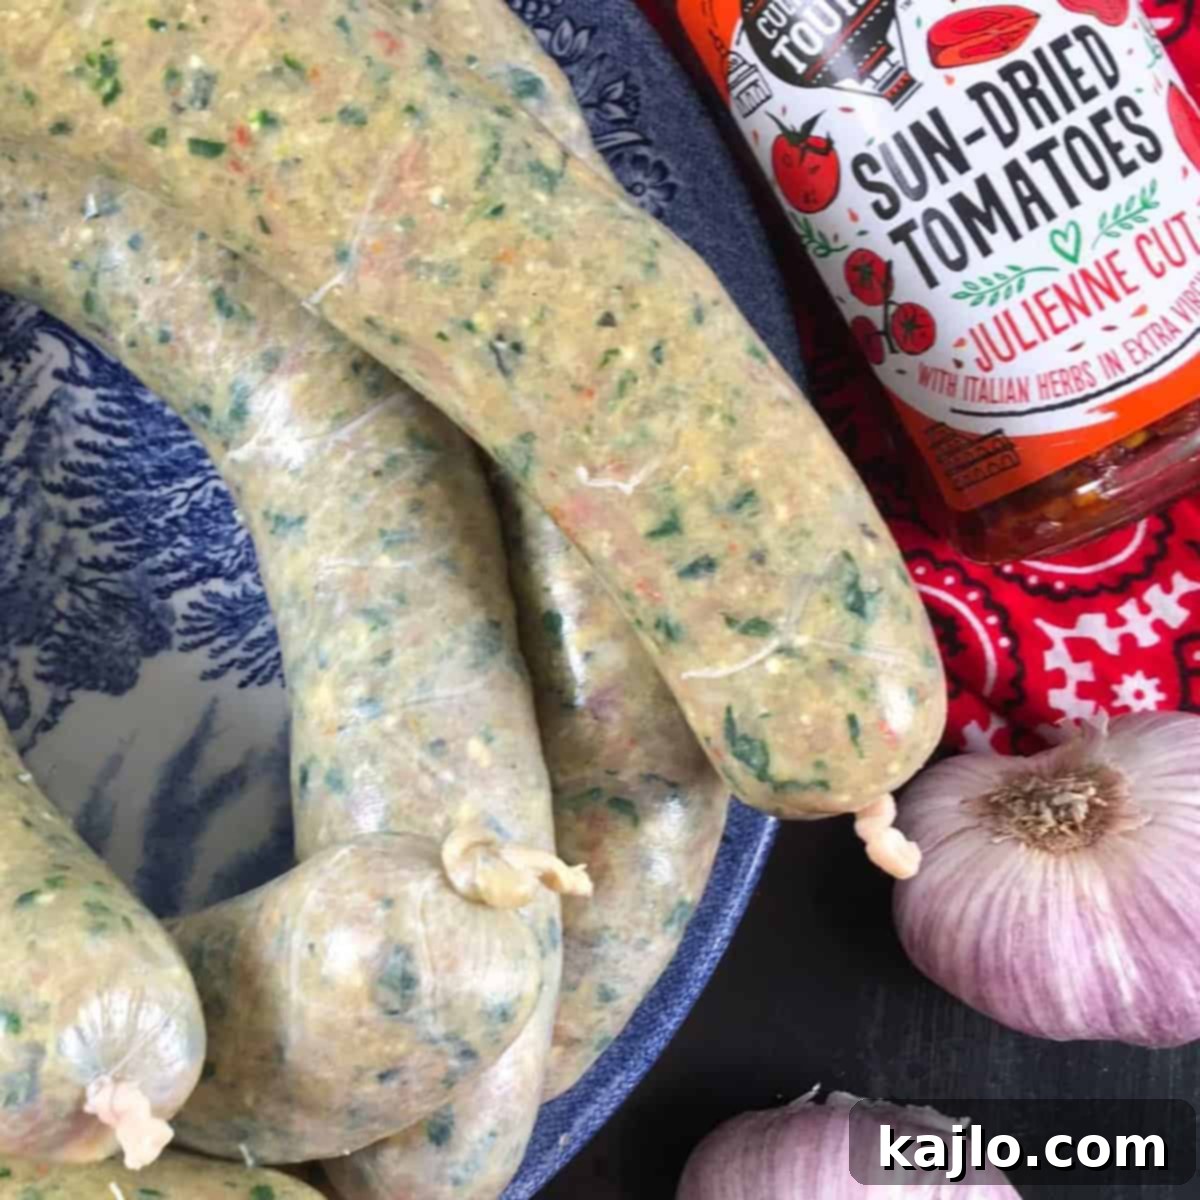
This recipe yields a generous quantity of **homemade chicken feta sausage**, making it perfect for meal prepping. Any raw sausage you don’t plan to cook and consume within 24 hours should be properly stored to maintain freshness. Double-wrapping the raw links tightly in plastic wrap is a good option for freezing. Even better, if you own a vacuum sealer, utilize it for your sausages. Vacuum sealing drastically extends their freezer life and protects against freezer burn, preserving the quality and flavor of your hard work.
Perfectly Cooking Your Delicious Chicken Feta Sausage
Given that this is a lean **chicken feta sausage**, careful cooking is paramount to prevent it from drying out. Roasting in the oven is an excellent method as it allows for even cooking and a beautifully browned exterior while keeping the interior juicy and tender. Here’s a reliable method to cook your homemade links to perfection:
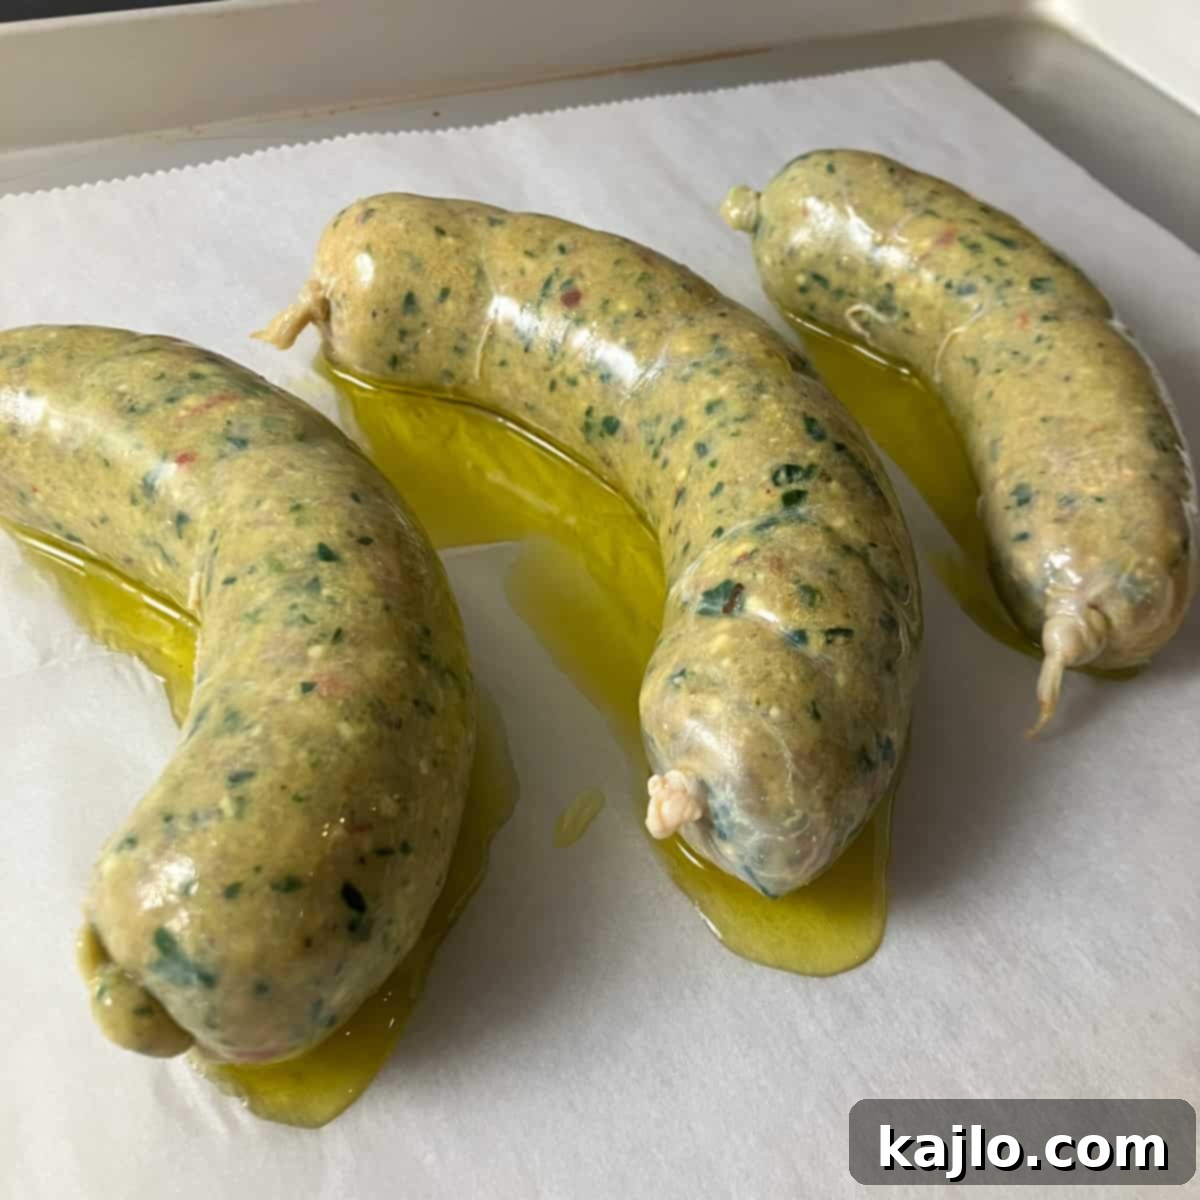
- **Oven Preparation for Roasting:** Begin by preheating your oven to a steady 400°F (200°C). Line a rimmed metal baking pan with parchment paper. This prevents sticking and makes cleanup a breeze. Arrange approximately 1 pound (454 grams) of your homemade chicken feta sausage on the pan, ensuring there is enough space between each link to allow for even heat circulation and browning. Drizzle the sausages generously with 2 tablespoons of olive oil, which will contribute to a golden crust and prevent the lean chicken from drying out.
- **The Roasting Process:** Once your oven has reached the desired temperature, carefully place the baking pan on the bottom rack. Roast the sausages for an initial 15 minutes. After this time, use tongs to carefully flip each sausage link, ensuring that all sides get an opportunity to brown evenly. Continue roasting for an additional 10-15 minutes. It’s crucial to monitor them closely during this phase; the goal is a beautifully golden-brown exterior and a cooked-through interior, not an overcooked, dry sausage.
- **Food Safety: Checking Internal Temperature:** Always prioritize food safety, especially with poultry. It is imperative that chicken sausage reaches a minimum safe internal temperature of 165°F (74°C). To confirm this, insert a reliable meat thermometer into the thickest part of the sausage, avoiding the casing or any bone (if present). This ensures that your delicious homemade sausage is safe to eat and perfectly cooked.

Frequently Asked Questions About Our Homemade Chicken Sausage Recipe
To further assist you in your sausage-making journey, here are answers to some common questions regarding this **homemade chicken sausage recipe**:
How can I make chicken sausage without pork casing?
Making sausage without casings is incredibly simple and equally delicious! If you prefer not to use natural hog casings, or if you’re looking for an even quicker preparation method, you absolutely don’t have to use them. Instead, after grinding and mixing your chicken feta mixture, simply shape it by hand into desired sausage patties or free-form links. These can then be pan-fried, baked, or grilled just as you would with any other ground meat patty. This method is also excellent for those who wish to avoid pork products entirely, offering flexibility and convenience.
What are the best ways to serve chicken feta sausage?
The versatility of this **chicken feta spinach sausage** is one of its most appealing features. For a delightful dinner, slice the cooked sausage and toss it with your favorite pasta and a light, fresh tomato sauce, perhaps with a sprinkle of fresh basil. It also pairs wonderfully with roasted Mediterranean vegetables like bell peppers, zucchini, and onions. Beyond dinner, it makes a fantastic, healthy breakfast option. Serve it alongside cheesy scrambled eggs, a generous portion of fresh fruit, or incorporate it into a savory breakfast burrito or frittata. Its vibrant Mediterranean flavors also lend themselves well to salads, pita sandwiches, or even as a unique, gourmet topping for homemade pizza.
Expand Your Culinary Horizons: More Homemade Sausage Recipes
If you’ve enjoyed the rewarding process of making this **homemade sausage**, you might be inspired to explore other delicious varieties and master new techniques. The world of homemade charcuterie is vast and exciting!
- Homemade Italian Fennel Sausage: Dive into classic Italian flavors with this aromatic and savory sausage.
- Authentic Mexican Chorizo Recipe: Experience the bold and spicy notes of freshly made chorizo.
- Savory Chicken Bratwurst: A lighter take on a German classic, perfect for grilling.
- Pork Sausage in Air Fryer: While not strictly homemade, this recipe offers a convenient way to cook existing pork sausage.
For those interested in traditional cooking methods and utilizing ingredients fully, you may also find it insightful to learn How to Render Lard in Your Crock Pot. It’s another fantastic “slow food” project that adds a valuable skill to your repertoire.
We truly hope this detailed guide inspires you to try something new and exciting in your kitchen. Food is a perpetual journey of discovery, offering endless opportunities to try new recipes, master novel techniques, and savor incredible flavors. It’s a culinary path that truly never gets boring!
