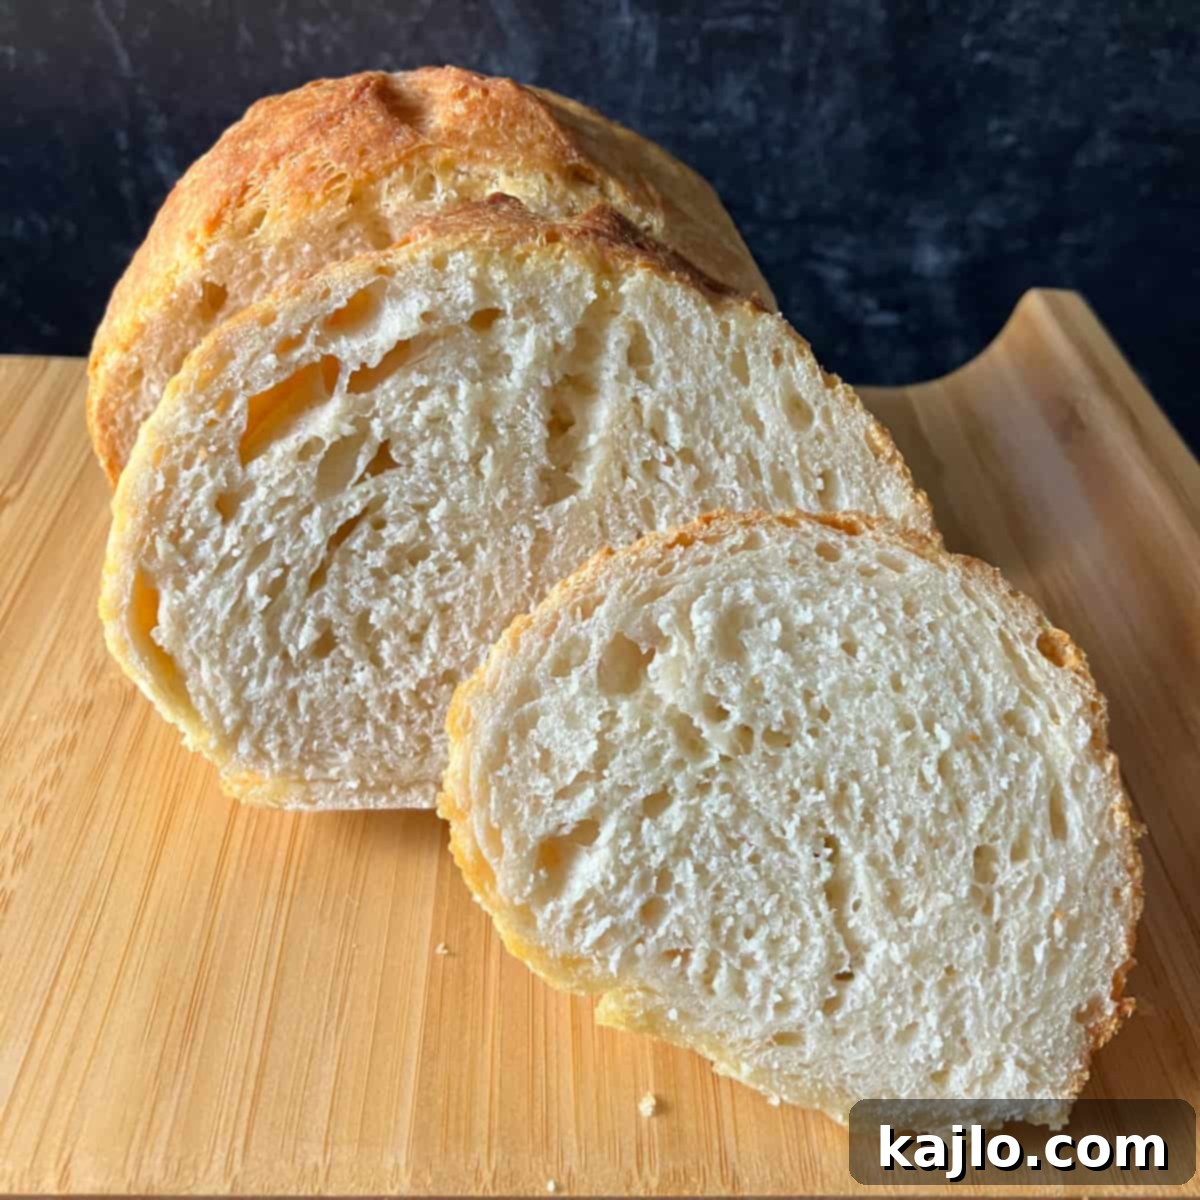
Delicious Homemade Bread in Your Air Fryer: The Easiest Recipe!
Unleash the aroma of freshly baked bread in your kitchen with this incredibly simple air fryer bread recipe. Forget the traditional oven and lengthy baking times; our method offers a super easy and fast way to create a delightful loaf using just a few common ingredients and your trusty air fryer. Whether you’re a seasoned baker or new to the world of bread making, this guide will walk you through everything you need to know, from selecting the right ingredients to mastering how long to bake bread in an air fryer. You’ll learn the secrets to achieving a perfect loaf with a golden crust and soft interior, and how to tell when your homemade bread is perfectly done.
This versatile 3-ingredient air fryer bread (plus water and salt) works wonderfully in various air fryer models, including popular brands like Ninja. Beyond a basic yeast loaf, we’ll also explore quick bread variations, and how to quickly transform regular bread into crispy toast or flavorful garlic bread using your air fryer. Get ready to impress your family and friends with this convenient and delicious approach to baking homemade bread!
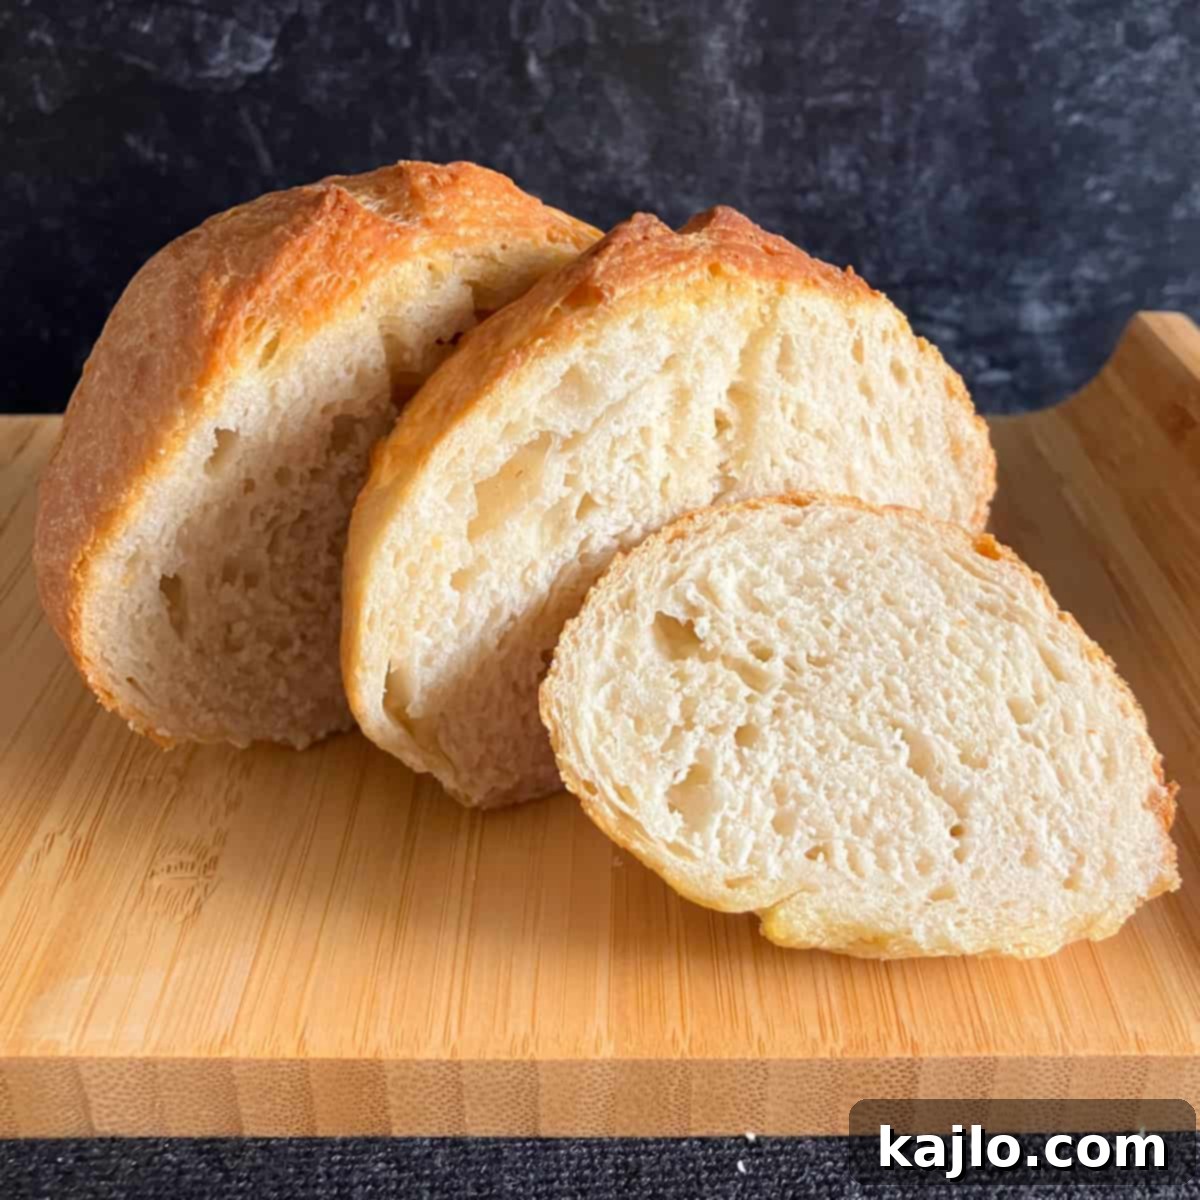
Why Bake Bread in an Air Fryer?
The air fryer has revolutionized home cooking, and baking bread is no exception. For small loaves, an air fryer offers several distinct advantages over a conventional oven:
- Speed and Efficiency: Air fryers heat up much faster than traditional ovens, reducing preheating time significantly. This means you can enjoy fresh bread in a fraction of the time, perfect for a quick dinner side or a weekend treat.
- Perfect Crispy Crust: The intense, circulating hot air in an air fryer is ideal for creating a beautifully crispy crust, often comparable to artisan bakery bread, while keeping the inside wonderfully soft.
- Energy Saving: For smaller portions, using an air fryer consumes less energy than heating up a large oven, making it a more economical choice.
- No Pan Required: This particular recipe is designed as a no-pan air fryer bread, simplifying the process even further. You won’t need specialized bread pans, just your air fryer basket and a piece of parchment paper.
- Convenience: The compact size makes it perfect for individuals or small families, providing a fresh loaf without overwhelming your kitchen with a large batch. It’s an excellent substitute for store-bought dinner rolls.
While this recipe yields a small loaf, it’s precisely this size that ensures even cooking. A larger loaf in an air fryer might result in a burnt exterior before the interior is fully cooked. This recipe is designed to serve approximately two people, making it an ideal side dish.
🍞 Simple Ingredients for Your Air Fryer Bread
Making delicious homemade bread in your air fryer is surprisingly simple, requiring only a handful of basic pantry staples. For this easy recipe, you’ll need just three core ingredients, plus water and salt:
- 120 grams All-Purpose Flour: This is roughly 1 cup, but for the most accurate and consistent results in baking, weighing your flour is always recommended. Precision with flour ensures the right dough consistency.
- ½ teaspoon Instant Yeast: Instant yeast is a fantastic choice for this recipe as it doesn’t require prior activation and can be mixed directly with the dry ingredients. It ensures a good rise for a light and airy texture.
- ½ teaspoon Salt: Essential for flavor, salt also plays a role in controlling yeast activity and strengthening the gluten structure in your dough.
- 5 tablespoons Warm Water: The temperature of your water is crucial for activating the yeast. It needs to be warm, but not too hot, to bring the dough together.
- Cooking Spray: A light mist of cooking spray helps prevent sticking and promotes an even, golden-brown crust.
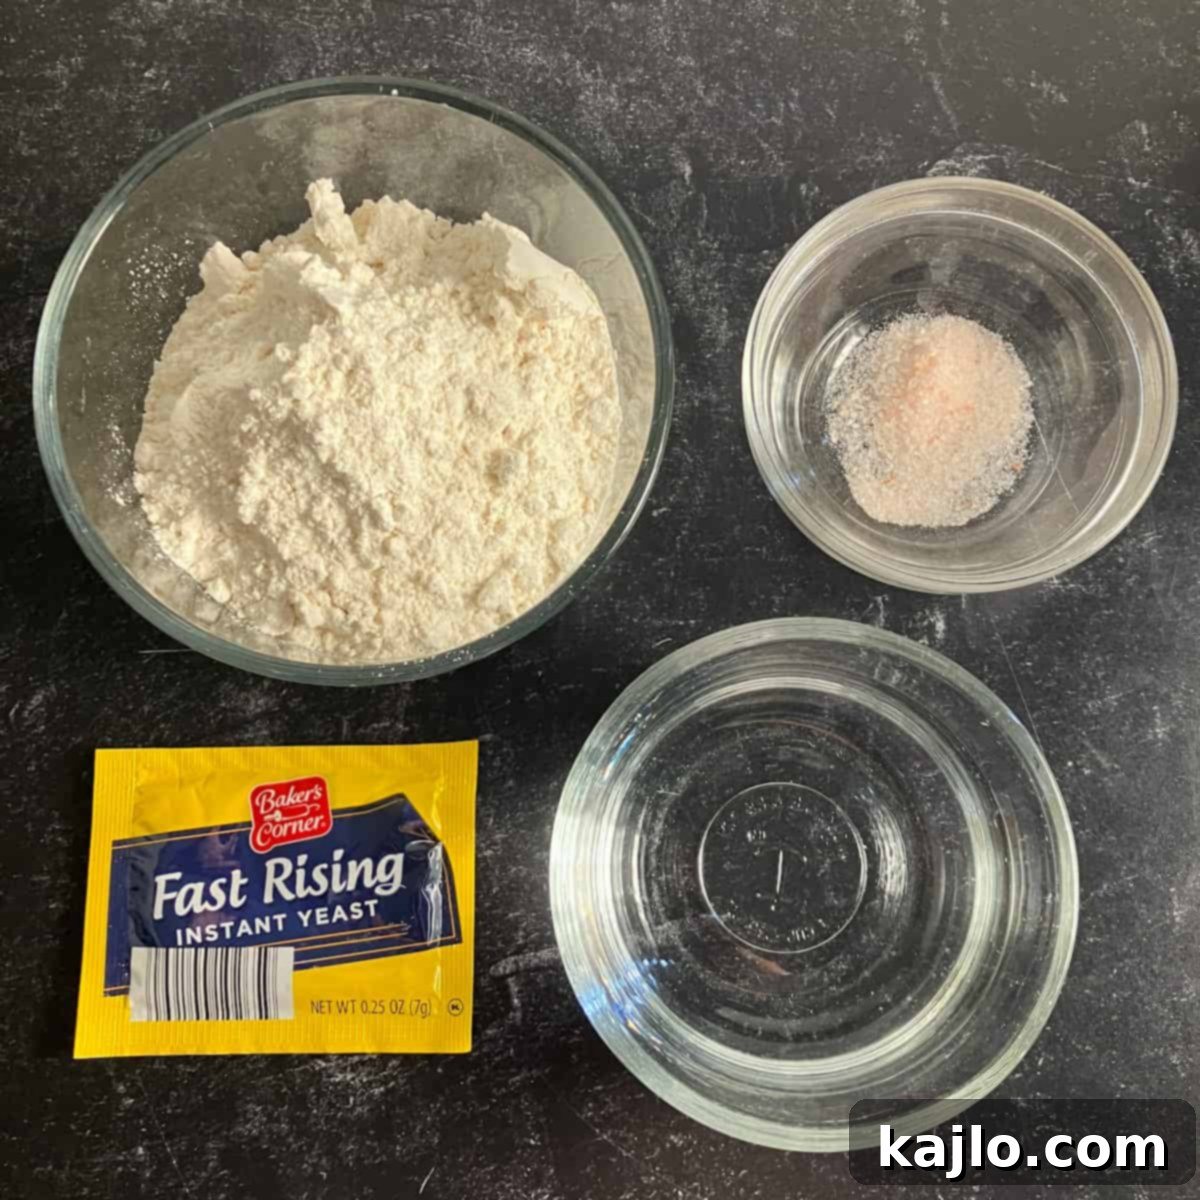
Beyond these ingredients, you’ll also need a sheet of parchment paper cut to fit your air fryer basket, plastic wrap for covering the dough during its rise, and a kitchen thermometer to ensure optimal water temperature and bread doneness. There’s no need for fancy equipment like a stand mixer or dough hook; this recipe is designed to be as straightforward as possible.
It’s important to note that this recipe is specifically scaled for a single, small loaf. We do not recommend doubling the recipe, as a larger quantity of dough may not cook evenly in an air fryer, leading to a burnt exterior and an undercooked center. Sticking to the recommended size ensures the best possible results.
➕ How to Air Fry Bread: Step-by-Step Guide
Follow these detailed steps to create your delicious homemade bread in the air fryer:
- Measure and Mix Dry Ingredients: Begin by accurately weighing 120 grams of all-purpose flour. In a medium-sized mixing bowl, combine the measured flour with ½ teaspoon of instant yeast and ½ teaspoon of salt. Stir these dry ingredients together thoroughly to ensure they are well combined.
- Prepare and Add Water, Then Knead: Warm 5 tablespoons of water to a temperature between 110-125°F (43-51°C). This temperature is crucial for activating the yeast without killing it. Pour the warm water into the bowl with your dry ingredients. Mix or gently knead the mixture until it forms a cohesive, shaggy ball of dough. Once formed, cover the bowl tightly with plastic wrap and let it rise in a warm room (ideally around 70°F or 21°C) for a full 3 hours. During this time, the volume of the dough ball should visibly increase as the yeast works its magic.
- Preheat Your Air Fryer: Towards the end of the 3-hour rising period, preheat your air fryer to 400°F (200°C). Allow it to preheat for at least 5 minutes to ensure it reaches the optimal baking temperature.
- Shape the Dough: Once the dough has risen, gently knead or fold it towards the middle about five times. This helps to create a smooth, round loaf. If the dough is a bit sticky, you can lightly sprinkle about 1 tablespoon of flour on your hands and the bowl to make handling easier.
- Prepare Air Fryer Basket and Place Dough: Carefully place a sheet of parchment paper, cut to fit, into the bottom of your hot air fryer basket or tray. This prevents sticking and makes cleanup a breeze. Transfer the shaped, round dough into the center of the prepared basket. Using a sharp knife or a bread lame, cut a shallow slash into the top of the dough – this helps the bread expand evenly during baking. Finish by misting the dough lightly with cooking oil spray for a beautiful golden crust.
- Air Fry the Bread: Place the basket back into the preheated air fryer. Air fry the bread for 13-18 minutes at 400°F (200°C). If you are using an air fryer oven, position the loaf in the middle rack. The key to knowing when your bread is done is checking its internal temperature with an instant-read thermometer. It should reach approximately 180°F (82°C). After the cooking time is complete, leave the bread in the hot air fryer for an additional 3 minutes. This residual heat helps it continue to cook through and develops a firmer crust.
- Cool Before Serving: Once baked, carefully remove the bread from the air fryer. It’s essential to allow the bread to cool for at least one hour on a wire rack before attempting to cut and serve it. This cooling period allows the internal structure of the bread to set properly, preventing it from being gummy or dense when sliced.
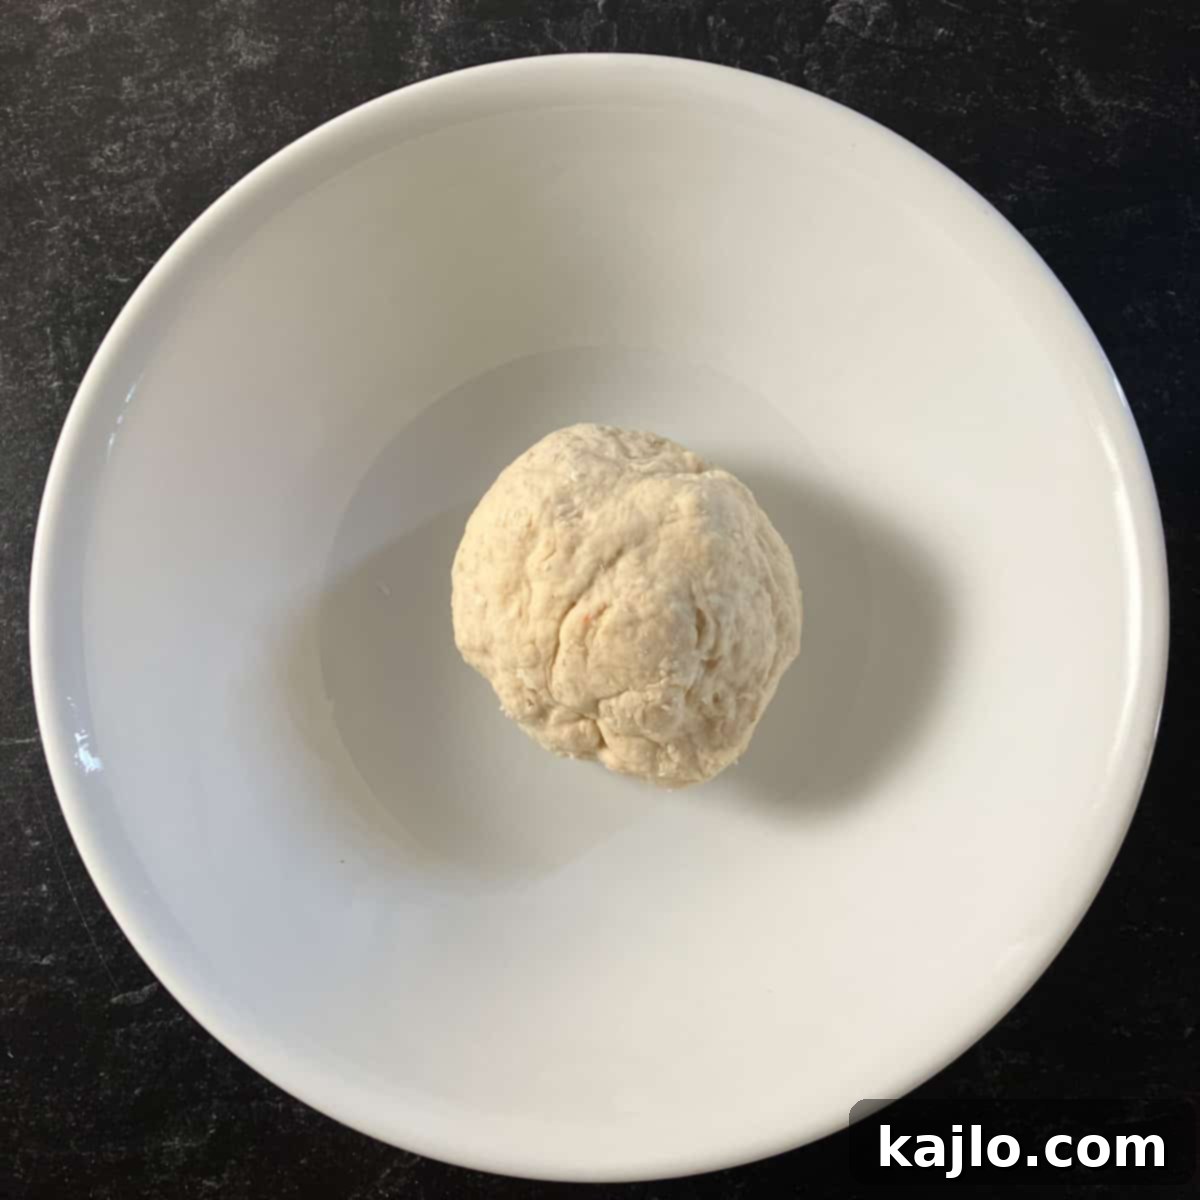


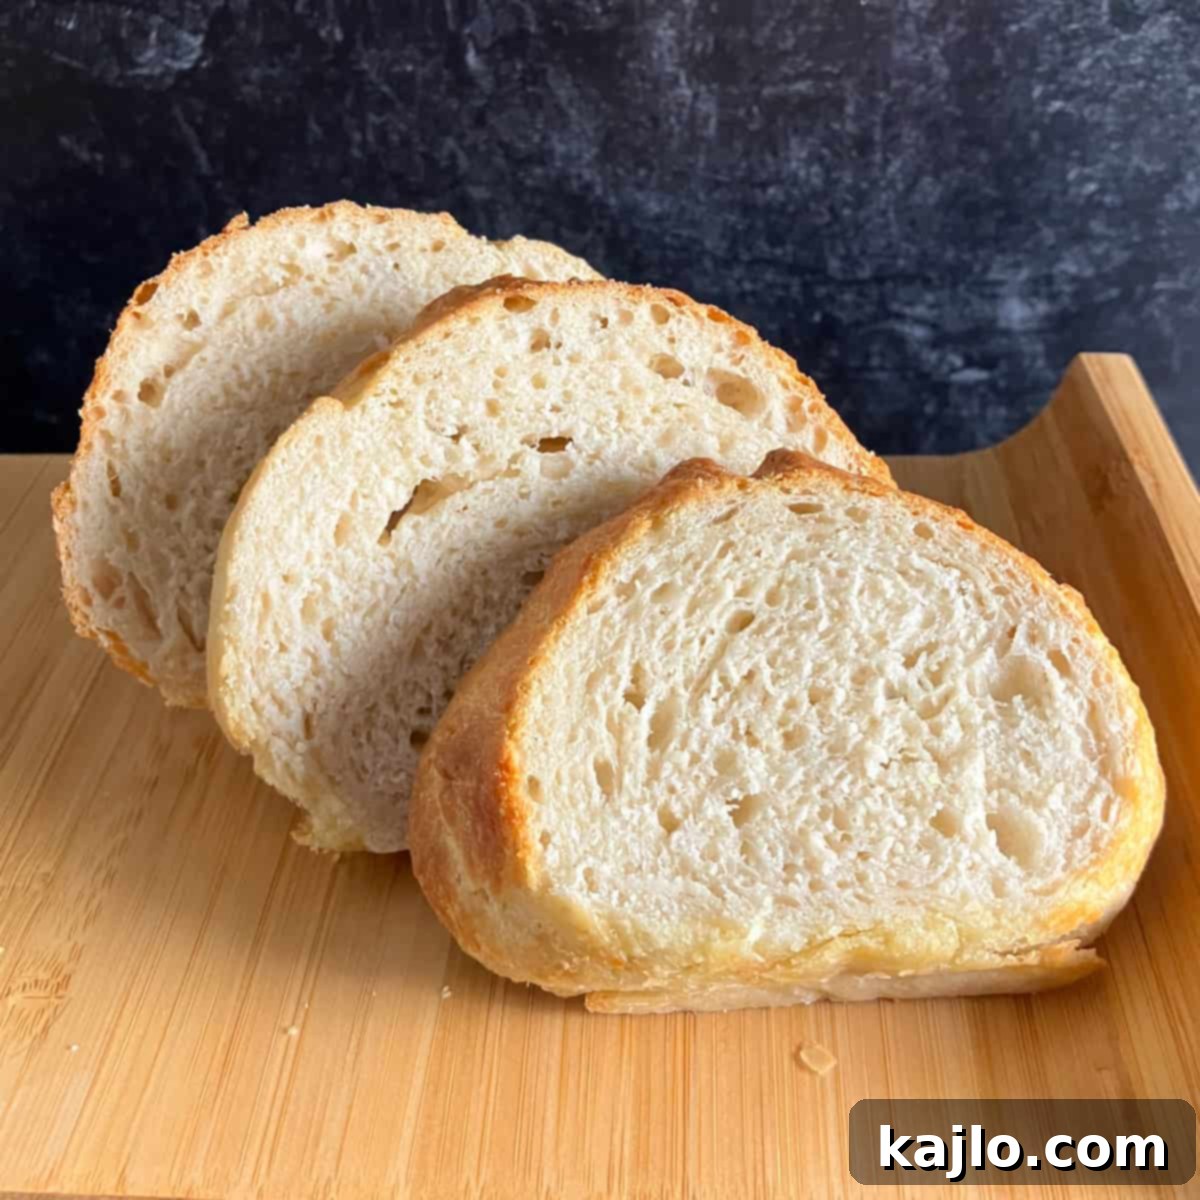
Keep in mind that larger air fryer ovens might take a bit longer to cook compared to smaller basket-style air fryers. If you notice your easy air fryer bread is browning too quickly on the outside but seems undercooked in the middle, simply cover it loosely with aluminum foil to prevent further browning and continue air frying for a few more minutes until it reaches the desired internal temperature.
How to Know When Your Air Fryer Bread is Done
The most reliable way to determine if your yeast bread is fully cooked is by checking its internal temperature. Use an instant-read thermometer inserted into the center of the loaf. Generally, bread is considered done when it reaches an internal temperature of 190-210°F (88-99°C). For this specific air fryer no-knead bread recipe, aiming for an internal temperature of about 180°F (82°C) immediately after baking is ideal, as the bread will continue to cook slightly from the residual heat as it rests in the hot air fryer.
Another indicator is the color of the crust; it should be deep golden brown. You can also lightly tap the bottom of the loaf; if it sounds hollow, it’s usually a good sign of doneness. However, the thermometer is truly the most foolproof method.
💡 Expert Tips for Perfect Air Fryer Bread
Achieving consistently great results with your air fryer bread is easy with these expert tips:
- Storage Solutions: For optimal freshness, wrap your homemade bread tightly in plastic wrap and store it in the refrigerator for up to 1-2 days. For longer-term preservation, place the bread in a freezer bag, pressing out as much air as possible, and store it in the freezer. It can be defrosted and reheated for a quick snack.
- Weigh Your Flour: Precision is paramount in baking. While cup measurements are common, they can lead to significant inconsistencies in the amount of flour used. For the best, most reliable results, always weigh your dry ingredients, especially flour, using a kitchen scale.
- Water Temperature is Key: The temperature of your water directly impacts yeast activity. If the water is too hot, it will kill the yeast, preventing your bread from rising. If it’s too cold, the yeast will be sluggish, and your bread may not rise adequately. Aim for 110-125°F (43-51°C) for optimal activation.
- Optimal Rising Environment: Your dough needs a warm, consistent environment to rise properly. A room temperature of around 70°F (21°C) is ideal. Avoid placing the dough in the refrigerator to rise for this quick bread recipe, as it’s not designed for a slow, cold fermentation.
- Achieving an Airy Crumb: If you prefer a bread with a more open, airy crumb and larger holes, similar to sourdough, you’ll need to increase the moisture content slightly in your dough. However, be aware that wetter doughs are harder to shape into a neat, free-form loaf and might require a small baking pan or ramekin to help maintain their round shape in the air fryer.
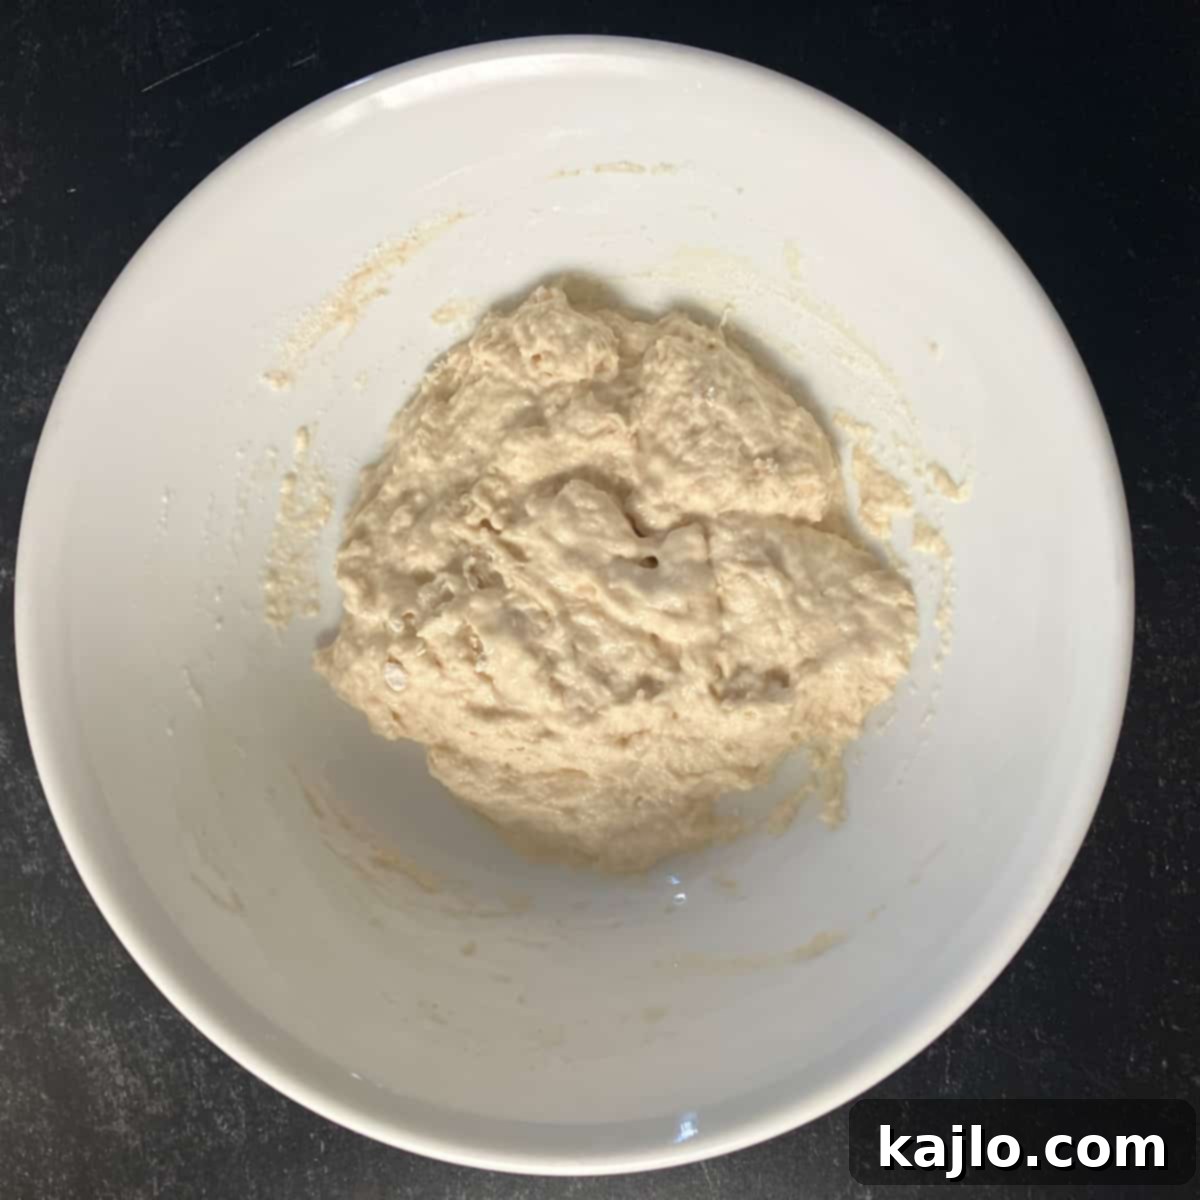
When I experimented with adding a little more water to achieve larger holes, the resulting loaf, while not as crusty or traditionally photogenic, did yield a wonderfully holey bread that was perfect for cutting into thin slices, demonstrating the versatility of the recipe.
Regarding flour types, whole wheat flour will generally produce a much denser loaf due to its higher fiber content. While it adds nutritional benefits, it can significantly alter the texture. If you’re looking to make a “healthier” loaf, I suggest starting by replacing only 1 part of the all-purpose flour with whole wheat flour (e.g., 3 parts all-purpose to 1 part whole wheat). If you’re satisfied with the results, you can gradually increase the proportion of whole grain flour in subsequent attempts.
Air Fryer Bread: The Full Recipe
Air Fryer Bread Recipe (How to Air Fry Bread)
My air fryer bread recipe is a super easy and fast way to make homemade bread with yeast.
Author: Summer Yule
Prep Time: 3 hrs
Cook Time: 15 mins
Total Time: 3 hrs 15 mins
Course: Side Dish
Cuisine: American
Servings: 2
Calories: 218 kcal
Ingredients:
- 120 grams all-purpose flour (about 1 cup, but weigh it for the best results)
- ½ teaspoon instant yeast
- ½ teaspoon salt
- 5 tablespoons warm water
- cooking spray
Instructions:
- Weigh the flour. Mix it with the yeast and salt in a medium-size bowl.
- Warm the water to 110-125°F (43-51°C). Add it to the dry ingredients. Knead or stir into a shaggy and cohesive ball of dough. Cover the bowl of dough with plastic wrap and let it rise in a warm room for 3 hours. The volume of the dough ball should increase.
- Towards the end of the rising time, preheat the air fryer to 400°F (200°C) for 5 minutes.
- Knead or fold the bread dough towards the middle about five times to make it round. You can sprinkle about 1 tablespoon of flour on your hands and the bowl to make this easier.
- Carefully place a sheet of parchment paper cut to fit into the bottom of the hot air fryer basket or tray. Place the shaped dough round into the prepared basket. Cut a slash into the top and mist the dough with cooking oil spray.
- Air fry the bread for 13-18 minutes at 400℉ (200°C). (If cooking in an air fryer oven, place the loaf of bread in the middle.) The bread should reach an internal temperature of about 180°F (82°C). Leave the bread in the hot air fryer for an additional 3 minutes after the cooking time is up.
- Allow the bread to cool for at least one hour before cutting and serving.
Equipment:
- Air Fryer
- Parchment Paper
- Kitchen Thermometer
Notes from the Dietitian:
This is a level 3 recipe (weight maintenance and active lifestyles). White bread is a calorie-dense food that lacks the protein, fiber, and fluid volume that helps us feel full on fewer calories. One of the reasons low carb diets help some people lose weight is that these diets eliminate a lot of the foods that are easy to overeat. That said, homemade bread is the ultimate comfort food, and typically provides some B-complex vitamins and iron through enrichment of the flour.
I know I enjoy treating myself to some golden brown freshly baked homemade bread on occasion. If you feel the same, I hope you love this recipe, and that it turns out delicious and perfect for you 🙂
Nutrition information is for one serving.
Nutrition Information (Per Serving):
- Calories: 218 kcal
- Carbohydrates: 45.8 g
- Protein: 6.2 g
- Fat: 0.6 g
- Saturated Fat: 0.1 g
- Sodium: 582.6 mg
- Potassium: 64.3 mg
- Fiber: 1.6 g
- Calcium: 1% DV
- Iron: 15.5% DV
Keywords:
air fry bread, air fryer bread, how long to bake bread in air fryer, homemade bread, yeast bread, easy air fryer recipes, bread machine alternative, small loaf bread, crispy bread
Nutrition Info Disclaimer
All recipes on this website may or may not be appropriate for you, depending on your medical needs and personal preferences. Consult with a registered dietitian or your physician if you need help determining the dietary pattern that may be best for you.
The nutrition information is an estimate provided as a courtesy. It will differ depending on the specific brands and ingredients that you use. Calorie information on food labels may be inaccurate, so please don’t sweat the numbers too much.
“To taste” means to your preferences, which may have to be visual to follow food safety rules. Please don’t eat undercooked food x
Frequently Asked Questions About Air Fryer Bread
Can I make other types of bread in the air fryer?
Absolutely! The air fryer is surprisingly versatile for various types of bread. Beyond this yeast bread, you can make quick breads (like the banana muffins linked below), transform store-bought bread into toast or garlic bread, or even reheat leftover bread to restore its freshness. The key is to adjust cooking times and temperatures based on the bread type and size.
What kind of air fryer is best for baking bread?
Most basket-style air fryers work well for small loaves, as do air fryer ovens. The main difference lies in capacity and cooking time. Basket models tend to cook faster due to their concentrated airflow. Air fryer ovens offer more space, but might require slightly longer baking times. Any model that allows for preheating and temperature control to 400°F (200°C) should be suitable.
Can I use whole wheat flour for this recipe?
Yes, but with modifications. As mentioned in the tips, whole wheat flour will result in a denser loaf. To incorporate it, start by substituting only a quarter or a third of the all-purpose flour with whole wheat flour. This allows you to introduce more fiber while still maintaining a reasonable texture. You might also need a tiny bit more water to compensate for whole wheat flour’s higher absorption.
Why did my air fryer bread turn out dense or not rise?
Several factors can lead to dense bread or poor rise. The most common culprits are incorrect water temperature (too hot or too cold kills/inhibits yeast), old or inactive yeast, or an insufficient rising time in a cool environment. Ensure your yeast is fresh, your water is within the recommended temperature range, and your dough rises in a consistently warm spot.
👩🍳 More Air Fryer Delights to Explore
Once you’ve mastered this delicious homemade air fryer bread, expand your air frying horizons with these other fantastic bread-related recipes:
- How to Toast Bread in Air Fryer: Achieve perfectly crispy toast every time, ideal for breakfast or quick snacks.
- Air Fryer Garlic Bread: Transform ordinary bread into a flavorful, aromatic side dish in minutes.
- Air Fryer Banana Muffins (no yeast air fryer quick bread): A delightful sweet quick bread alternative, perfect for a treat without the yeast.
Join our community! Subscribe for all of the latest and greatest recipes, and follow me on Facebook, Pinterest, Instagram, and YouTube!
