Discover the Delight of Growing Your Own Popcorn Sprouts: A Simple Guide to Fresh, Sweet Greens
Imagine harvesting incredibly sweet, tender greens right from your kitchen counter. What if we told you these gourmet microgreens come from ordinary popcorn kernels? It’s true! You can easily cultivate your own supply of delicious popcorn sprouts, also known as popcorn greens or popcorn shoots. This comprehensive guide will walk you through every step of growing these delightful edibles, answering all your questions about how to grow popcorn grass at home. Prepare to taste some of the sweetest, freshest greens you’ve ever experienced!
“I threw a couple popcorn kernels in with my basil plant and a week later I have 3 little sprouts. They’re amazing!”
– Elissa, a happy home grower
Growing your own food can be an incredibly rewarding experience, and cultivating popcorn microgreens is surprisingly simple and satisfying. It’s a project that brings fresh flavors and a touch of green to your home, regardless of your climate or gardening expertise. Whether you’re an experienced gardener or just starting out, the ease and speed of growing edible popcorn sprouts make it an ideal choice for anyone looking to add fresh, nutrient-rich greens to their diet.
Many people purchase microgreen seeds from specialized suppliers, but you might be surprised to learn that the very same popcorn kernels you buy for movie night can be transformed into vibrant, edible shoots. This makes sprouting popcorn kernels an accessible and economical gardening endeavor. There’s no need for expensive equipment or rare seeds; just a few basic supplies and a little patience are all it takes.
🌱 What Exactly Are Popcorn Shoots?
Popcorn shoots are simply the young, tender sprouts that emerge from unpopped popcorn kernels. When properly germinated and grown, these kernels produce vibrant green or yellow blades, similar to wheatgrass, that are entirely edible and packed with a unique, surprisingly sweet flavor. The process of cultivating these greens is straightforward, making them an excellent introduction to microgreens for beginners.
Taste and Texture: Light-Grown vs. Dark-Grown Popcorn Sprouts
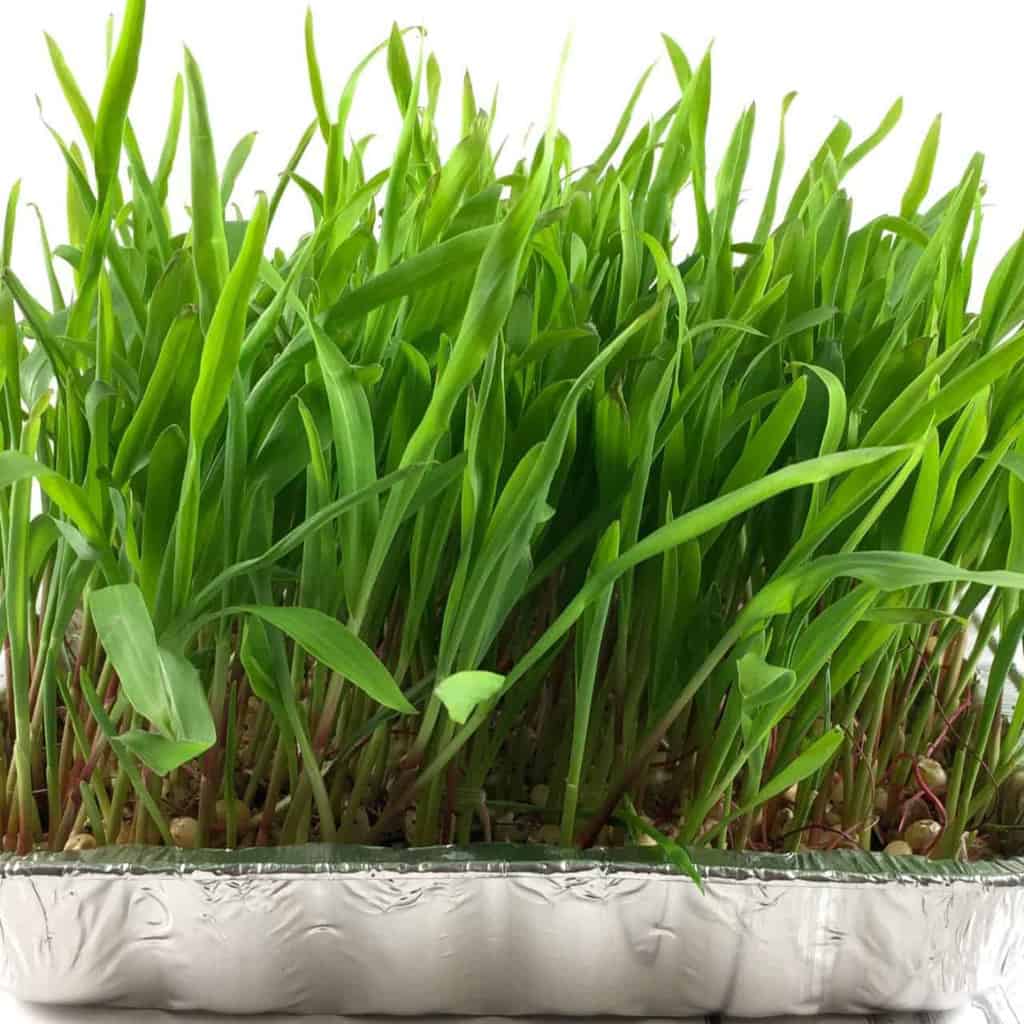
My initial venture into growing popcorn greens involved allowing them to flourish in the sun for two weeks. The resulting green leaves, while slightly fibrous, offered an incredibly sweet taste—a delightful surprise! Many describe the flavor of young popcorn shoots as akin to biting into a fresh ear of sweet corn, but some find them so intensely sweet that they resemble stevia. This natural sweetness is truly remarkable and makes them a fantastic addition to various dishes.
Intrigued by different growing methods, I also experimented with growing popcorn shoots in complete darkness for just one week. The outcome was a batch of highly tender, yellow shoots that were even sweeter and less fibrous than their sun-kissed counterparts. While they lacked the vibrant green hue, their superior tenderness and intense sweetness made them our preferred choice for eating. This method, called etiolation, prevents chlorophyll development, resulting in a softer texture and often a sweeter taste.
The main trade-off for growing in the dark is the color; you won’t achieve the lush, verdant look of greens grown in sunlight. However, if tenderness and sweetness are your top priorities, the dark-grown method is highly recommended. It’s a fascinating experiment that highlights how growing conditions can dramatically influence the characteristics of your sprouts.
🍿 Essential Supplies for Growing Popcorn Grass
One of the best aspects of growing popcorn grass is that you likely already possess most, if not all, of the necessary supplies. This project requires minimal investment, making it accessible to virtually anyone interested in home gardening. Here’s a simple checklist of what you’ll need:
- Popcorn Kernels: Unpopped, unseasoned kernels are essential. Any standard white or yellow variety from your grocery store will do.
- Glass Jar or Bowl: For soaking the kernels. A canning jar (quart-sized is ideal) works perfectly.
- Potting Soil: A good quality, sterile potting mix to provide a medium for growth.
- Shallow Tray with Clear Lid: An 8″x8″ (20×20 cm) metal baking pan with a clear plastic lid is excellent. Disposable aluminum pans with clear dome lids are a convenient option. A slightly larger pan is also acceptable.
- Water: For soaking and watering the sprouts.
- Cheesecloth or Breathable Cover: To cover the jar during soaking, allowing air circulation while keeping dust out.
You don’t need to make a special trip to a garden center for the popcorn. Standard, unflavored popcorn kernels from your local grocery store are perfectly suitable. The key is to ensure they are relatively fresh. Kernels that have been sitting on a shelf for many years might have a lower germination rate, so opt for a brand with a good turnover.
I personally used Bob’s Red Mill white popcorn kernels, primarily because they were readily available. However, any variety of white or yellow popcorn kernels should sprout effectively. Given the high product turnover in most grocery stores today, finding fresh, viable kernels shouldn’t be an issue.
Even if you find the unique sweetness of popcorn greens isn’t entirely to your liking, this remains an incredibly fun and educational project, especially for children. It’s a wonderful way to introduce them to the magic of gardening and the concept of growing food from simple ingredients. Regardless of your climate or gardening experience, you can enjoy fresh, homegrown greens without needing to visit the store, embracing a rewarding “slow food” and DIY philosophy.
🌽 Step-by-Step: How to Grow Popcorn Grass
Follow these easy instructions to cultivate your own fresh, sweet popcorn sprouts:
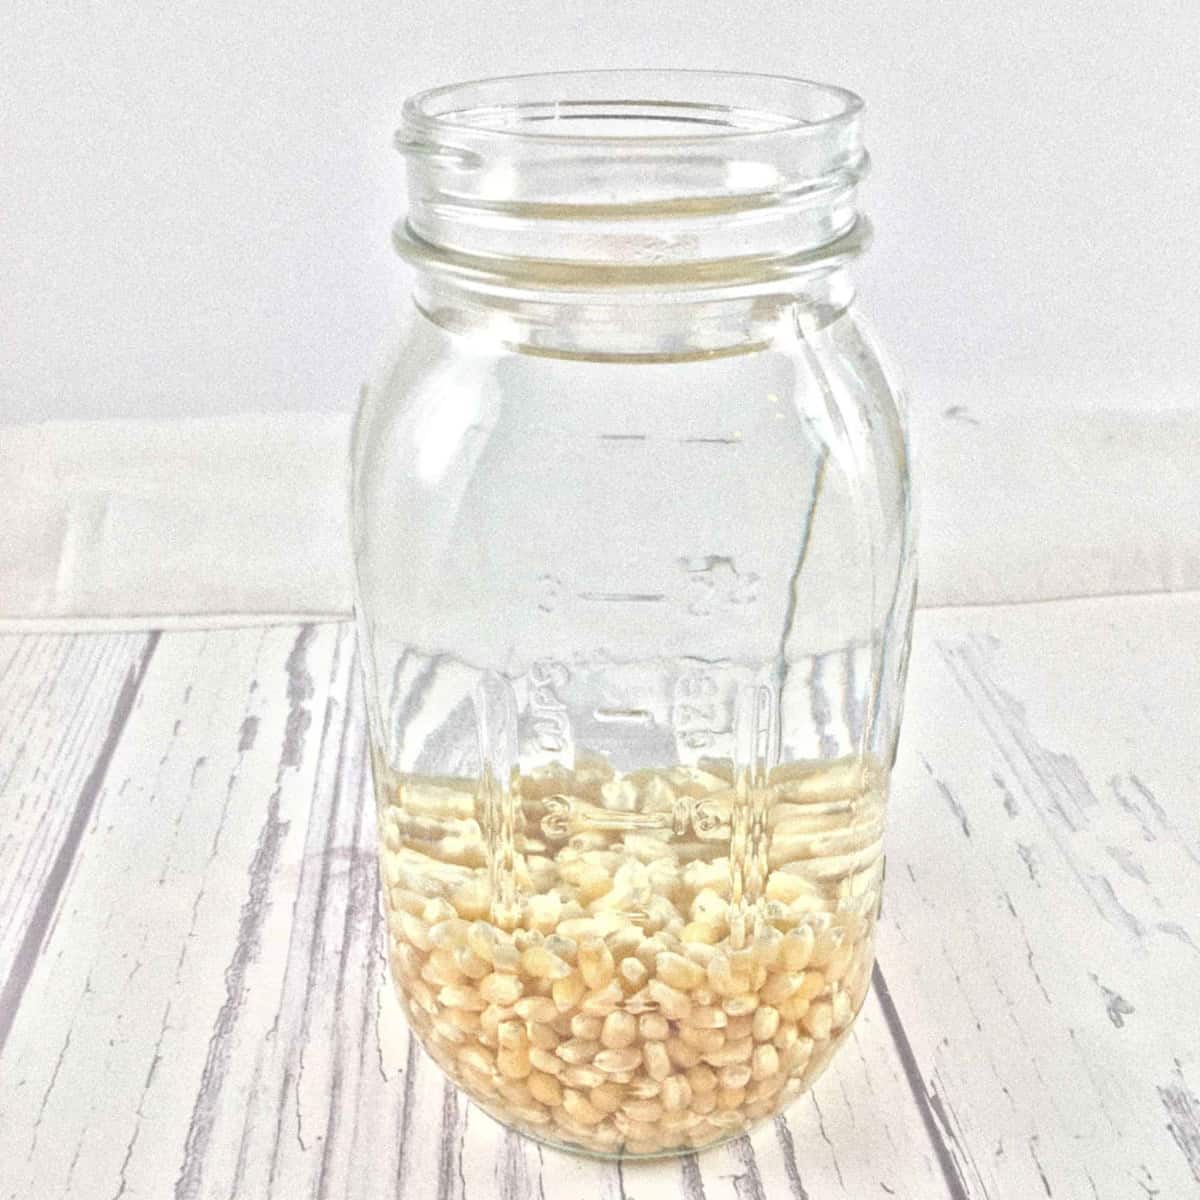
Soak the Kernels: Place ½ cup of unpopped popcorn kernels into a glass jar (a quart-sized canning jar is ideal). Fill the jar with warm water, ensuring the kernels are fully submerged. Cover the mouth of the jar with cheesecloth or a clean dishtowel, secured with a rubber band, to allow air circulation while preventing dust or debris from entering.

Popcorn kernels soaking in a jar. Continue Soaking: Allow the kernels to soak for a total of three days at room temperature. To ensure the water remains fresh and prevent any potential mold or bacterial growth, drain and refill the jar with fresh warm water after 1½ days.
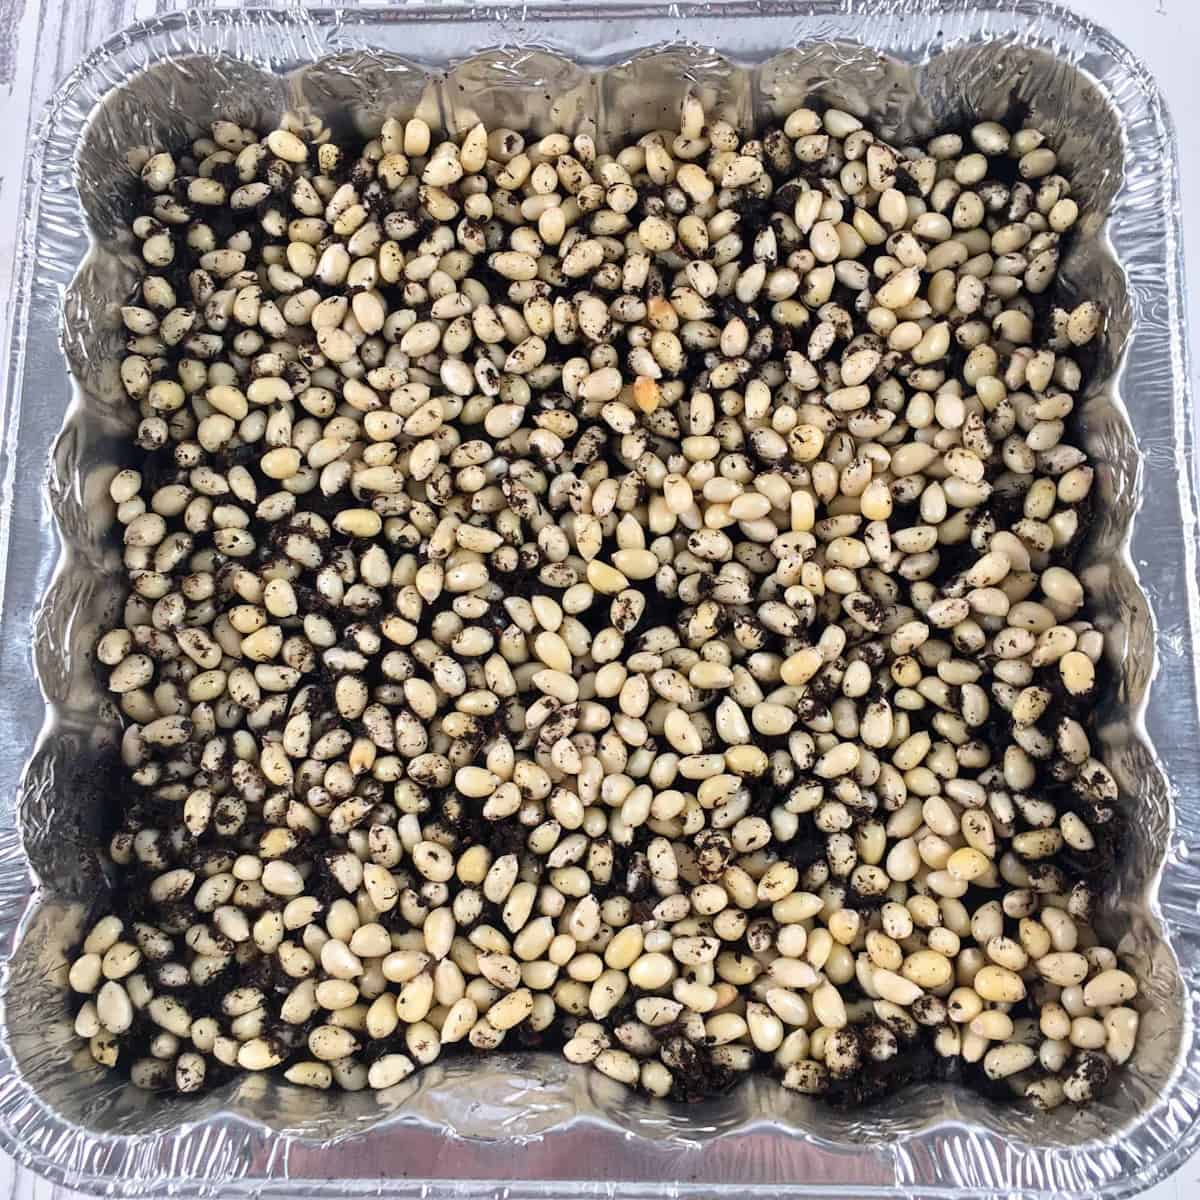
Prepare the Planting Tray: After three days of soaking, drain the water thoroughly from the jar. Take an 8-inch by 8-inch (20×20 cm) metal baking pan and fill it with 1 to 1½ inches (2.54-3.81 cm) of fresh potting soil. Spread the soaked popcorn seeds evenly across the surface of the soil in a single layer. Gently press the seeds into the soil, but do not cover them with additional soil. They need light (or darkness, depending on your desired outcome) to sprout effectively.

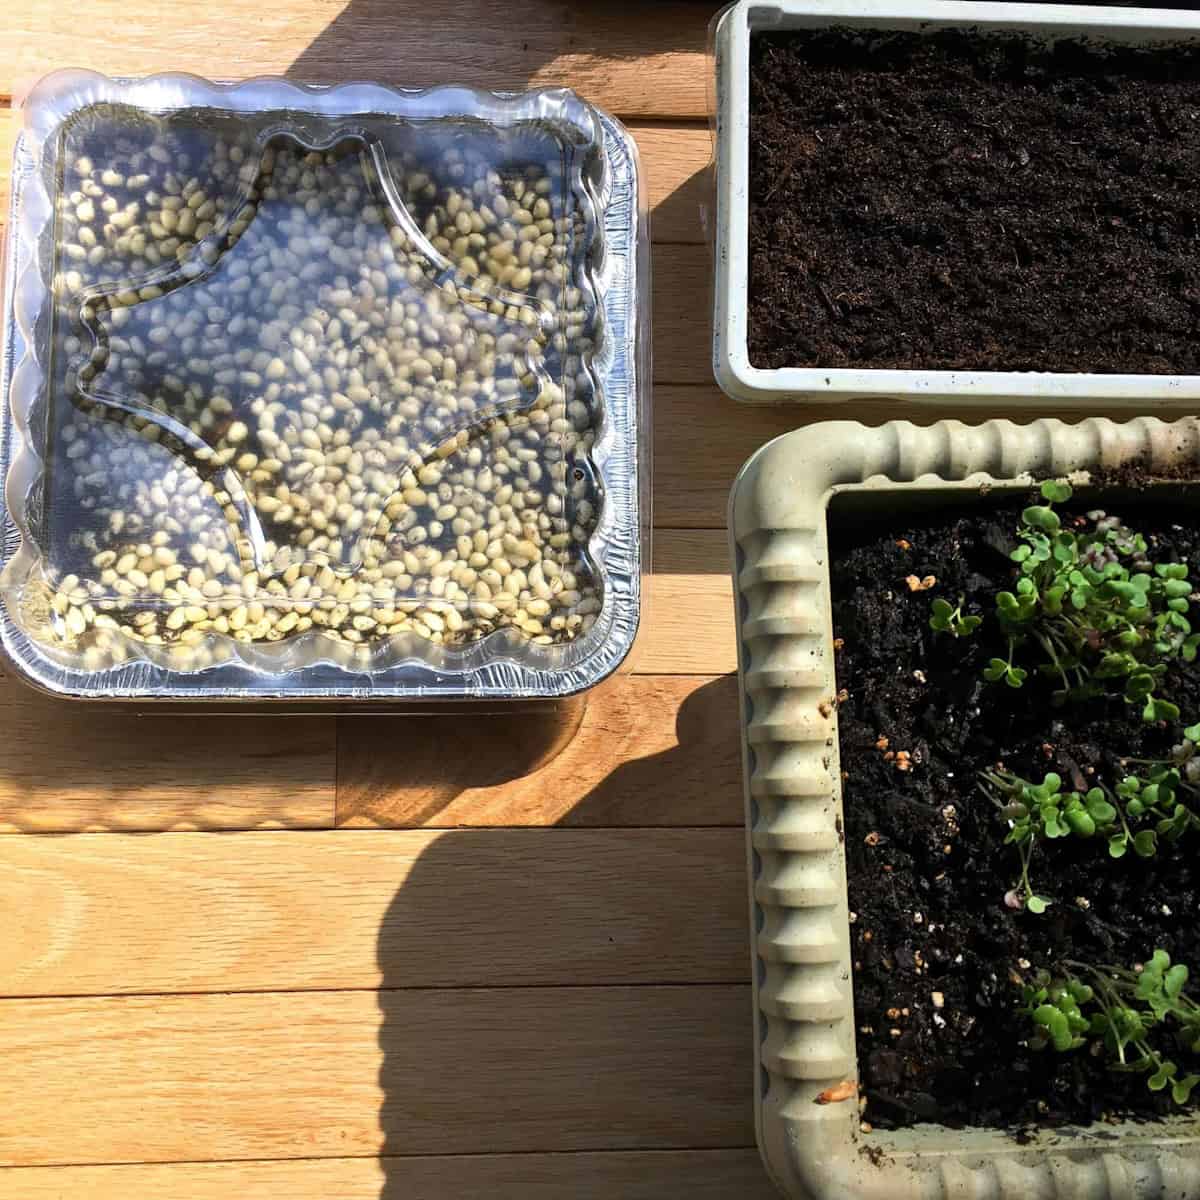
Popcorn seeds spread on potting soil. Moisten and Cover: Moisten the soil thoroughly with water, ensuring it is damp but not waterlogged. Cover the baking pan with a clear lid. This creates a mini-greenhouse effect, helping to maintain high humidity around the seeds, which is crucial for germination and growth. If you live in a particularly humid environment or notice any signs of mold, remove the lid for a few hours daily or permanently to improve air circulation.

The planted popcorn kernels covered with a clear lid. Grow in Darkness for Tender Yellow Shoots: For the most tender, intensely sweet, and yellow popcorn shoots, place the covered pan in a dark location, such as a closet or pantry. Allow them to grow for approximately one week. The absence of light prevents the development of chlorophyll, resulting in their pale color and remarkably soft texture.
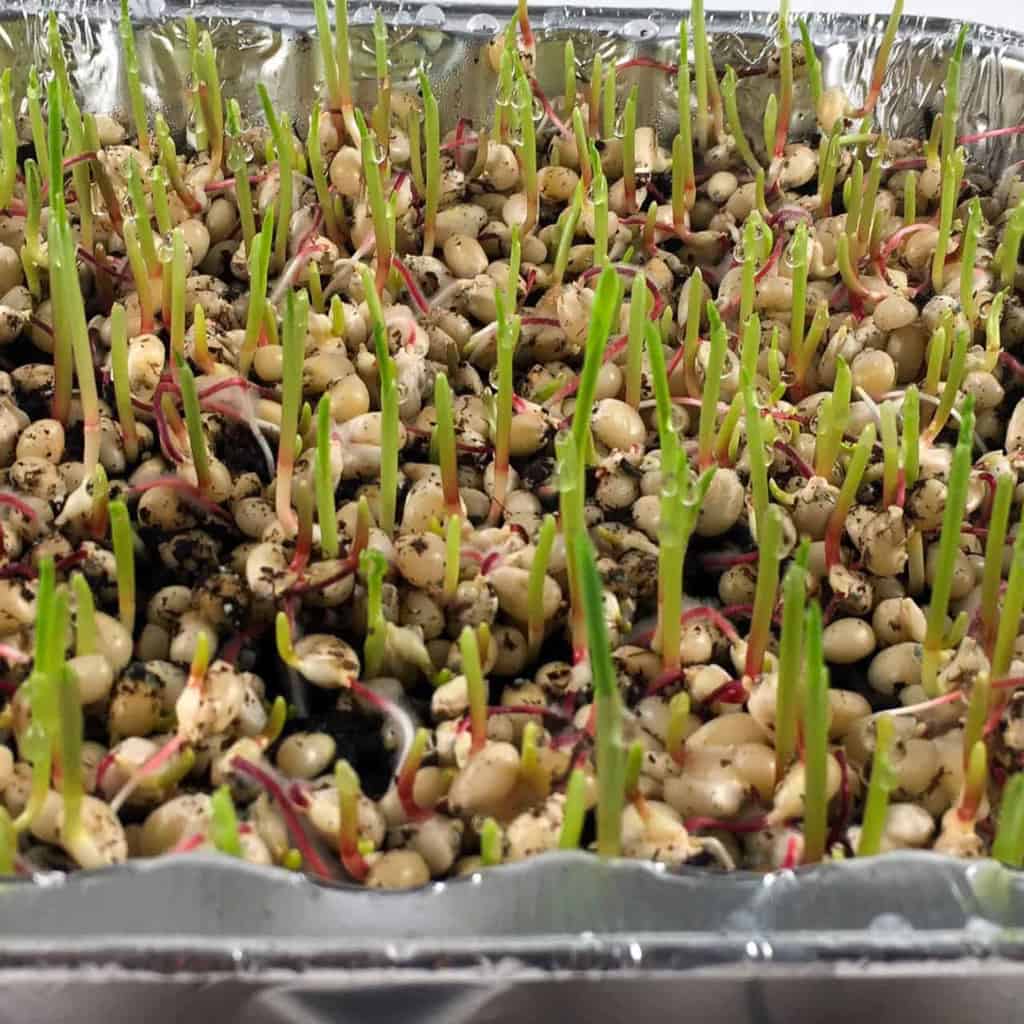
Grow in Light for Green Shoots: If you prefer more fibrous, traditionally green popcorn greens, place the covered pan next to a sunny window. You can begin harvesting these greens after one week for a slightly more tender product, or allow them to grow for two weeks for a higher yield of more robust greens. Here’s what one week of growth typically looks like:

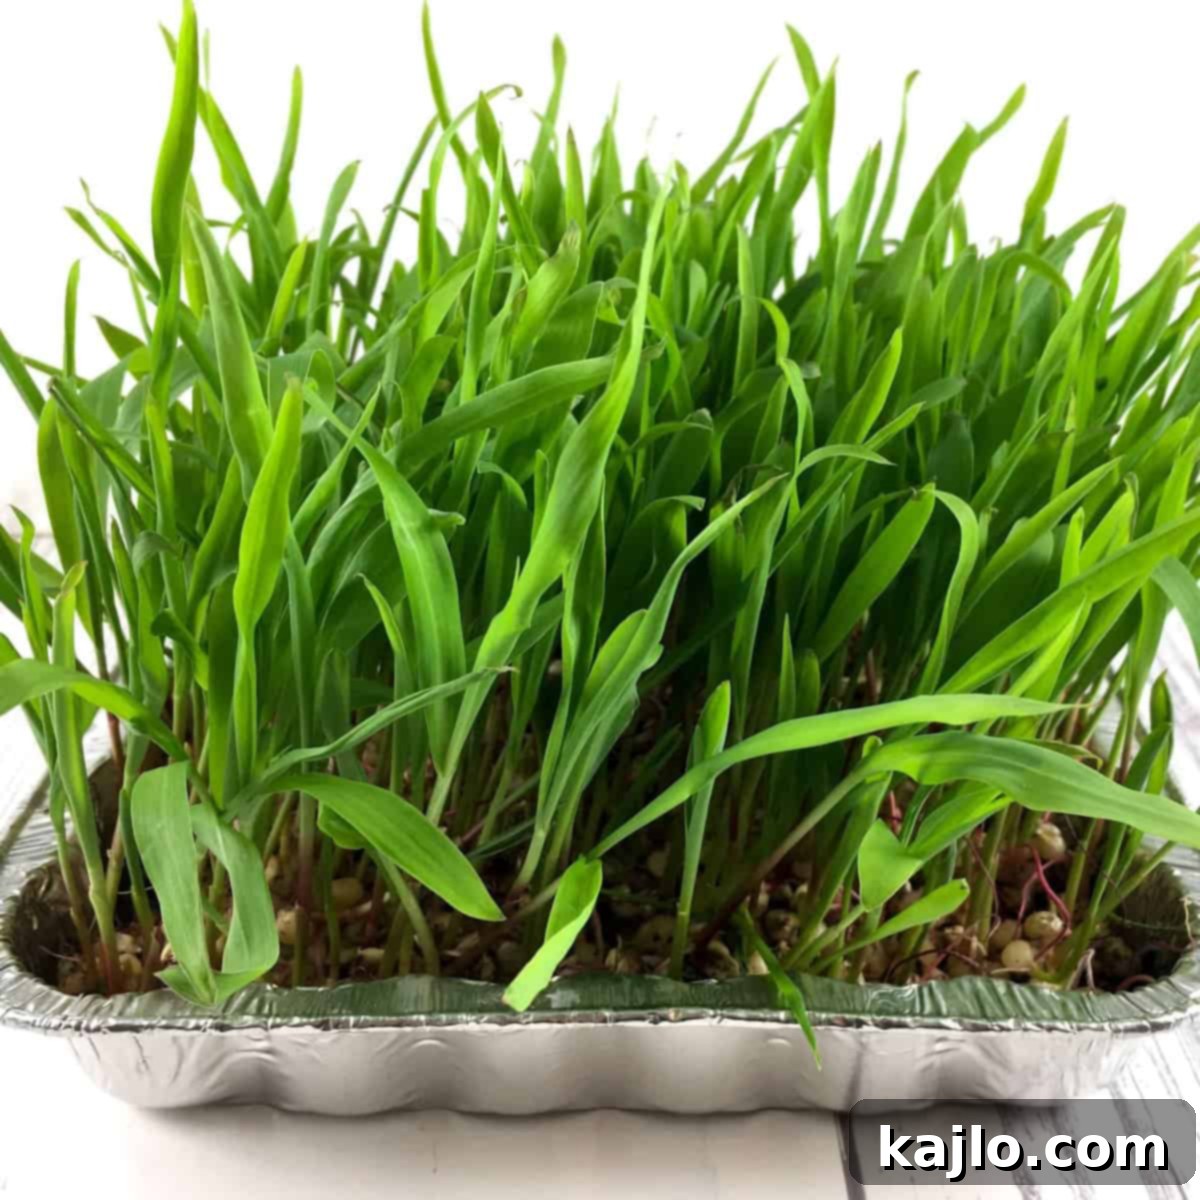
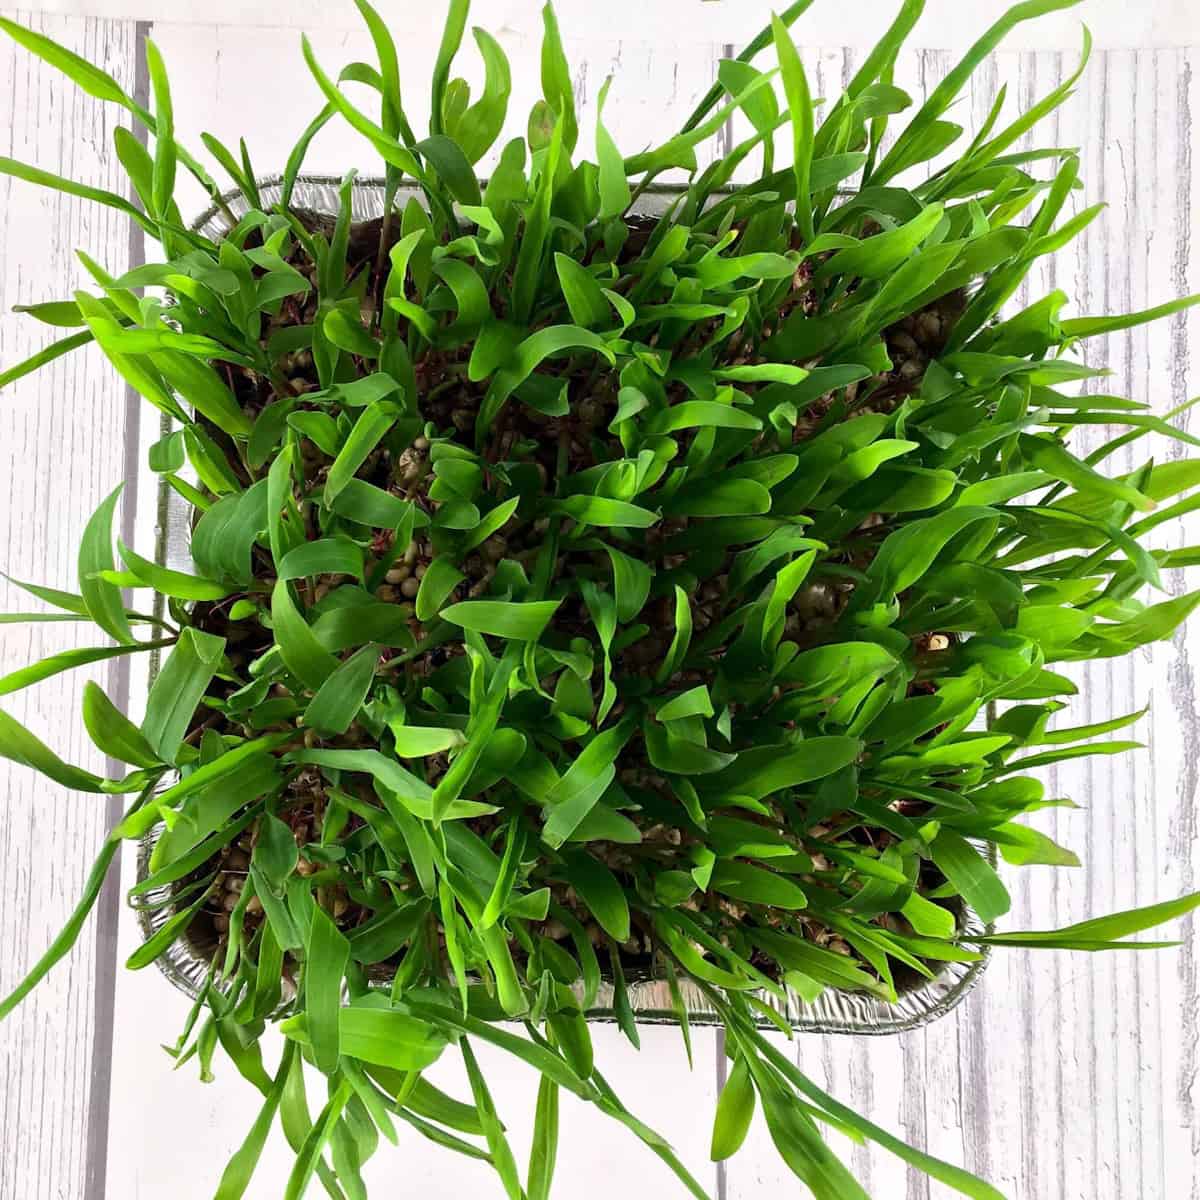
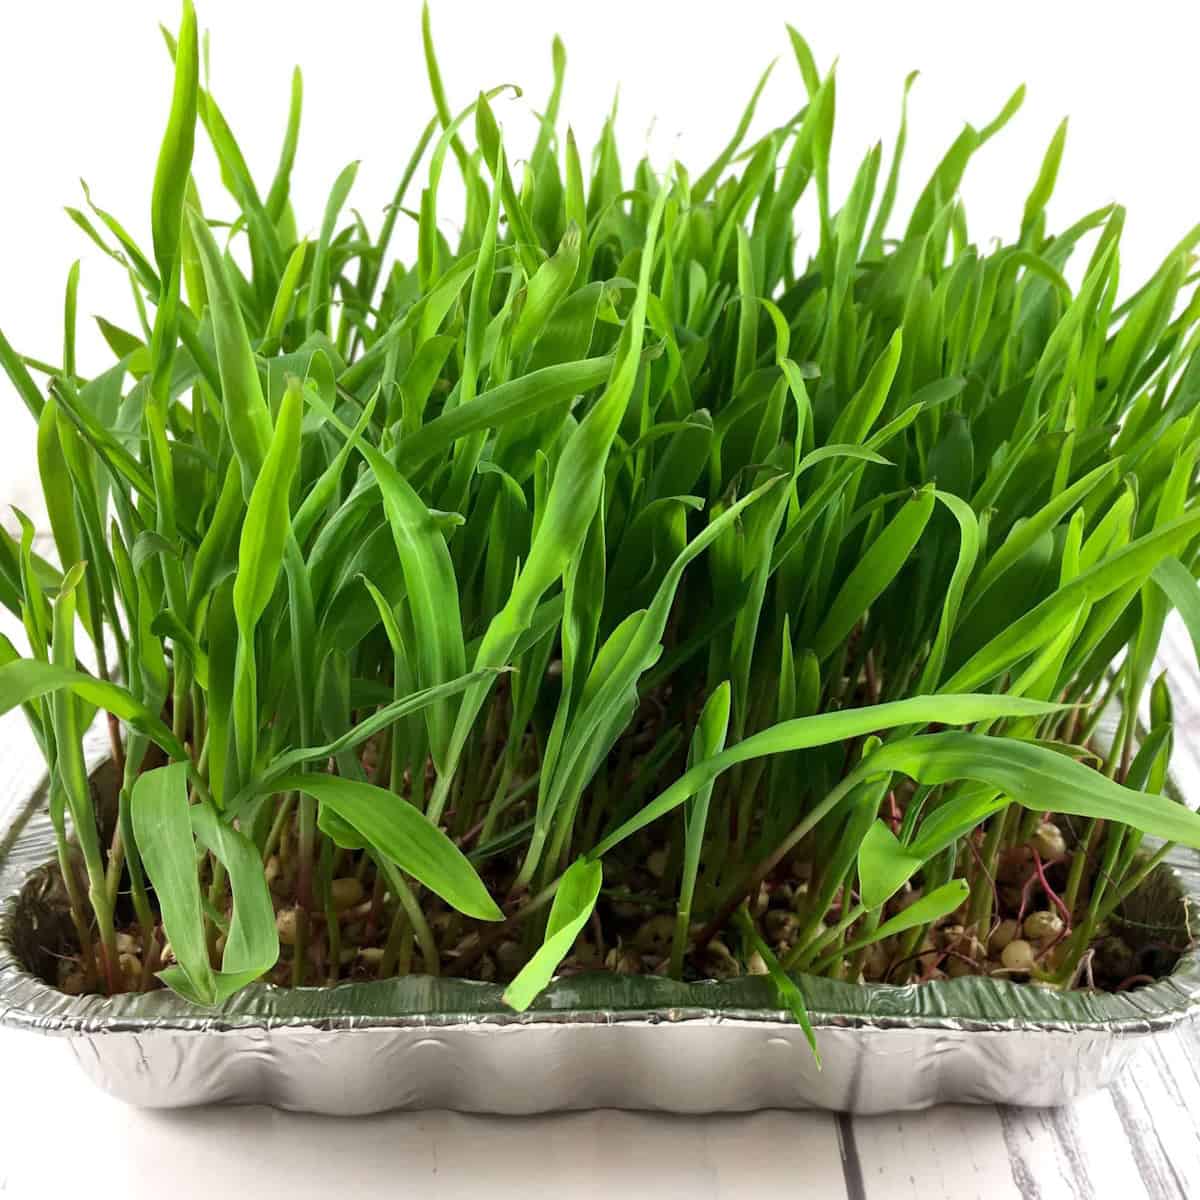
Popcorn greens after one week of growth in sunlight. Monitor Longer Growth: If you choose to grow your popcorn shoots for two weeks, they will become quite tall and dense. You may need to remove the clear lid during the last few days of growth to prevent overcrowding and allow for better air circulation, especially as the greens reach the top of the container. After two weeks, your harvest will be substantial:

A thriving tray of popcorn greens after two weeks. Harvesting Your Popcorn Greens: When your popcorn grass is ready for harvest (typically 3-6 inches or 7.6-15.2 cm tall), use sharp scissors to cut the shoots just above the soil line. After harvesting, gently remove any lingering seed coats that may be clinging to the greens. They are now ready to be enjoyed!
➕ Culinary Uses for Popcorn Shoots
Once harvested, your fresh popcorn shoots can be used in much the same way you would use other microgreens or tender leafy greens. Their distinct sweet flavor makes them a versatile ingredient that can elevate a wide range of dishes. Here are a few creative ways to incorporate popcorn grass into your meals:
- Salads: Sprinkle generously over any green salad for an added layer of sweetness and crunch. They pair wonderfully with a light vinaigrette. Try them in a Popcorn Chicken Salad Bowl or a refreshing Summer Berry Salad.
- Sandwiches & Wraps: Tuck them into sandwiches, wraps, or even burgers for a fresh, sweet element. They can be a delightful substitute for traditional lettuce. Consider them for a Sardine Salad Sandwich Wrap.
- Garnish: Their vibrant appearance makes them an excellent garnish for soups, stews, omelets, or roasted vegetables.
- Smoothies: Blend a handful into your morning smoothie for a nutrient boost and a subtle, pleasant sweetness.
- Lightly Steamed/Sautéed: For a simple side dish, lightly steam or quickly sauté your popcorn microgreens with a touch of garlic and olive oil. Be careful not to overcook to retain their tender texture and sweet flavor.
- Pestos & Sauces: Experiment with adding them to homemade pestos or other green sauces for a unique flavor profile.
The culinary possibilities are vast, and the joy of using ingredients you’ve grown yourself makes every dish taste even better. Don’t hesitate to get creative and discover your favorite ways to enjoy these unique greens!
Watch How to Make It!
While the video player is not directly embedded in this HTML, you can typically find a video demonstrating this process on the original article’s platform, often under the title “Popcorn Grass”.
How to Grow Popcorn Grass (It’s Easy!)
By Summer Yule
Reader Rating: 5 out of 5 stars (based on 5 votes)
If you’d like to rate or print this recipe, please visit the original source article.
- Prep Time:
- 10 mins
- Growing Time:
- 10 days
- Total Time:
- 10 days, 10 mins
- Course:
- Slow Food DIY
- Cuisine:
- American
- Servings:
- 4
- Calories:
- 5 kcal per serving
Ingredients
- ½ cup popcorn kernels (unpopped, unseasoned)
- Water
Love this recipe? Please leave a comment below!
Instructions
- Put the popcorn kernels in a glass jar (a quart-sized canning jar works well) and fill with warm water. Cover the jar with cheesecloth or a dishtowel to prevent dust while allowing air.
- Let the popcorn kernels soak for three days at room temperature. Remember to drain and refill the jar with fresh water after 1½ days to maintain water quality.
- After three days, drain the water from the jar. Fill an 8-inch by 8-inch (20×20 cm) metal baking pan with 1-1½ inches (2.54-3.81 cm) of potting soil. Spread the soaked popcorn seeds in a single layer on the soil. Press them gently into the soil, but do not cover them.
- Moisten the soil well with water. Cover the baking pan with a clear lid to keep the seeds moist. If you notice mold, remove the lid for better air circulation.
- For tender, yellow shoots, grow the popcorn in a dark place for approximately one week.
- For more fibrous green shoots, grow the popcorn next to a sunny window. They can be harvested at one week for tenderness or two weeks for a higher yield of tougher greens.
- If growing for two weeks, your greens might crowd the container. You may need to remove the lid for the last few days.
- When ready to harvest, cut the shoots with sharp scissors above the soil line. Remove any seed coats. Your shoots will be around 3-6 inches (7.6-15.2 cm) long.
- Enjoy your popcorn greens by topping salads or lightly steaming them as a veggie side dish.
Equipment
- Wide-Mouth Quart Jar
- Cheesecloth
- 8×8 inch metal baking pan with clear lid
Notes
💭 Expert Tips from Dietitian Summer Yule
This is a level 1 recipe (may help support fat loss). Are popcorn sprouts good for you? Leafy greens are incredibly nutrient-dense and low in calories, making them an excellent choice for almost any dietary pattern. While not truly “zero-calorie,” they are often considered “free foods” due to their high fiber content and minimal caloric impact, which can greatly aid in feeling full and satisfied during weight loss efforts.
For those who enjoy a generous volume of food, incorporating leafy greens daily is a smart strategy. They significantly boost the fiber content of your meals, contributing to satiety. Furthermore, popcorn sprouts fit seamlessly into various eating plans, including low-carb, vegetarian, and vegan diets, while providing essential nutrients like Vitamin C.
Nutrition information is an estimate for one serving.
Nutrition Info Disclaimer
All recipes and dietary information on this website are for informational purposes only and may not be appropriate for all individuals. Always consult with a registered dietitian or your physician to determine the best dietary pattern for your specific medical needs and personal preferences.
The provided nutrition information is an estimate and should be used as a courtesy. Values may vary depending on the specific brands and ingredients used. Calorie information on food labels can sometimes be inaccurate, so focus on overall healthy eating habits rather than precise numbers.
Please note that “to taste” implies adjusting ingredients to your preferences. Always follow food safety guidelines and ensure food is cooked thoroughly where applicable.
Nutrition
- Keywords:
- corn, gardening, gluten-free, how do you grow popcorn greens, low-calorie, microgreens, popcorn, popcorn greens, popcorn shoots, vegan, vegetarian
Shop our cookbook! Easy Air Fryer Recipes for One
Burning your air fryer recipes? Here’s how to fix it!
Frequently Asked Questions About Popcorn Sprouts
Where does popcorn come from?
Popcorn originates from specific varieties of corn kernels that possess a hard, moisture-tight outer shell. When these kernels are heated, the tiny bit of water trapped inside turns into steam. This steam builds immense pressure until the outer shell ruptures with an audible “pop,” transforming the kernel into the familiar fluffy, edible popcorn we enjoy. This unique characteristic is what makes these kernels so perfect for both popping and sprouting.
Can I regrow popcorn sprouts after harvesting?
Unfortunately, popcorn sprouts are typically a one-time harvest. Once you cut the shoots above the soil line, the kernel has expended most of its stored energy, and it’s unlikely to produce another robust crop. For a continuous supply, it’s best to plant new kernels every 1-2 weeks in fresh soil.
What are the nutritional benefits of popcorn greens?
Like other microgreens, popcorn sprouts are concentrated sources of vitamins, minerals, and antioxidants. They provide Vitamin C, various B vitamins, and potentially other beneficial plant compounds. Their fresh, live nature means you’re getting nutrients in a highly bioavailable form, contributing to overall well-being and adding vibrant health to your diet.
Is popcorn grass safe for cats?
While often called “popcorn grass,” these sprouts are not the same as commercially sold cat grass (which is typically wheat, oat, rye, or barley grass). Popcorn grass or shoots can potentially cause an upset stomach in cats and should generally not be fed to them. It’s also important to note that this is distinct from the ornamental “popcorn plant” (Cassia didymobotrya or Senna didymobotrya), which is also unsafe for pets. If you’re looking to provide safe greens for your feline friends, consider growing designated cat grass specifically intended for pets.
We hope this detailed guide has clarified how simple and rewarding it is to grow your own popcorn greens. Now that you’re equipped with all the knowledge, we’d love to hear about your experience! Tell us how you prefer to grow your popcorn shoots:
- Do you prefer them raised in the dark for tender yellow shoots, or in the sun for vibrant green ones?
- What’s your ideal harvesting time – one week for maximum tenderness, or two weeks for a larger, more fibrous yield?
Also, don’t keep your culinary creations a secret! Share your innovative ways to use these amazing popcorn microgreens. Whether it’s topping salads, enhancing sandwiches, or a unique steamed veggie side, we’re always looking for more ideas to enjoy this homegrown goodness!
Join our growing community! Subscribe to receive our latest and greatest recipes directly, and follow us on Facebook, Pinterest, Instagram, and YouTube for daily inspiration!
