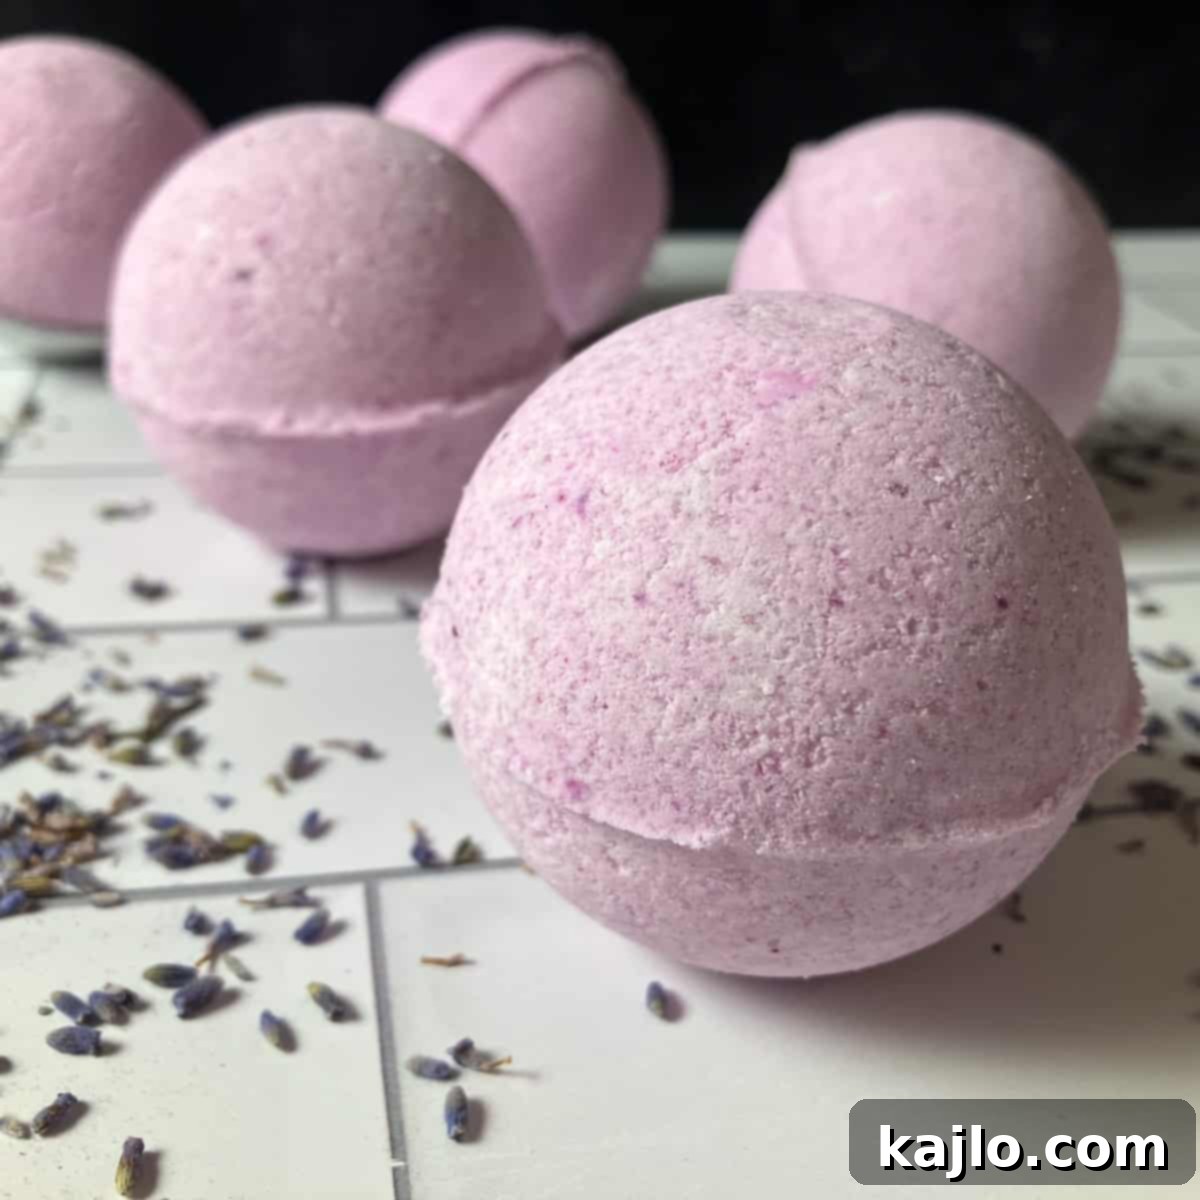
Discover the delightful art of crafting your own bath bombs right at home! This comprehensive guide provides an easy-to-follow, **no-fail DIY bath bomb recipe** perfect for all ages, from older kids and tweens to teens and adults. Beyond just learning **how to make bath bombs**, you’ll delve into understanding the essential **ingredients for bath bombs**, master the techniques for **storing homemade bath bombs**, and get answers to common questions like **how long homemade bath bombs last**.
For years, I struggled with various **DIY bath bomb recipes** that consistently ended in frustration. But this particular method, an adaptation of a trusted recipe shared by a friend, has proven to be truly foolproof. It’s the closest you’ll get to a **professional bath bomb recipe** without the hefty price tag, ensuring beautifully fizzy and fragrant creations every time.
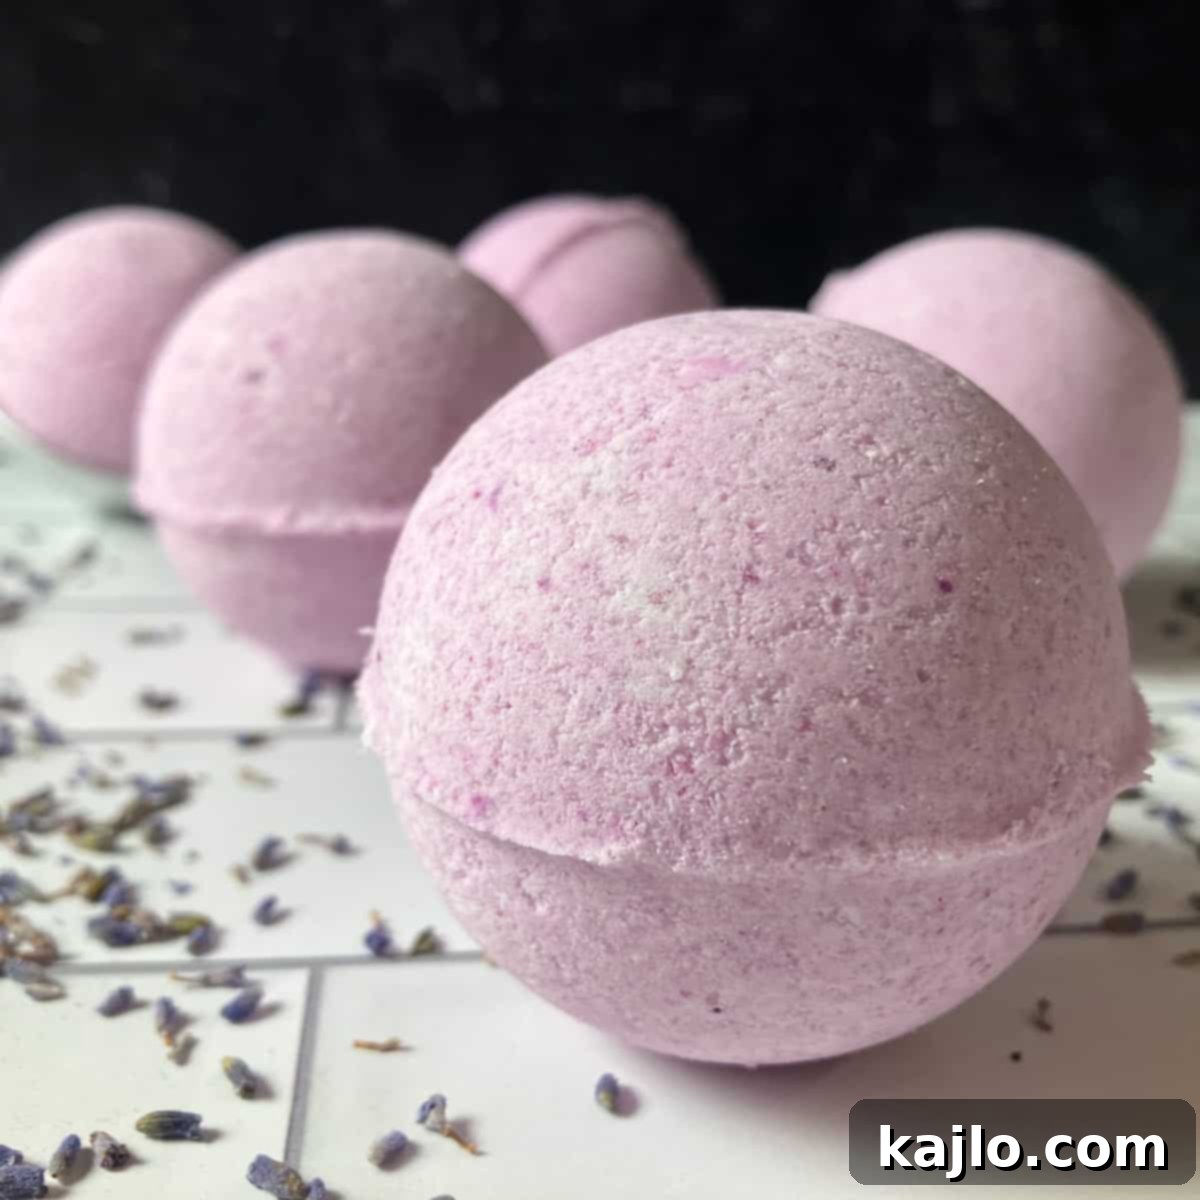
Creating your own bath bombs isn’t just a fun craft; it’s an opportunity to personalize your self-care routine and make thoughtful gifts. These homemade delights are fantastic for birthday party favors, unique additions to Mother’s Day gift baskets, or simply a luxurious treat for yourself. Forget wondering **how do you make a quick bath bomb** – this recipe is your ultimate answer. Just a friendly reminder: these are not food, so please do not eat them!
Why Make Your Own Bath Bombs? The Benefits of DIY
There are numerous compelling reasons to venture into the world of **homemade bath bombs**. Beyond the sheer joy of creating something with your own hands, DIY bath bombs offer significant advantages:
- Personalization: You have complete control over the scents, colors, and added beneficial ingredients. Tailor your bath bombs to your mood, skin type, or occasion. Want a relaxing lavender bomb for bedtime? Or an invigorating peppermint and eucalyptus blend for a morning pick-me-up? The possibilities are endless.
- Cost-Effectiveness: High-quality bath bombs from commercial brands can be quite expensive. Making them yourself, especially in larger batches, dramatically reduces the cost per bomb, allowing you to enjoy luxurious baths more frequently without breaking the bank.
- Transparency of Ingredients: When you make your own, you know exactly what goes into each bath bomb. This is particularly beneficial for those with sensitive skin or specific allergies, allowing you to avoid harsh chemicals, artificial fragrances, or unwanted additives.
- Creative Expression: From choosing vibrant colors to experimenting with unique molds and decorative elements, making bath bombs is a fantastic outlet for creativity. It’s a relaxing and rewarding hobby that yields beautiful, functional results.
- Thoughtful Gifts: Handmade gifts carry a special charm. Presenting friends and family with a basket of your custom-made bath bombs shows care and effort, making them truly cherished presents.
Ready to unlock these benefits? Let’s dive into the core of our **bath bomb recipe** and discover just how simple and rewarding it can be!
➕ The Ultimate Bath Bomb Recipe: Simple & Effective
Crafting your own bath bombs requires just a few readily available ingredients, many of which you might already have if you enjoy making your own body and bath products. The secret to a perfect bath bomb lies in the precise ratio of liquids to dry ingredients and a firm packing technique. Think of the ideal consistency as slightly damp sand – just enough moisture to hold together without triggering the fizzing reaction prematurely.
Essential Bath Bomb Ingredients
Here’s your straightforward shopping list to create amazing **DIY bath bombs**:
- 1 cup baking soda (Sodium Bicarbonate): The cornerstone of your bath bomb, providing the primary fizz when combined with citric acid.
- ½ cup corn starch: This acts as a stabilizer, slowing down the fizzing reaction to make your bath bomb last longer and harden more effectively.
- ½ cup Epsom salt: Known for its soothing properties, Epsom salt enhances the relaxing experience of your bath, helping to relieve muscle aches and tension.
- ½ cup citric acid powder: The other half of the fizzing equation! This food-grade acid reacts with baking soda in water to create the satisfying effervescence.
- 2 tablespoons coconut oil, melted: This acts as a binder, helping the dry ingredients adhere to each other. It also adds moisturizing properties to your bath. Sweet almond oil is an excellent alternative if preferred.
- 4 teaspoons water: Just a small amount is crucial for binding the ingredients without activating the fizz. Chamomile tea can be used for added skin benefits and a subtle aroma.
- 2 teaspoons essential oil: Elevate your bath bombs with your favorite natural fragrances. Popular choices include lavender for relaxation, jasmine for a sweet floral note, rosemary or eucalyptus for an invigorating feel, orange or peppermint for a refreshing burst, or chamomile for its calming properties.
- 6-8 drops liquid food coloring (optional): Add a vibrant touch to your bath bombs. Ensure it’s liquid, not gel or powder, for best results in this recipe.
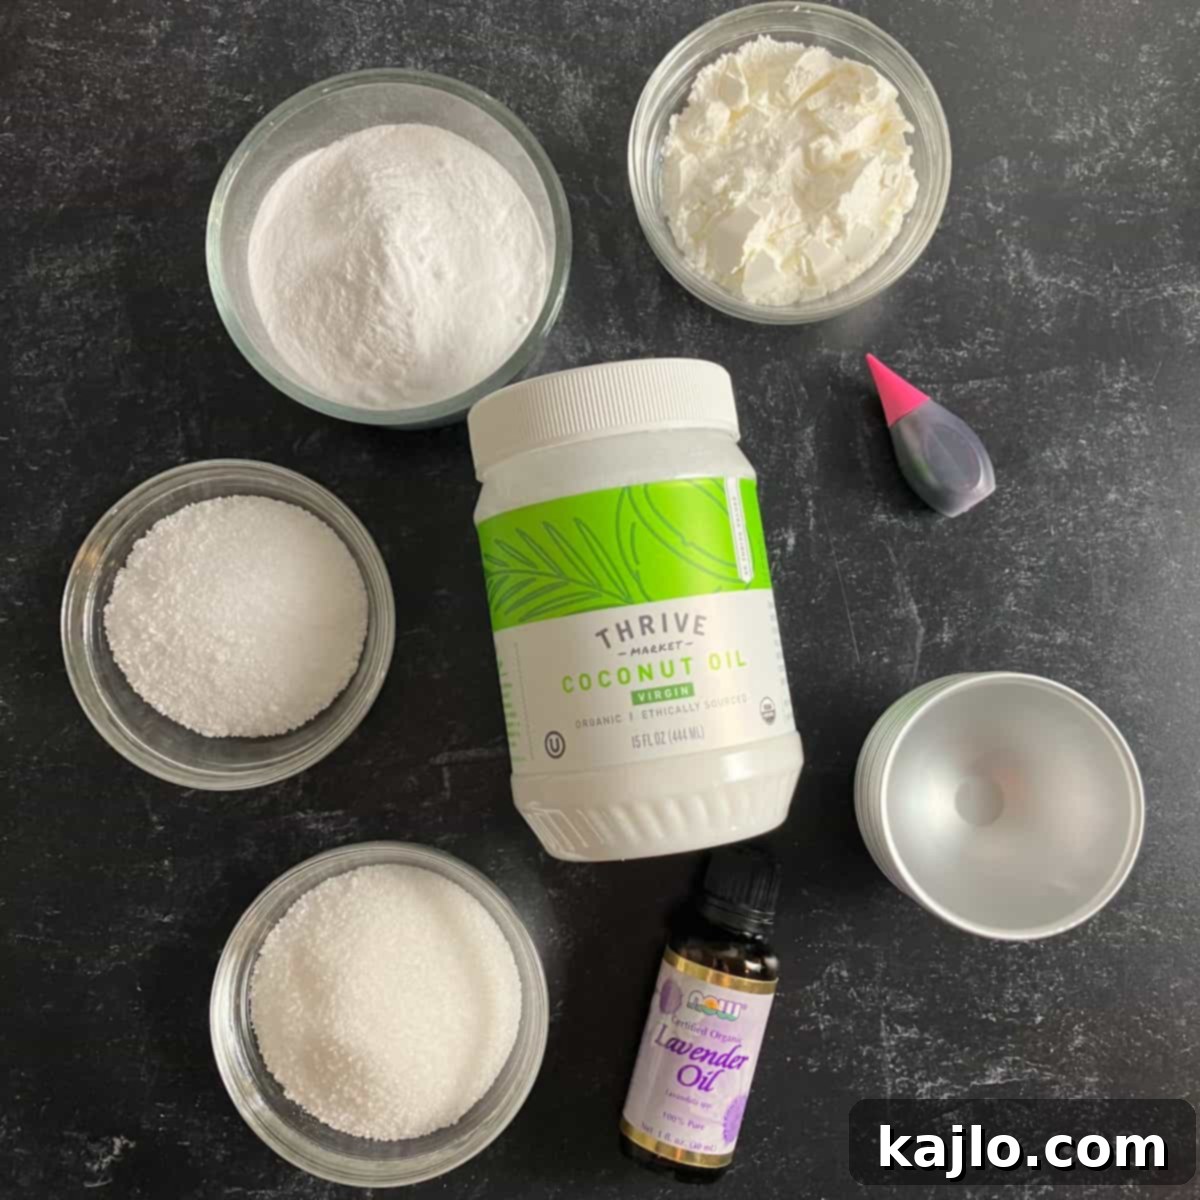
I personally prefer using essential oils to infuse my bath bombs with natural, therapeutic scents. These can be found at most health food stores or conveniently online. Remember, the ratio of liquid to dry ingredients is paramount for this **no-fail bath bomb recipe**. Using liquid food coloring is key; if you opt for gel or powder food coloring, you might need to slightly adjust the water content to achieve the perfect “wet sand” consistency.
In addition to the ingredients, you’ll need two essential tools: a non-reactive bowl for mixing (stainless steel or Pyrex works wonderfully) and **bath bomb molds**. These molds are crucial for shaping your creations and achieving that professional look.
A note on citric acid: While commonly used to acidify foods for canning, its role in bath bombs is to create that delightful fizz when it reacts with baking soda upon contact with water.
What Ingredients Should You Avoid in Bath Bombs?
When crafting **homemade bath bombs**, it’s crucial to prioritize safety and functionality. Avoid any ingredients you are allergic to or wouldn’t want to soak your body in. For example, I steer clear of talc due to its potential link to cancer, a concern supported by various health organizations (source).
Furthermore, be mindful of ingredients that could potentially clog drains, stain your tub, or cause damage. While mica powder is a popular natural colorant, certain types or excessive amounts might leave a residue that discolors your tub. Though it typically scrubs off, opting for non-staining alternatives can save you a cleanup headache.
Natural additions like rose petals, large citrus fruit peels, or significant amounts of clays can be beautiful but pose a risk of clogging your pipes. Always remember that whatever you add to your bath bomb will eventually go down the drain. Choose finely ground botanicals or ensure larger pieces are used sparingly and can be easily scooped out after your bath to prevent plumbing issues.
Do Bath Bombs Need Epsom Salt?
While not strictly essential for the fizzing action, Epsom salts are a highly recommended ingredient for a truly soothing and relaxing bath experience. The magnesium sulfate in Epsom salt is widely believed to help relieve minor aches and pains in sore muscles, especially in the neck, shoulders, back, and legs, as noted on product packaging. It’s easily found in most drug stores, supermarkets, and online retailers like Amazon, making it an accessible and beneficial addition to your **homemade bath bomb recipe**.
How to Make Bath Bombs: Step-by-Step Instructions
Ready to create your own spa-worthy treats? Follow these simple instructions to make **bath bombs like a pro**:
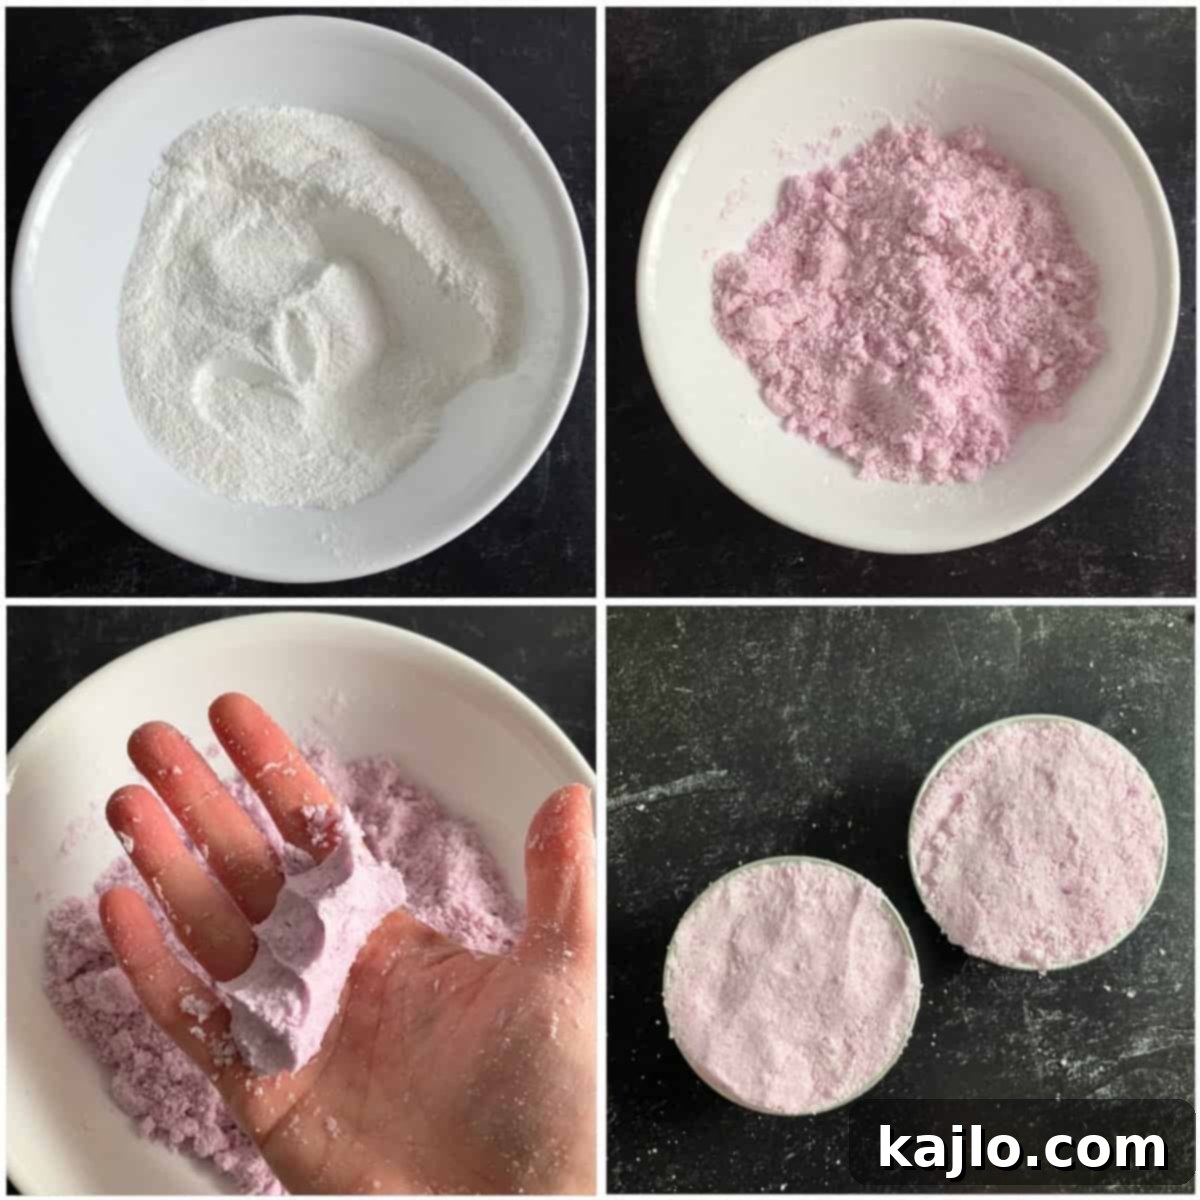
Combine Dry Ingredients. In a large, non-reactive mixing bowl, combine the baking soda, corn starch, Epsom salt, and citric acid. It’s crucial to measure these dry ingredients precisely, using a flat edge to level off your measuring cups. Thoroughly whisk or stir them together with a spoon until everything is evenly distributed. This ensures a consistent reaction and texture in your finished bath bombs.
Incorporate Wet Ingredients. Next, gently add the melted coconut oil, water, your chosen essential oils, and liquid food coloring (if using). Using clean hands, begin mixing the ingredients together. The consistency is critical here: the mixture should resemble wet sand – just damp enough to hold its shape when squeezed, but not so wet that it starts to fizz. If it’s too dry, add a tiny bit more water (a quarter teaspoon at a time); if too wet, add a touch more baking soda or corn starch.
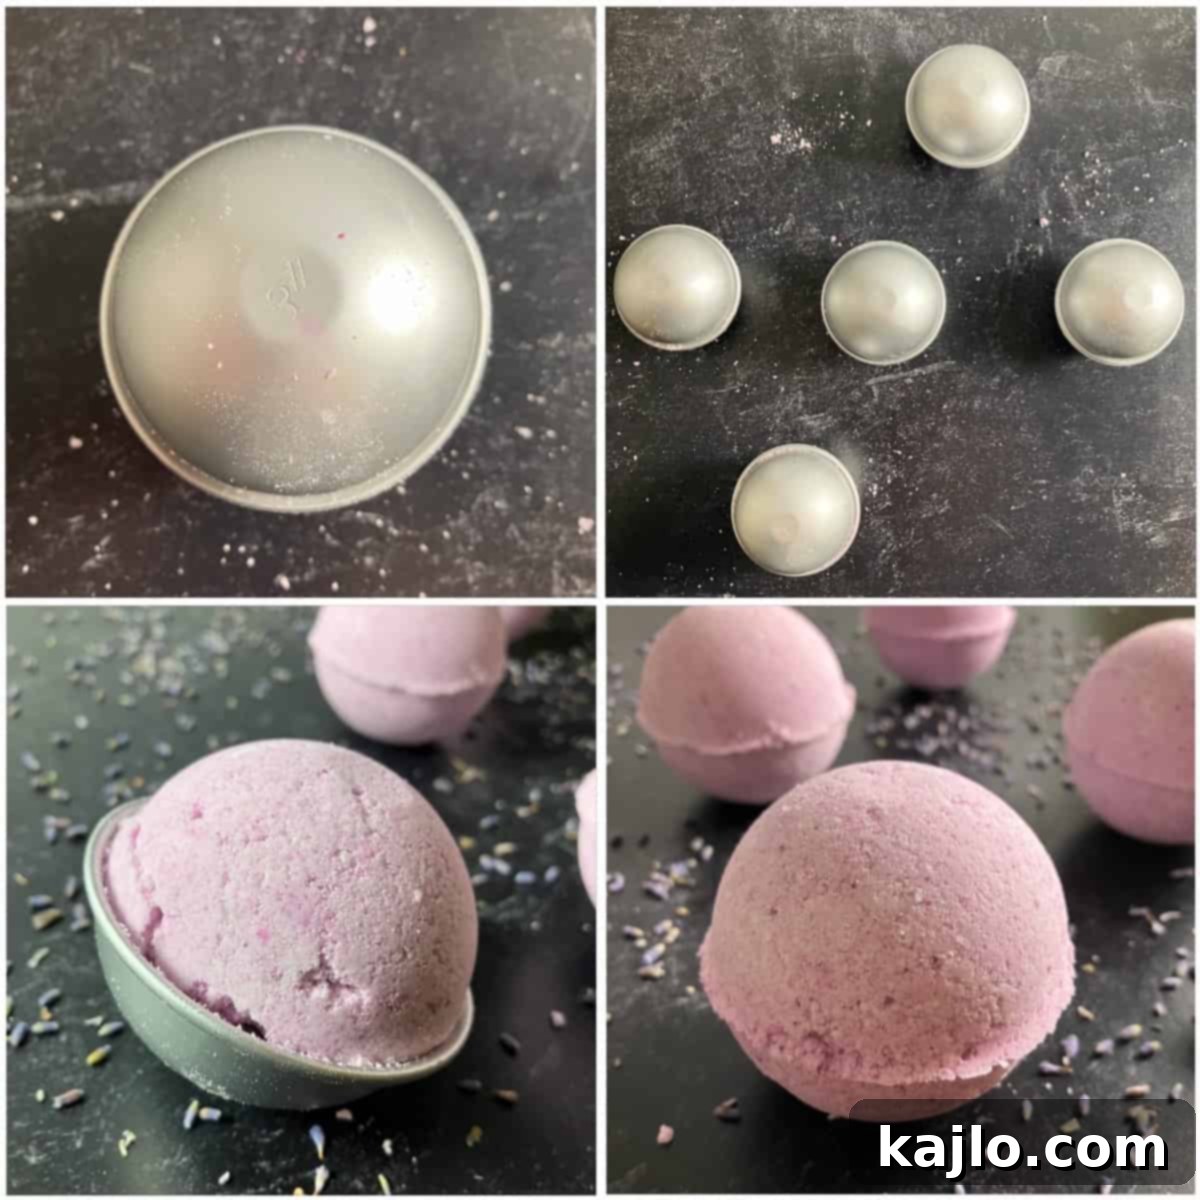
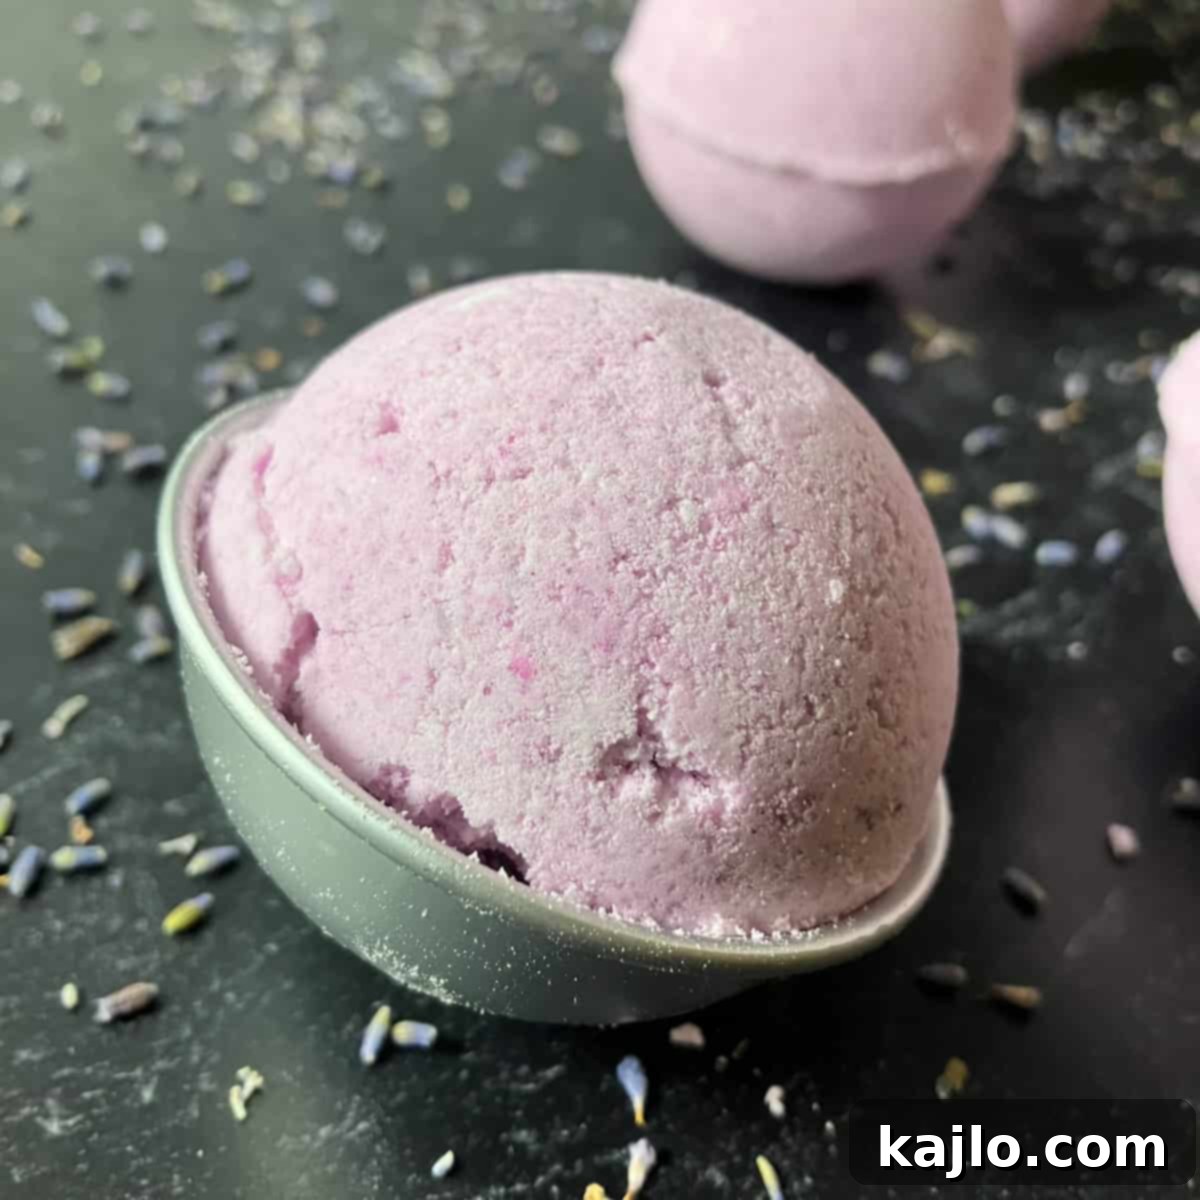
Pack into Molds. Take portions of the mixture and tightly pack them into your bath bomb molds. If using spherical molds, overfill each half slightly, then press the two halves together very firmly. You want to compact the mixture as much as possible to ensure your bath bombs are solid and don’t crumble easily.
Unmold and Dry. Allow the bath bombs to set in their molds for about 10-15 minutes. This short period helps them hold their shape. After this initial set, carefully unmold them. If they stick, a brief stint in the freezer (5-10 minutes) can sometimes help. Once unmolded, place them on a clean, dry surface to air dry and harden for at least 12-24 hours. Full dryness is essential for a durable, long-lasting bath bomb.
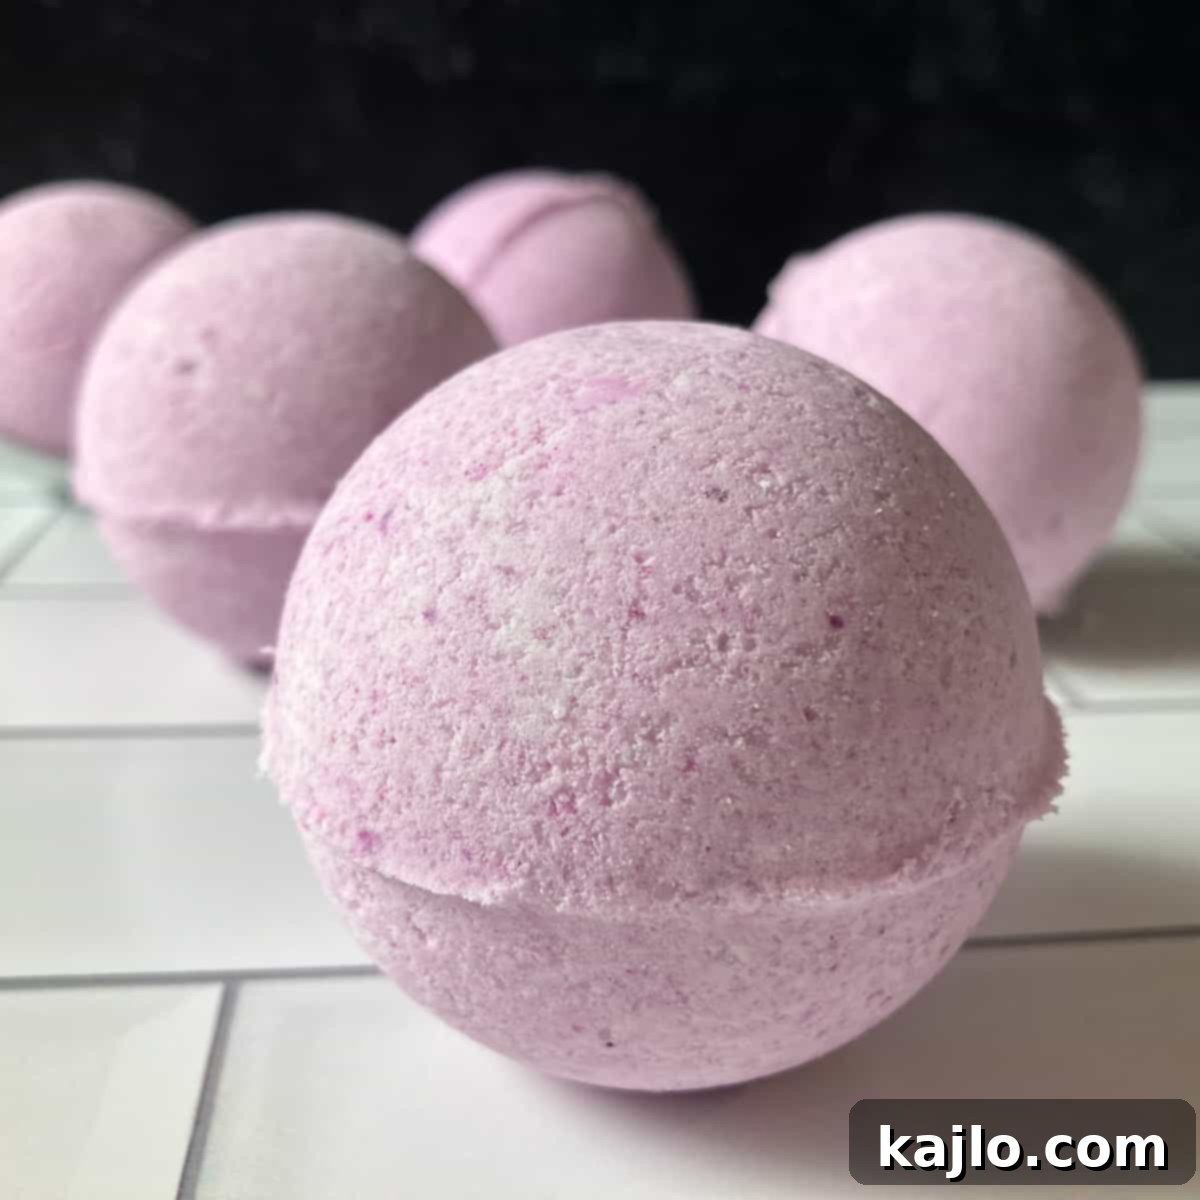
Enjoy Your Creation! Once your bath bombs are fully dry and hard, they are ready to use. Simply drop one into your next warm bath and watch it fizz and release its lovely fragrance. This easy method for **how to make bath bombs with essential oils** allows for incredible creativity. Experiment with different essential oil blends – try orange vanilla for a comforting scent, rose for a romantic Valentine’s Day treat, or mint for a festive Christmas aroma. The possibilities for customization are truly limitless!
How to Make Bath Bombs Without Molds
Don’t have specialized **bath bomb molds**? No problem! You can still create beautiful and functional bath bombs using items you likely already have around the house. Before investing in dedicated molds, I often used silicone cocktail cube trays to shape my creations. Here are some other creative alternatives for **making bath bombs without molds**:
- Silicone Ice Cube Trays: Perfect for smaller, single-use bath bombs. They come in various shapes and sizes, offering a fun way to diversify your collection.
- Silicone Cupcake Liners or Muffin Tins: These are ideal for creating larger, puck-shaped bath bombs. Simply press the mixture firmly into the liners.
- Small Yogurt Cups or Disposable Containers: Wash and dry empty yogurt cups or similar small plastic containers. Pack the mixture tightly inside and allow it to dry before gently cutting away the plastic.
- Plastic Easter Eggs: These can serve as temporary molds for spherical bath bombs. Pack each half and press them together, then carefully open them after a short drying period to allow the bomb to fully harden.
Important Tip: If you use kitchen items like ice cube trays, it’s wise to dedicate them solely to bath bomb making. This prevents any accidental cross-contamination with food or drinks, ensuring safety and peace of mind.
How to Make Bath Bombs Without Citric Acid
If citric acid is hard to find or you prefer an alternative, you can still create effective bath bombs. Cream of tartar is a popular substitute for citric acid in bath bomb recipes. You can typically find it in the spice section of most grocery stores, though it’s often sold in small containers.
For those interested in experimenting, there are numerous recipes for **bath bombs without citric acid**. Many substitute the ½ cup of citric acid with approximately ¼ cup of cream of tartar. You might also find variations that adjust other liquid ingredients, such as slightly more coconut oil, to achieve the desired consistency. Keep in mind that the fizzing action might be slightly different or less intense compared to a citric acid-based bomb, but they will still dissolve and release fragrances and emollients into your bathwater.
How to Make Natural Bath Bombs
If you’re seeking **100% natural bath bombs**, especially for sensitive skin, you’ll be pleased to know that this recipe is easily adaptable. The base ingredients are already natural! The primary non-natural component in our original recipe is the liquid food coloring.
To create a truly natural bath bomb, simply skip the artificial food coloring. You can replace the drops of food coloring with an equal amount of water or a strongly brewed, cooled herbal tea (like chamomile or green tea) for a subtle color and added benefits. Alternatively, explore natural colorants:
- Clays: Kaolin clay for white, rose clay for pink, bentonite clay for a light grey. These also offer skin-detoxifying benefits.
- Powdered Herbs & Spices: Turmeric for yellow/orange (use sparingly to avoid staining), spirulina for green, beetroot powder for red/pink.
- Plant-based Extracts: Some liquid natural food colorings are derived from fruits and vegetables, offering a vibrant alternative to artificial dyes.
How Do You Add Color to Bath Bombs Naturally?
Adding natural color to your bath bombs is straightforward. Many natural food colorings are available in liquid form and can be used directly. If you find **natural food coloring powder**, simply mix it with a few drops of water or essential oil to create a paste before adding it to your dry ingredients. This prevents clumping and ensures even color distribution throughout your bath bombs.
How Long Do Homemade Bath Bombs Last?
Generally, both store-bought and **homemade bath bombs** can maintain their quality for 6-12 months when stored correctly. However, for optimal fizz and fragrance, I highly recommend using your **DIY bath bombs** within 1-2 months. Beyond this period, they can start to dry out, become brittle, crumble easily, and gradually lose their effervescence.
Humidity is a major enemy of bath bombs. If you live in a very humid climate, the moisture in the air can significantly shorten their shelf life, sometimes causing them to react and fizz prematurely. To combat this, some enthusiasts suggest replacing a portion of the water in bath bomb recipes with witch hazel, which evaporates more quickly and can help reduce moisture absorption during the drying process.
What Ingredient Makes Homemade Bath Bombs Last Longer?
Ever wondered **why you put cornstarch in bath bombs**? Cornstarch plays a crucial role as a stabilizer in bath bombs. It helps slow down the chemical reaction between baking soda and citric acid, making the fizz last longer once the bath bomb is in water. This also contributes to a harder, more durable bath bomb that is less prone to crumbling. Alongside cornstarch, proper storage is paramount to prolonging the life of your **DIY bath bombs**.
How to Make Bath Bombs Without Cornstarch?
If cornstarch isn’t suitable for your recipe, arrowroot powder is an excellent alternative. It functions similarly as a binder and stabilizer, helping to create firm bath bombs while also contributing to a silky smooth feel in the bathwater.
How to Store Bath Bombs for Maximum Freshness
Proper storage is vital to preserving the quality, fragrance, and fizz of your **homemade bath bombs**. To ensure they remain fresh and effective for as long as possible, follow these key tips:
- Airtight Containers: Store your bath bombs in an airtight container, such as glass jars with sealed lids or plastic containers. This prevents moisture from the air from prematurely activating the fizzing agents.
- Plastic Wrap or Bags: Individually wrapping each bath bomb tightly in plastic wrap or placing them in small, sealed plastic bags offers an extra layer of protection against humidity.
- Cool, Dry Place: Keep your stored bath bombs in a cool, dark, and dry environment. Avoid bathrooms, which tend to be humid, and direct sunlight, which can degrade essential oils and colors. A cupboard or pantry shelf is often ideal.
- Avoid Extreme Temperatures: Fluctuations in temperature can also affect the integrity of your bath bombs. Consistent, moderate temperatures are best.
By following these storage guidelines, you can significantly extend the life and potency of your **DIY bath bombs**, allowing you to enjoy their luxurious benefits whenever you desire.
Is It Cheaper to Make or Buy Bath Bombs?
The cost-effectiveness of making your own bath bombs versus buying them often depends on quantity. While a single, high-quality store-bought bath bomb might range from $5-9, the real savings come when you decide to make **bath bombs in bulk** at home. If you only need one or two, buying might seem simpler. However, for a larger quantity, making them yourself is almost always the more economical choice.
Here’s an estimated breakdown of **how much it costs to make bath bombs** if you purchase the ingredients online:
- Baking Soda: check price
- Corn Starch: check price
- Epsom Salt: check price
- Citric Acid: check price
- Coconut Oil: check price
- Essential Oils: check price
- Food Coloring: check price
Based on typical bulk purchasing, the total cost for these ingredients can be around $35-40, which yields enough materials to produce 10 or more bath bombs. This brings the cost per homemade bath bomb down to approximately $3.50 or less, a significant saving compared to retail prices. Furthermore, you can often find many of these staples even more affordably at local grocery stores, reducing your costs even further.
How to Make Bath Bombs Harder and Prevent Crumbling
If your **homemade bath bombs** aren’t holding their shape or are crumbling too easily, there are a few key factors to consider. The most common culprit is too much liquid in the mixture. The ideal consistency should be akin to damp sand – it should hold together when squeezed in your fist but not be visibly wet or sticky. Adding too much water or oil will activate the fizzing prematurely and prevent them from hardening properly.
Another crucial step is the packing technique. Ensure you are very firmly packing the mixture into your molds. The tighter you pack the “dough,” the denser and harder your final bath bomb will be. Don’t be afraid to apply significant pressure when pressing the mold halves together.
Finally, adequate drying time in a low-humidity environment is essential. Allow them to air dry for a full 12-24 hours. Rushing this process, or drying them in a humid space, can lead to soft, crumbly bath bombs. Patience is key for achieving perfectly hard, durable creations.
How to Make Bath Bombs Fizz More Effectively
The satisfying fizz of a bath bomb is its signature feature. To enhance this, consider these tips:
- Size Matters: Generally, larger bath bombs tend to fizz for a longer duration simply because there’s more material to react with the water.
- Cornstarch’s Role: As mentioned, cornstarch acts as a modulator, slowing down the immediate reaction between baking soda and citric acid. This controlled release allows for a more sustained and enjoyable fizz, rather than a rapid, short-lived burst, as explained by Arm and Hammer.
- Fresh Ingredients: Ensure your baking soda and citric acid are fresh. Old or expired ingredients may have lost some of their reactive potency, leading to a weaker fizz.
- Proper Storage: Storing bath bombs in an airtight, dry environment prevents them from absorbing ambient moisture, which can degrade their fizzing power over time.
Frequently Asked Questions About DIY Bath Bombs
How Do You Make a Bath Bomb with Three Ingredients?
Simplifying a bath bomb recipe to just three ingredients typically means making some compromises. You’ll likely need to forgo either the essential fizzing agents (baking soda/citric acid), the stabilizing cornstarch, or the soothing Epsom salts. For example, some recipes focus on creating a non-fizzy bath melt with just baking soda, a binding oil, and essential oil. Here is an example of instructions for bath bombs made without citric acid, cream of tartar, or Epsom salt, demonstrating a minimalist approach.
How Do You Make Cheap Bath Bombs?
The essential oil is often the most expensive component in a **bath bomb recipe**. To significantly reduce the cost of your **DIY bath bombs**, you can simply omit the essential oil. While they won’t have the aromatic benefits, they will still provide the fizz and moisturizing properties. You can also opt for synthetic fragrance oils (though be mindful of skin sensitivities) or use less expensive natural alternatives like a strong tea for a subtle scent.
Do Bath Bombs Ruin Bathtubs?
High-quality, properly made bath bombs should not damage your bathtub. However, there are a few precautions: ensure all ingredients, especially salts and oils, fully dissolve. Excessive oil could potentially leave a residue or, over time, contribute to clogs if used frequently with already slow drains. Also, it’s important to note that bath bombs can damage the jets and internal mechanisms of jetted spa tubs. They are best reserved for use in standard bathtubs.
What Holds Bath Bombs Together?
The small amount of liquid, including both water and melted oil (like coconut oil), acts as the primary binder that holds the dry bath bomb ingredients together. This creates the “wet sand” consistency necessary for the mixture to be packed firmly into molds and retain its shape as it dries.
Should Bath Bombs Float or Sink?
There’s no universal rule for whether a bath bomb should float or sink; it largely depends on the recipe’s density and how tightly it’s packed. Some **DIY bath bomb recipes** are designed to float, slowly spinning and releasing colors and scents from the surface. Others, like this one, tend to sink to the bottom, creating a beautiful bubbling effect from below the water’s surface. Both methods effectively release the bath bomb’s contents, so enjoy whichever experience your creation offers!
How Much Do Homemade Bath Bombs Sell For?
Online consensus suggests that **homemade bath bombs** can typically sell for anywhere from $3 to $10 each, depending on the ingredients, size, complexity, and local market. Factors like unique designs, high-quality essential oils, or special packaging can command higher prices. It’s worth noting that if you plan to market your bath bombs for specific medicinal, mental, or physical benefits, they may require FDA approval, as advised by Shopify.
How to Make Bath Bombs with Shea Butter?
For an extra moisturizing touch, you can easily incorporate shea butter into your bath bomb recipe. Shea butter is known for its excellent emollient properties, leaving skin feeling soft and supple. Typically, it can replace or supplement some of the coconut oil in a recipe. Here is an easy recipe to guide you on how to make shea butter bath bombs, offering a luxurious twist to your homemade spa experience.
Other Useful How-To Guides for Self-Care and Home
If you enjoy learning new skills and embracing the world of DIY as part of your self-care journey, here are some other helpful articles you might find interesting:
- How to Grow Popcorn Greens
- How to Make Lard in Your Crockpot
- Forever Weight Loss (A Comprehensive How-To Guide)
- How to Start a WordPress Blog on Bluehost
- How to Microwave Vegetables Perfectly
Watch How to Make It!
How to Make Bath Bombs (DIY Bath Bomb Recipe)
Summer Yule
Print Recipe
Pin Recipe
15 mins
How to
5
Ingredients
- 1 cup baking soda
- ½ cup corn starch
- ½ cup Epsom salt
- ½ cup citric acid
- 2 tablespoons coconut oil, melted
- 4 teaspoons water
- 2 teaspoons essential oil
- 6-8 drops liquid food coloring
Instructions
- Put the baking soda, corn starch, Epsom salt, and citric acid in a mixing bowl. (Make sure to measure carefully, leveling your measuring cups with a flat edge.) Whisk or stir these dry ingredients together with a spoon.
- Next, add in the wet ingredients: melted coconut oil, water, essential oil, and food coloring. Mix the bath bomb ingredients together with clean hands. Important! The texture should be similar to wet sand.
- Tightly pack the mixture into your bath bomb molds. To use spherical molds like I used, pack each half of the mold, and level off the top. Then firmly press the halves of the molds together.
- Allow the bath bombs to dry for 10-15 minutes before carefully unmolding them and allowing them to air dry and harden more. If you leave the bath bombs in the molds too long, they’ll stick to the mold. If this happens, you may have success with sticking them in the freezer before unmolding.
- When fully dry (12-24 hours), add a bath bomb to your next bath. Enjoy this easy way to engage in a little self-care.
Save this Recipe
Equipment
- Bath Bomb Molds
Notes
nutrition info disclaimer
All recipes on this website may or may not be appropriate for you, depending on your medical needs and personal preferences. Consult with a registered dietitian or your physician if you need help determining the dietary pattern that may be best for you.
The nutrition information is an estimate provided as a courtesy. It will differ depending on the specific brands and ingredients that you use. Calorie information on food labels may be inaccurate, so please don’t sweat the numbers too much.
“To taste” means to your preferences, which may have to be visual to follow food safety rules. Please don’t eat undercooked food x
bath bomb DIY, bath bomb recipe, DIY bath bombs, homemade bath bomb, homemade bath bombs, how to make a bath bomb, how to make bath bomb, how to make bath bombs, make bath bombs, recipe for bath bombs
Join our community! Subscribe for all of the latest and greatest recipes, and follow me on Facebook, Pinterest, Instagram, and YouTube!
