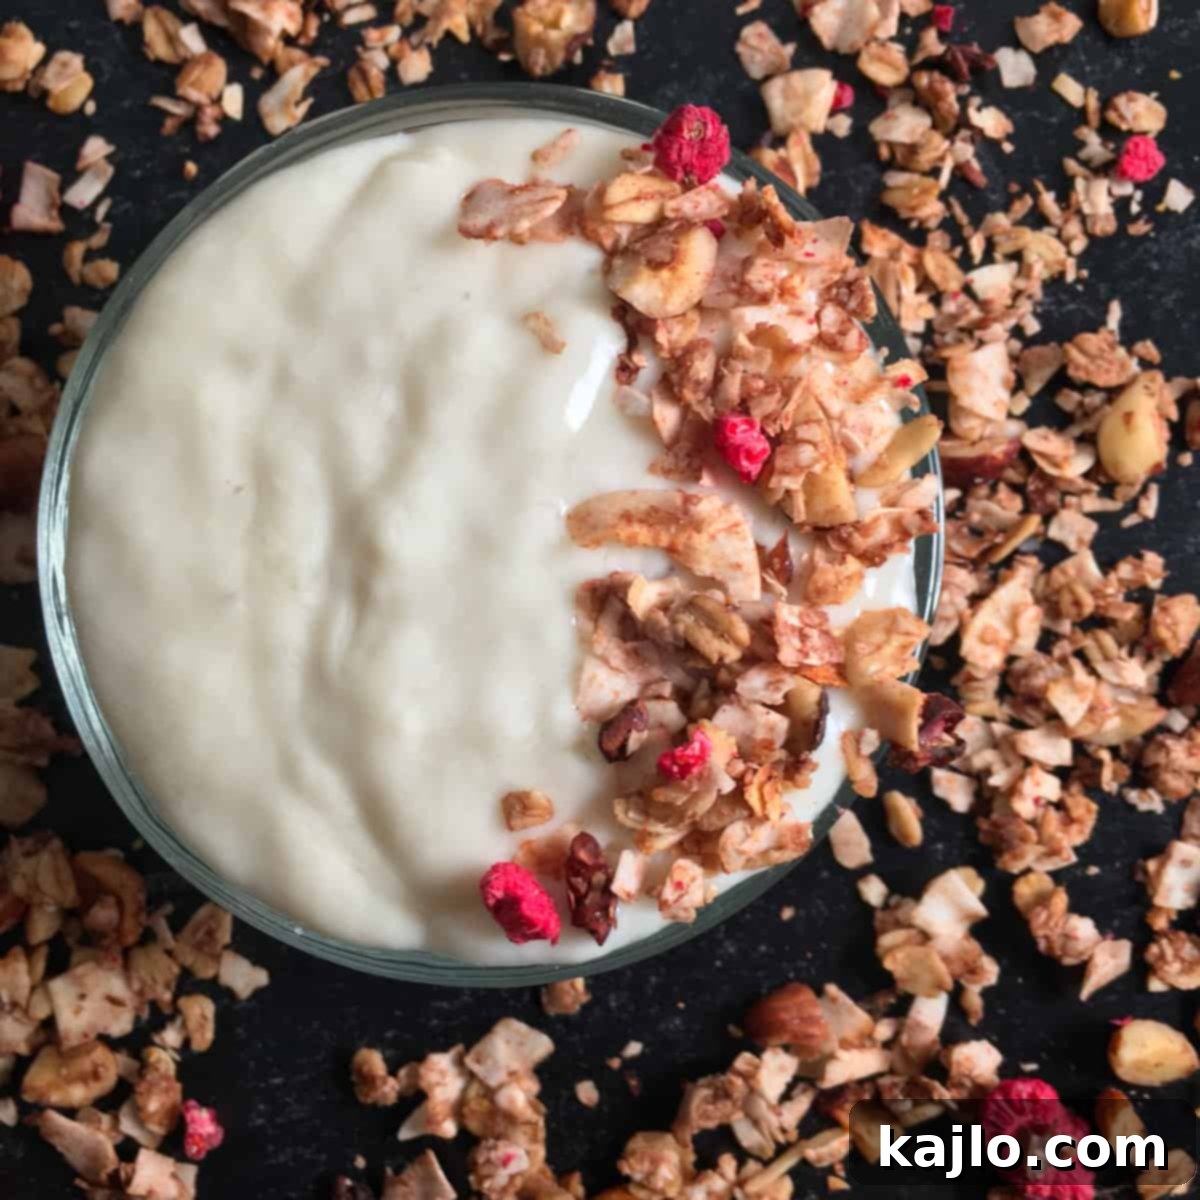
Unlock the secrets to crafting your own luscious and creamy homemade oat milk yogurt! This comprehensive guide will show you exactly how to make oat yogurt from scratch, eliminating the need for specialized yogurt makers or expensive powdered starters. Whether you prefer the convenience of an Instant Pot oat milk yogurt recipe or the traditional stovetop method, we’ve got you covered with easy-to-follow, step-by-step instructions. Dive into the world of delicious vegan yogurt, made with your favorite non-dairy milk, and discover how this simple process can not only nourish your body but also save you money. Ready to embrace the joy of making yogurt with oat milk today?
This homemade oat milk yogurt Instant Pot recipe is a game-changer for anyone who loves the tangy, probiotic goodness of fermented oat yogurt but is put off by its often-hefty price tag. We believe you’ll find this easy, DIY approach yields the best oat milk yogurt you’ve ever tasted, and the best part is, you won’t even need a fancy yogurt starter culture to begin!
Over the years, I’ve experimented with a variety of plant-based yogurts. Soy milk yogurt, for instance, often mimics the characteristics of dairy yogurt quite closely. Coconut milk yogurt, with its rich texture, always proves to be a delightful and exceptionally creamy treat.
You can even whip up a simple 2-ingredient almond milk yogurt following the specific recommendations in my Instant Pot Almond Milk Yogurt recipe. However, venturing into the realm of oat milk yogurt presents a unique set of challenges that need to be addressed for a truly successful outcome.
One of the primary hurdles when attempting to create homemade oat milk yogurt is its inherent tendency to remain thin and runny. Unlike dairy milk or even some other plant-based alternatives like coconut milk, oat milk, regardless of its brand or fat content, often struggles to achieve that desired thick, creamy texture during the fermentation process. Even varieties marketed as “extra creamy” or “protein-rich” oat milks typically fail to thicken adequately during incubation, leaving you with a less-than-satisfactory liquid consistency rather than a spoonable yogurt.
Another common issue with oat milk yogurt is separation after incubation. You might end up with distinct layers: a watery, thin liquid on top and a somewhat grainy, denser liquid below. This separation can be quite unappealing and detracts from the overall enjoyment of your homemade creation.
Fortunately, there’s a straightforward and effective solution to tackle both of these problems. The key lies in adequately thickening your oat milk *before* you even initiate the fermentation process. This crucial step not only ensures your homemade oat yogurt achieves that wonderfully thick and luxurious consistency but also plays a vital role in preventing the undesirable separation during fermentation.
Keep reading to uncover the simple techniques and expert tips for making the absolute best creamy and thick oat milk yogurt right in your own kitchen!
😋 Understanding Oat Yogurt Brands and Nutrition
Does oat yogurt offer calcium? Does oat yogurt provide protein? These are crucial questions for anyone considering plant-based alternatives, and the answers are not always straightforward. The nutritional profile of oat yogurt can vary significantly depending on whether you purchase a store-bought brand or make it at home, and, critically, on the specific brand of oat milk used in its production.
To give you a clearer picture, here’s a comparative look at the nutrition information for some popular oat yogurt products alongside a traditional dairy option and our homemade version (all per 5.3-ounce / 150g serving):
| Brand | Calories | Net Carbs (g) | Protein (g) | Calcium (% DV) | Added Sugar (g) |
|---|---|---|---|---|---|
| Oatly Oatgurt (plain) | 160 | 18 | 3 | 15 | 6 |
| Chobani Oat Yogurt (peach) | 130 | 22 | 6 | 0 | 15 |
| Silk Oat Yeah Yogurt (Vanilla) | 120 | 18 | 3 | 10 | 9 |
| Chobani Greek Yogurt(nonfat, plain, dairy) | 80 | 6 | 14 | 15 | 0 |
| Homemade Oat Yogurt (made with ½ cup dry rolled oats) | 150 | 23 | 5 | 0 | 0 |
| Kite Hill Greek Style Yogurt (plain, unsweetened) | 120 | 3 | 15 | 4 | 0 |
Please note that the above nutrition information was accurate at the time this article was written and may be subject to change. It’s also worth highlighting that many popular oat yogurt brands do not offer a plain, unsweetened variety, and none of the leading brands are specifically marketed as “Greek yogurt” from oat milk alone. For instance, Kite Hill Greek yogurt typically uses a blend of almond and soy milk to achieve its texture and protein content.
While some enthusiasts choose to make their own oat milk from rolled oats specifically for making oat yogurt, it’s important to understand that homemade oat milk typically doesn’t provide significant amounts of calcium. Furthermore, it’s relatively low in protein compared to fortified store-bought versions or dairy milk.
It’s true that commercially produced oat milk is often considered an ultra-processed food, potentially containing various additives and anti-nutrients. However, many whole plant foods also naturally contain anti-nutrients, and this fact alone doesn’t mean they should be avoided entirely. When you’re actively seeking a plant-based alternative to traditional dairy products, prioritizing options that effectively provide essential nutrients like calcium and protein becomes paramount.
⭐ The Undeniable Benefits of Making Your Own Oat Milk Yogurt
So, why go through the effort to make oat yogurt at home? The advantages of preparing your own delicious vegan oat yogurt are numerous and compelling:
- Superior Nutritional Profile: Store-bought oat yogurts often fall short in key nutrients, typically being low in calcium, protein, or both. They can also be surprisingly high in added sugars, even in their “plain” versions. By carefully selecting a high-quality, fortified oat milk as your base, you gain the power to create a homemade oat yogurt that is significantly richer in calcium and protein, tailored to your dietary needs.
- Effortless Preparation: Our recipe streamlines the process by utilizing readily available store-bought oat milk. This not only ensures a higher concentration of beneficial vitamins and minerals in your final product but also completely bypasses the time-consuming and often messy step of soaking and blending raw oats. It’s an easy route to a sophisticated plant-based staple.
- Cost-Effective Vegan Option: The price difference between dairy and vegan yogurts can be substantial. A single container of dairy yogurt might cost around $0.99, while its oat-based counterpart often retails for double, at $1.99. Making your own with protein-fortified oat milk, which costs approximately $5 for six cups, dramatically reduces your per-serving cost, bringing it down to a level comparable with conventional dairy yogurt. This makes homemade oat yogurt a budget-friendly choice.
- Authentic Vegan Probiotic Yogurt: This homemade oat milk yogurt isn’t just a dairy-free alternative; it’s a genuine source of live, active cultures. These beneficial bacteria, commonly known as probiotics, are crucial for supporting a healthy digestive system and promoting overall gut well-being.
- Enhanced Plant-Based Protein Content: If you’re searching for “proatgurt” (protein oat yogurt), you’ll quickly realize it’s not a common offering on store shelves. Our DIY approach empowers you to boost the protein content of your oat yogurt, making it an ideal choice for athletes, those managing their weight, or anyone looking to increase their plant-based protein intake.
- Low Sugar Control: Many commercial oat yogurts, even those labeled as plain, contain a notable amount of added sugar. By making your own, you have complete control. Choosing an unsweetened or low-sugar oat milk ensures your final product is a truly low-sugar oat yogurt, allowing you to sweeten it naturally if desired, without any hidden additives.
- Ideal for Meal Prepping: Homemade oat yogurt is an excellent component for your weekly meal prep. Portion it out for quick and healthy breakfasts, perhaps with a sprinkle of fruit and a side of toast, making busy weekdays much more manageable.
- Accommodates Special Diets: This versatile plant-based yogurt naturally fits a variety of dietary preferences and restrictions, including dairy-free, vegetarian, and vegan diets. Depending on your specific caloric and carbohydrate goals, it can also be a suitable addition to some relaxed low-carb eating plans.
- Irresistibly DELICIOUS: Oat milk yogurt boasts a wonderfully mild flavor with just a hint of tanginess. It offers a truly delightful way for individuals who need to avoid dairy to savor the creamy texture and refreshing taste of yogurt without compromise!
🥘 Essential Oat Milk Yogurt Ingredients
Ready to gather your ingredients for making oat yogurt in the Instant Pot or on the stovetop? Here’s what you’ll need to add to your shopping list for a perfect batch of homemade vegan yogurt:
- 3½ cups Oat Milk: While almost any oat milk variety will work for this recipe, keep in mind that the final consistency and nutritional profile of your yogurt will vary based on the specific type you choose. We’ll delve deeper into oat milk selection shortly.
- 2 tablespoons Plain, Unsweetened Oat Yogurt with Live, Active Cultures: This is your crucial yogurt starter. It’s imperative to select a plain, unsweetened variety, as flavored or sweetened yogurts can interfere with the fermentation process and introduce unwanted sugars. The label must explicitly state “live, active cultures” to ensure successful fermentation. I’ve personally tested Oatly plain oat yogurt and Kite Hill Greek yogurt (a non-oat, almond-soy blend) as starters, and both yielded excellent results.
- 2 teaspoons Xanthan Gum: This is the vegan thickener that will transform your oat milk into gloriously thick and creamy yogurt. Beyond its thickening capabilities, xanthan gum also acts as a stabilizer, playing a critical role in preventing the oat milk mixture from separating into watery and grainy layers during the essential fermentation period.
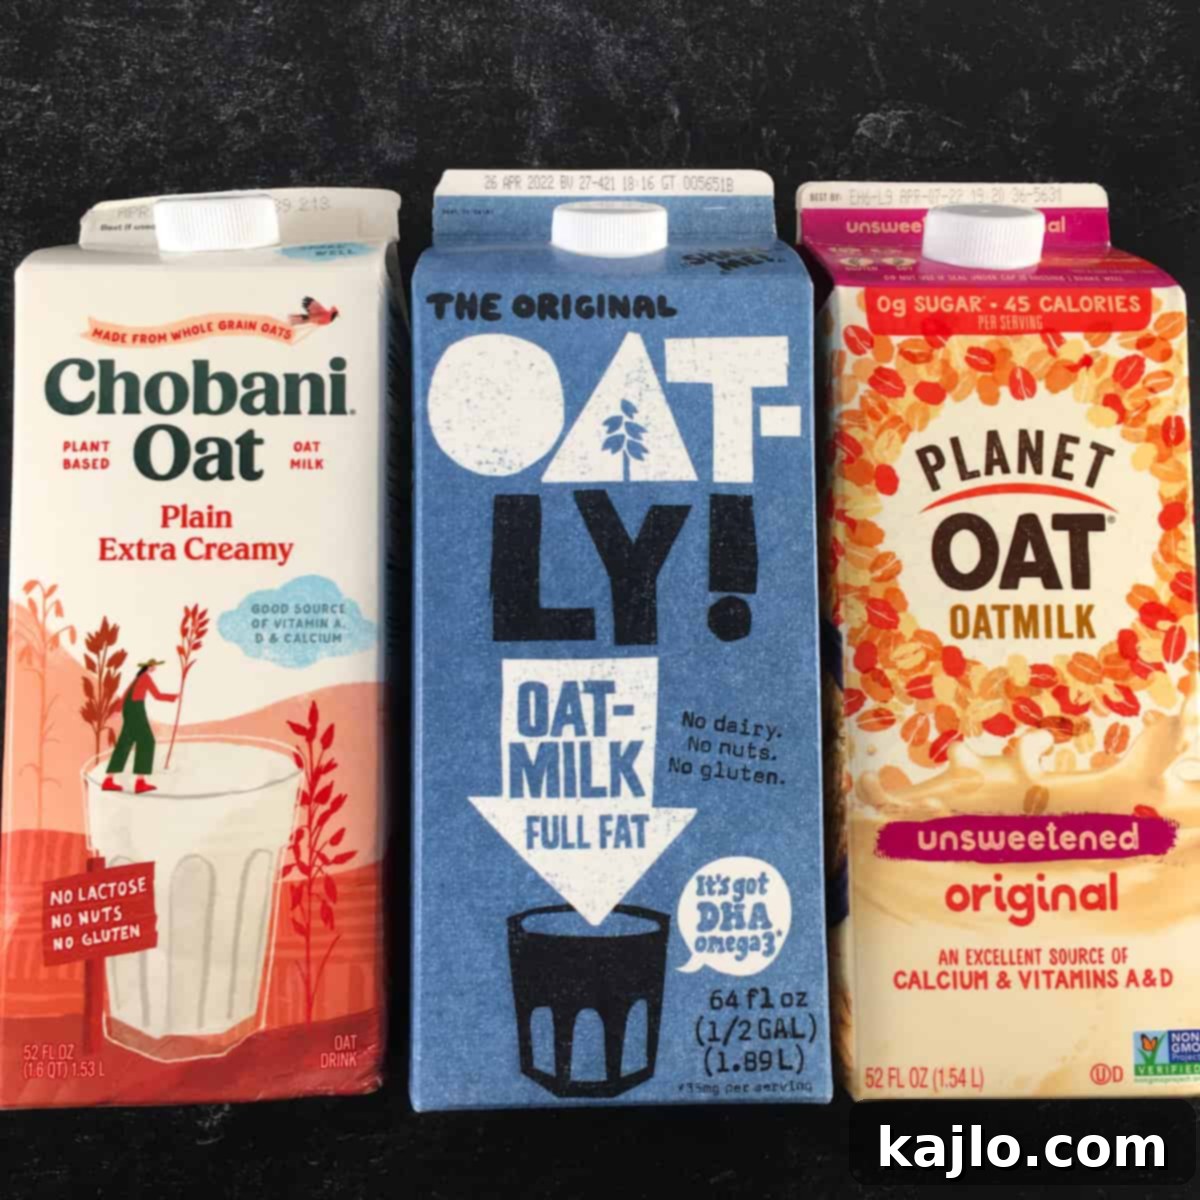
Just like with traditional dairy milk (such as cow’s milk or goat milk), the specific type of non-dairy milk you use will significantly influence the outcome of your yogurt. I rigorously tested several oat milk brands to find the best options for this recipe.
In my humble opinion, Chobani Extra Creamy Plain Oat Milk and Original Oatly Full Fat Oat Milk consistently produced the most satisfying and desirable oat yogurt. For those prioritizing nutrition, Califia Protein Oat Oatmilk (original flavor) emerged as my top recommendation for making high-protein oat yogurt. However, it’s worth noting that the Califia oat yogurt resulted in a slightly darker hue and showed a bit more separation compared to the other creamier oat milk options I tested.
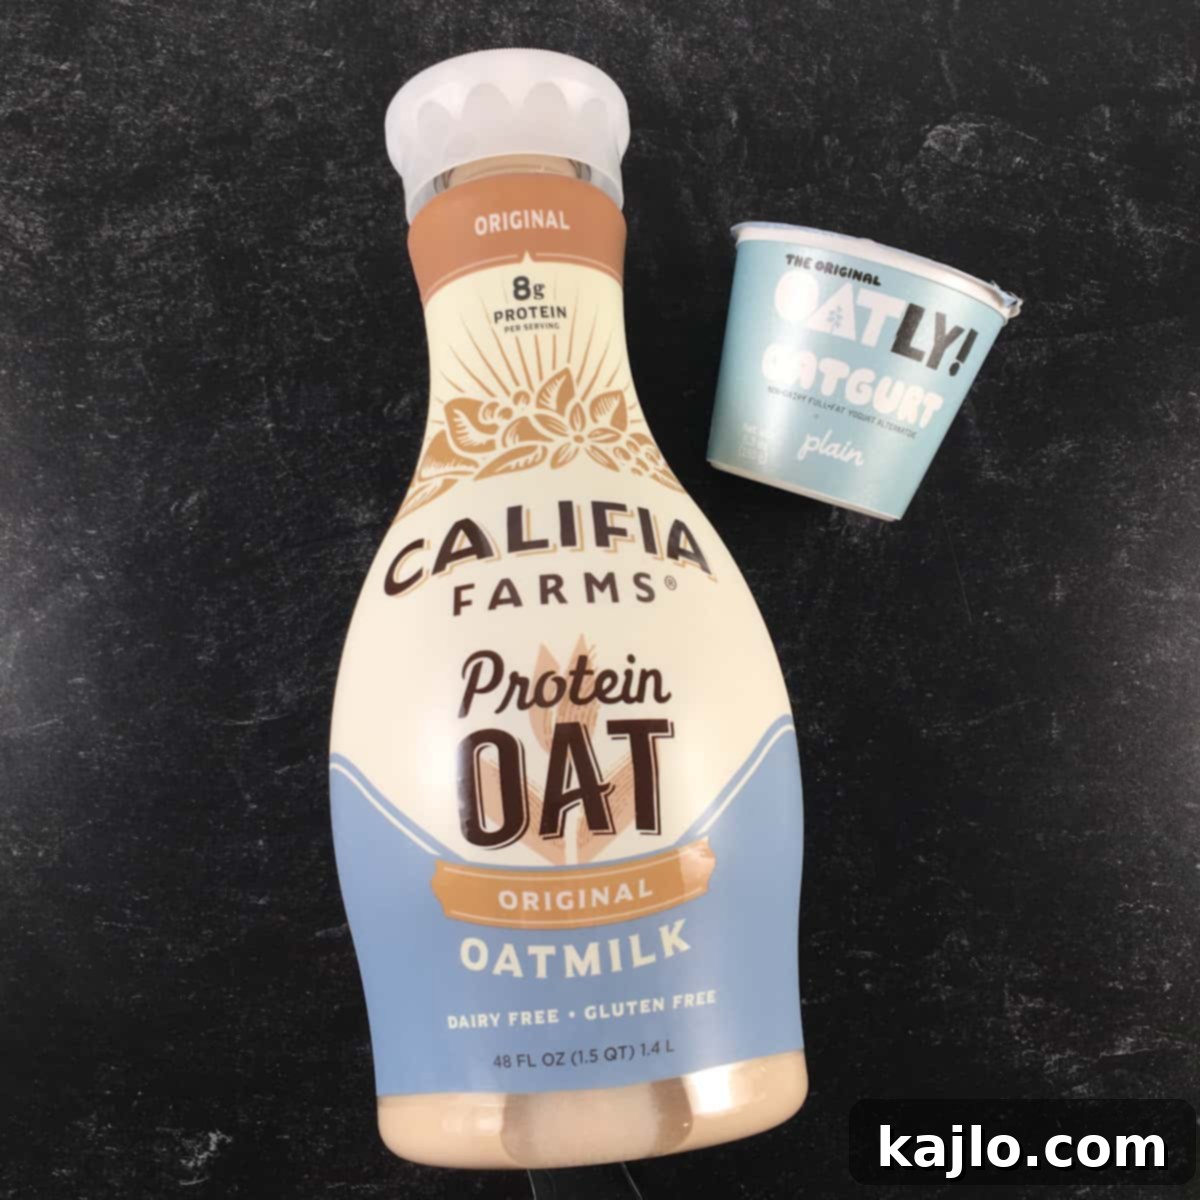
You can also successfully make homemade oat yogurt using lower-calorie oat milk options. For example, I experimented with unsweetened Planet Oat oat milk, which contains only 45 calories per cup. While this particular oat milk produced a yogurt with a more gelatinous, jelly-like texture rather than a smooth creaminess, it still fermented successfully and was perfectly usable.
Ultimately, to save both time and ensure superior nutrition, I strongly advise against making homemade oat milk from scratch for this recipe. Store-bought oat milks are generally nutritionally superior, often fortified with vitamins and minerals, compared to both traditional dairy milk and homemade oat milk preparations.
🍽 Essential Yogurt Making Supplies
To successfully craft delicious oat milk yogurt using the traditional stovetop and heating pad method, you’ll need a few key pieces of kitchen equipment:
- A Candy Thermometer and Whisk: A reliable candy thermometer is absolutely indispensable for most homemade yogurt recipes, and this one is no exception. Accurately monitoring the temperature of your oat milk throughout the process is paramount for proper fermentation. Incorrect temperatures are one of the most frequent causes of failed yogurt batches, so do not skip the thermometer! A sturdy whisk will ensure your ingredients are smoothly combined and help prevent lumps.
- A Wide-Mouth Quart Canning Jar with a Rim and Lid: A glass mason jar serves as the ideal vessel for incubating your oat milk and can transition directly to the refrigerator once your yogurt is complete. While a wide-mouth jar isn’t strictly essential, it significantly simplifies the pouring and filling process, making your life much easier.
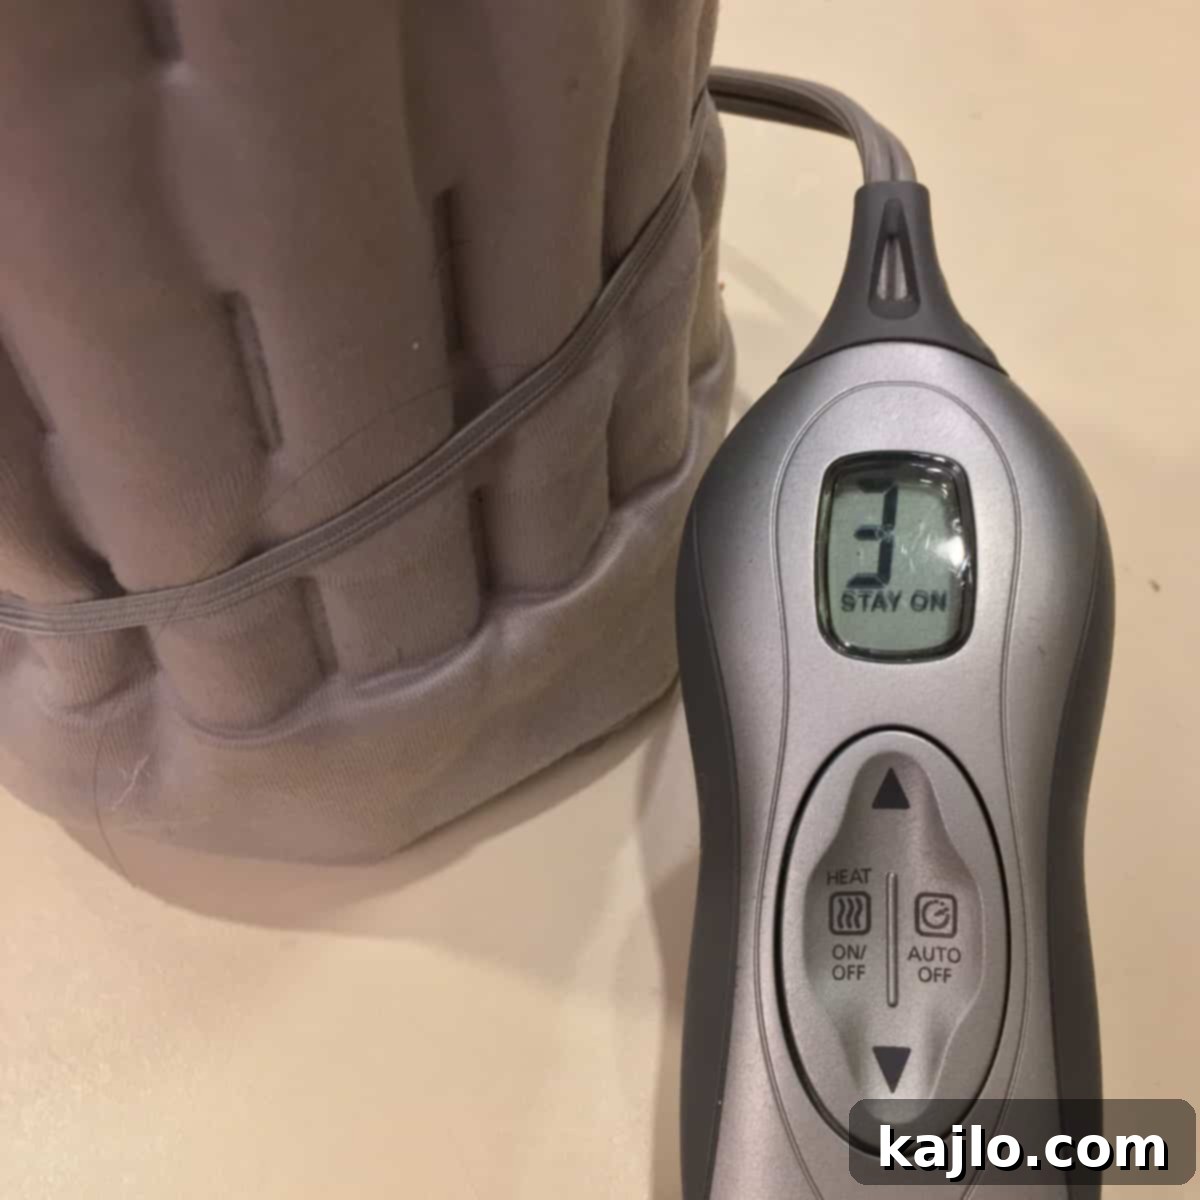
- A Heating Pad with Adjustable Heat and a “Stay On” Function: Your yogurt requires a consistent incubation temperature of 100-110°F (37.8-43.3°C) for several hours to ferment properly. A heating pad, when carefully wrapped around your jar, can effectively substitute for a dedicated yogurt maker. The crucial feature here is the ability to disable any “auto-off” settings, as the pad needs to maintain warmth continuously for 8-12 hours without interruption.
Through my own testing, I discovered that the medium setting (setting 3) on my particular heating pad consistently maintained the desired temperature of approximately 110°F (43.3°C). Information regarding the temperature output of your heating pad’s various settings may be available in its manual or online resources.
Alternatively, to make oat milk yogurt in an Instant Pot, you’ll need an Instant Pot equipped with the “yogurt” function. This method often proves even simpler and more consistent than the heating pad technique, offering set-and-forget convenience.
I personally use a Ninja Foodi Deluxe XL 8-quart for making my homemade oatgurt, but many other Instant Pot models are perfectly capable of producing excellent Instant Pot oat milk yogurt. If your multi-cooker has a smaller capacity, you might need to adjust the recipe by halving the ingredient quantities to fit.
❓ Should You Sterilize Jars for Oat Yogurt?
While it’s often not feasible to sterilize many yogurt makers due to their plastic components, if you’re making homemade oat yogurt using the stovetop method, sterilizing your incubation jar is a recommended best practice. Sterilization helps eliminate any unwanted bacteria that could interfere with the yogurt culture and ensure a clean, successful fermentation. After sterilizing, it’s crucial to allow the jar to cool to approximately 110°F (or below) before you introduce the oat milk and yogurt culture. Introducing the culture to a jar that is too hot can kill the beneficial bacteria, leading to a failed batch of yogurt.
🔪 How to Make Thick & Creamy Oat Milk Yogurt (Stovetop Method)
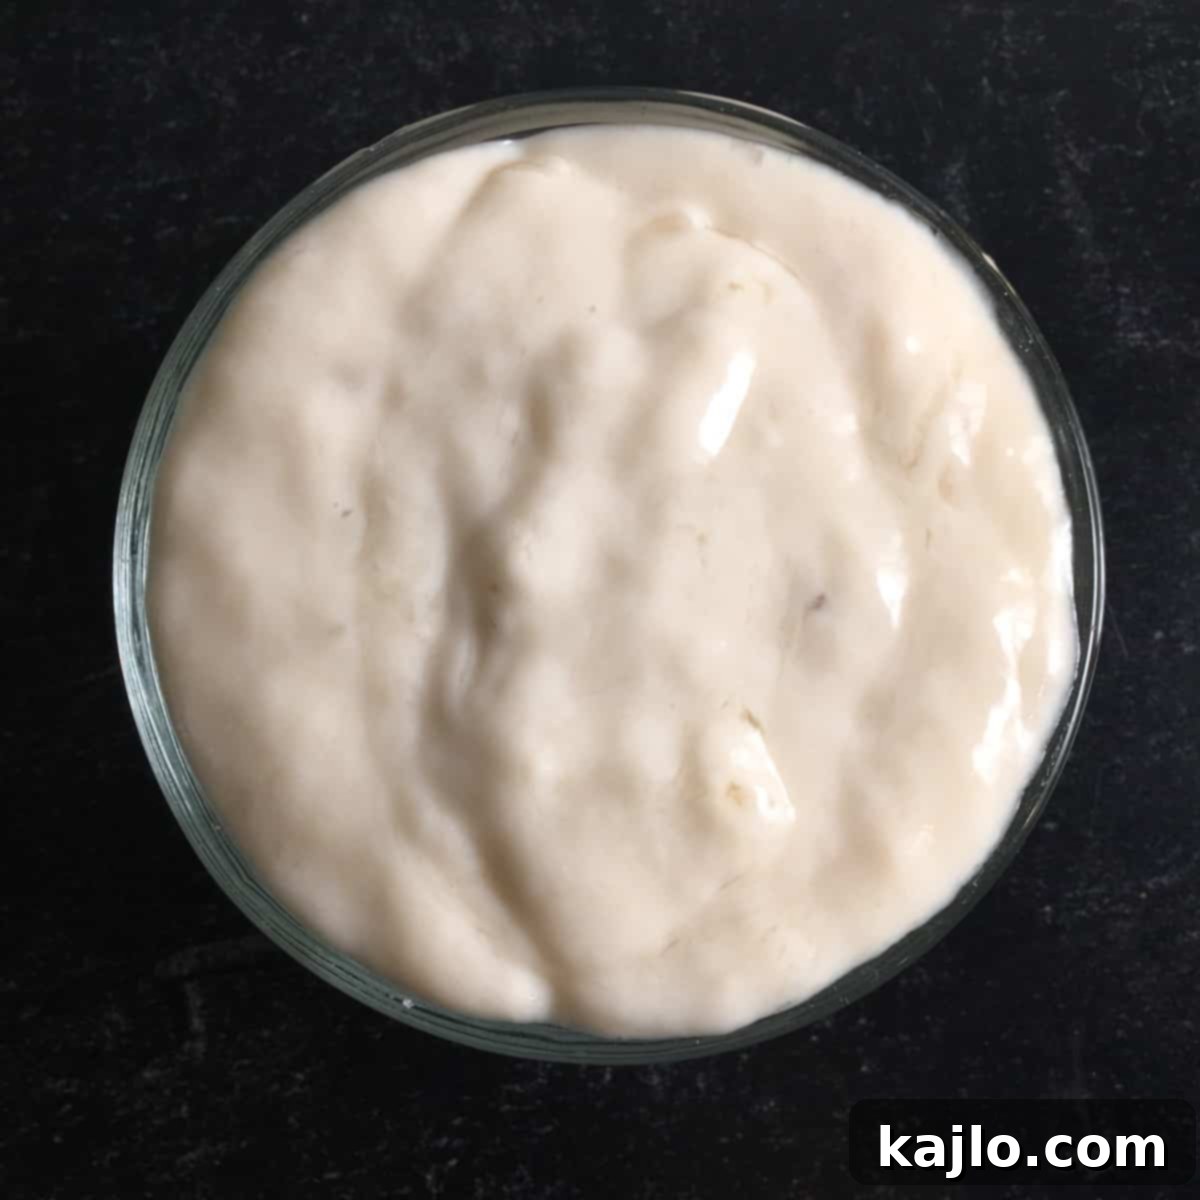
To begin making your delicious homemade oat yogurt, pour the oat milk into a small pot. Heat the milk over medium heat, continuously whisking to prevent scorching, until it reaches 180°F (82°C). As the milk heats, gradually sprinkle 1 teaspoon of xanthan gum over the surface at a time, whisking vigorously to fully incorporate it. Your goal is a smooth mixture, entirely free of any tapioca-like lumps. Utilize your candy thermometer to meticulously monitor the temperature, removing the milk from the heat the moment it reaches 180°F (82°C). At this point, the mixture will appear bubbly and noticeably thicker. This initial thickening stage is critical, as this is approximately the final thickness your oat yogurt will achieve. Ensure it meets your desired consistency before moving to the next step.
Once the oat milk has reached 180°F (82°C) and thickened, it’s time to let it cool down to the optimal incubation temperature range of 100-110°F (37.8-43.3°C). Continue whisking occasionally during this cooling period to prevent a skin from forming on the surface and to ensure even cooling. Keep a close watch on your candy thermometer to ensure the milk doesn’t get too cool, as this can hinder the activation of the yogurt cultures. For a faster cooling process, you can carefully submerge the base of your pot into a shallow bowl filled with ice water, stirring frequently until the desired temperature is reached.
Once your oat milk has cooled to the target temperature range, carefully remove 1 cup of the warm oat milk from the pot. In a separate bowl, whisk the yogurt starter (plain oat yogurt with live, active cultures) into this smaller amount of warm oat milk until it’s completely smooth and fully incorporated. This technique is crucial for preventing lumps in your final product and ensuring the starter is evenly distributed. Once smooth, whisk this yogurt-milk mixture back into the larger pot of oat milk, ensuring it is thoroughly blended.
Now, carefully pour your prepared oat milk and yogurt mixture into a 4-cup wide-mouth canning jar. At this point, the milk should still be within the ideal temperature range of 100-110°F (37.8-43.3°C). Securely place the lid and rim onto the jar. To create a consistent incubation environment, wrap the jar thoroughly in your heating pad, set to maintain a temperature of 110°F (43.3°C). If you’re unsure which setting corresponds to this temperature on your specific heating pad, you may find this information online. Crucially, ensure that any automatic shut-off features on your heating pad are disabled, as continuous warmth is vital for proper fermentation.
Fermenting Your Homemade Oat Yogurt
Allow the oat yogurt to incubate undisturbed for a period of 9 hours, ensuring it consistently remains within the 100-110°F (37.8-43.3°C) temperature range throughout this time. After the 9-hour incubation period has concluded, carefully transfer the jar directly into your refrigerator. This cooling step is essential to halt the fermentation process and allow the yogurt to set further and thicken even more overnight, ideally for another 8-12 hours. This chilling period will yield the best possible creamy consistency for your delicious dairy-free yogurt.
⏲️ How to Make Creamy Oat Milk Yogurt (Instant Pot Method)
To prepare oat yogurt in an Instant Pot, begin by pouring the oat milk directly into the inner pot. With the lid removed, activate your Instant Pot’s “yogurt, high temperature” setting. As the milk slowly warms, gradually whisk in the xanthan gum. Continue whisking steadily until the mixture becomes smooth and noticeably thickened. This initial thickening step is key to achieving a desirable creamy texture in your final vegan yogurt.
Allow the oat milk to heat until it reaches a precise temperature of 180°F (82°C). It’s important to whisk the milk frequently during this heating phase to prevent the formation of a skin across the top, which can lead to lumps. Once the oat milk reaches the correct temperature, carefully remove the inner pot from the Instant Pot base to begin the cooling process.
Let the thickened oat milk cool down on your counter until it reaches the ideal temperature range of 105-110°F (40.6-43.3°C), whisking occasionally to ensure even cooling and prevent skin formation. Once cooled, remove one cup of the milk mixture and, in a separate bowl, thoroughly whisk in your yogurt starter until completely smooth. Then, pour this smaller yogurt-milk mixture back into the main pot of milk, whisking well to combine. Finally, place the inner pot back into your Instant Pot base.
Place the lid securely on the Instant Pot, but crucially, ensure the steam release vent is set to the “venting” position (open), not sealed. This allows for proper air circulation during the fermentation process.
How long should you incubate oat milk yogurt in the Instant Pot? For optimal results, incubate your oat yogurt for 9 hours. Set your Instant Pot to the “low yogurt” setting. (For Ninja Foodi users, this setting is typically labeled as “ferment.”) This consistent low temperature ensures the live, active cultures can thrive and transform your oat milk into delicious yogurt.
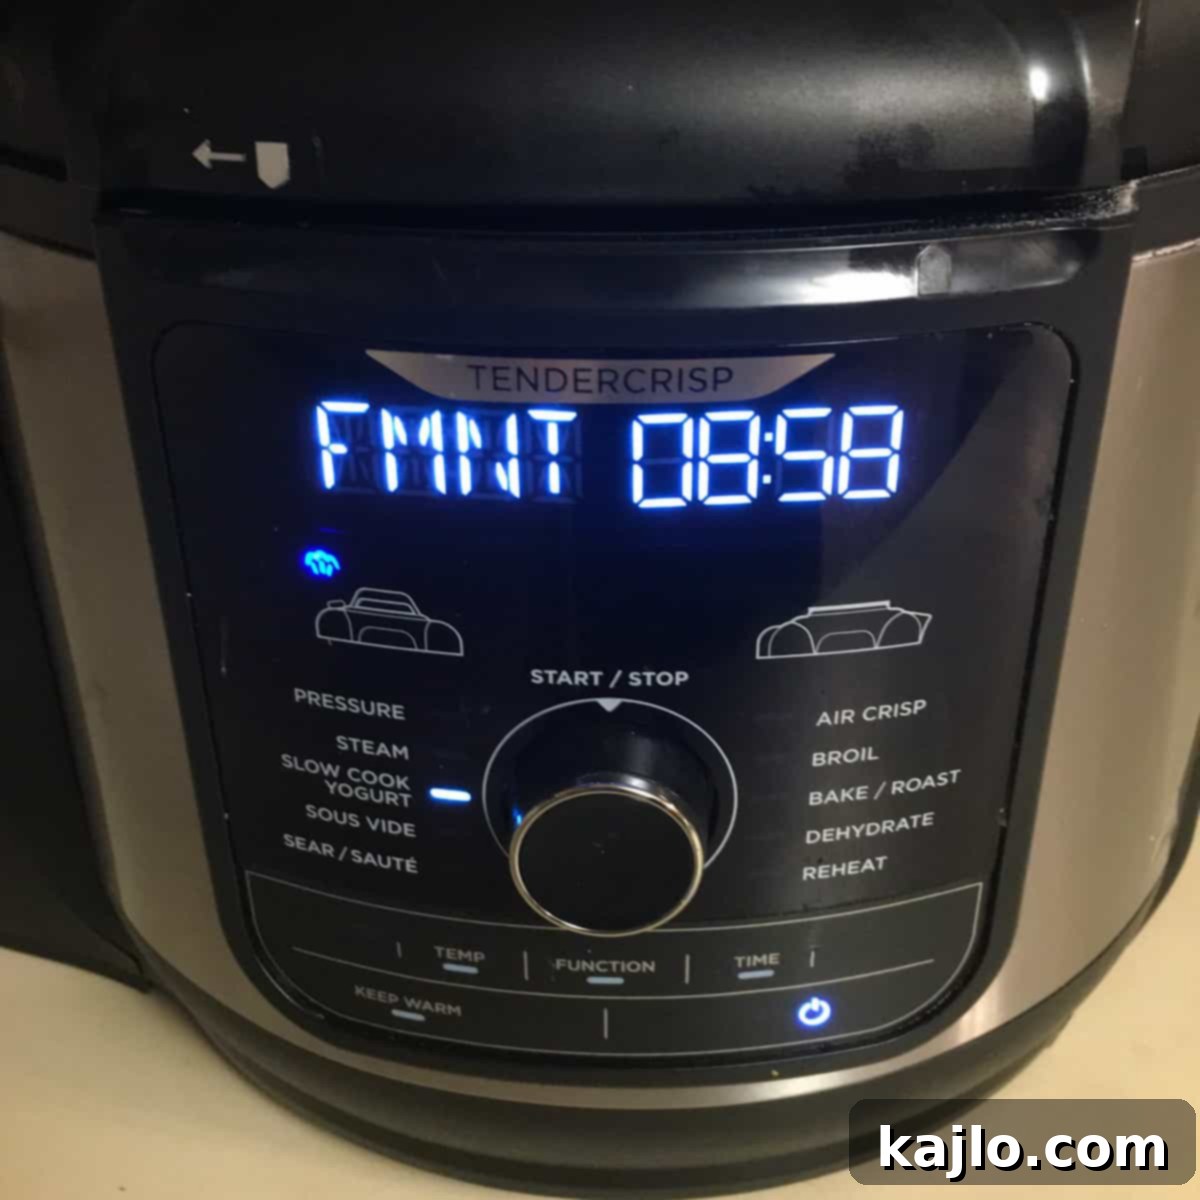
Once the incubation period is complete, carefully transfer your freshly made Instant Pot oat yogurt into a clean glass mason jar with a lid. Place the jar in the refrigerator and allow it to chill overnight. This crucial refrigeration step will further cool and thicken the yogurt, enhancing its texture and flavor before you enjoy it.
My number one piece of advice for newcomers to oat yogurt making is to pay meticulous attention to temperature. Maintaining the correct temperature throughout each stage of this process is the most critical factor for ensuring your success. In the past, I’ve had numerous batches of yogurt fail simply because I didn’t closely monitor and regulate the temperatures. Oat yogurt typically has a mild flavor profile and is not overly tangy, offering a gentle creaminess.
If you notice some liquid separation after the fermentation, don’t worry! This is a common occurrence, even with thickeners. Simply give it a good stir, and the liquid will reincorporate. The xanthan gum used in this recipe is specifically chosen to minimize separation, ensuring a consistently smooth and creamy texture in your final thick oat yogurt.
🥛 Troubleshooting: Why is My Oat Milk Yogurt Runny?
If your homemade oat milk yogurt turns out too thin or runny, the most common reason is insufficient thickening before the incubation process. In this specific recipe, we rely on xanthan gum as our primary thickener, which is crucial for achieving the desired creamy consistency.
A great advantage of xanthan gum is its ability to thicken cold liquids. This means that even if you end up with a runny batch of oat yogurt after incubating, you may still be able to salvage it by whisking in a small amount of xanthan gum after it has cooled. Start with a tiny pinch and gradually add more until you reach your preferred texture, whisking thoroughly to prevent lumps.
Other thickeners commonly used for plant-based yogurts include gelatin and agar-agar. However, both gelatin and agar-based yogurts tend to have a more distinct gelatinous, almost Jell-O-like consistency, which may not be ideal for everyone. Additionally, gelatin is not a suitable option for those following a vegan diet.
Starches such as cornstarch, potato starch, or arrowroot powder can also be used to thicken hot liquids. While effective, I generally find that starches tend to leave a slightly lumpy texture in yogurt, making them less preferred for this recipe. Well-whisked xanthan gum, on the other hand, consistently delivers a wonderfully smooth and lump-free oat milk yogurt, ensuring a superior eating experience.
🌡️ Can You Freeze Oat Yogurt?
Your freshly made oat milk yogurt will stay fresh and delightful in the refrigerator for approximately 3-4 days. While some sources suggest it might last longer, up to 7-14 days, it’s generally best to consume it within the shorter timeframe for optimal quality. Although you can technically freeze oat yogurt, it’s not typically recommended. Upon thawing, the texture will almost certainly become grainy and separated, losing its desirable creamy consistency. It’s much better to enjoy it fresh!
🥣 Creative Ways to Serve Homemade Oat Milk Yogurt
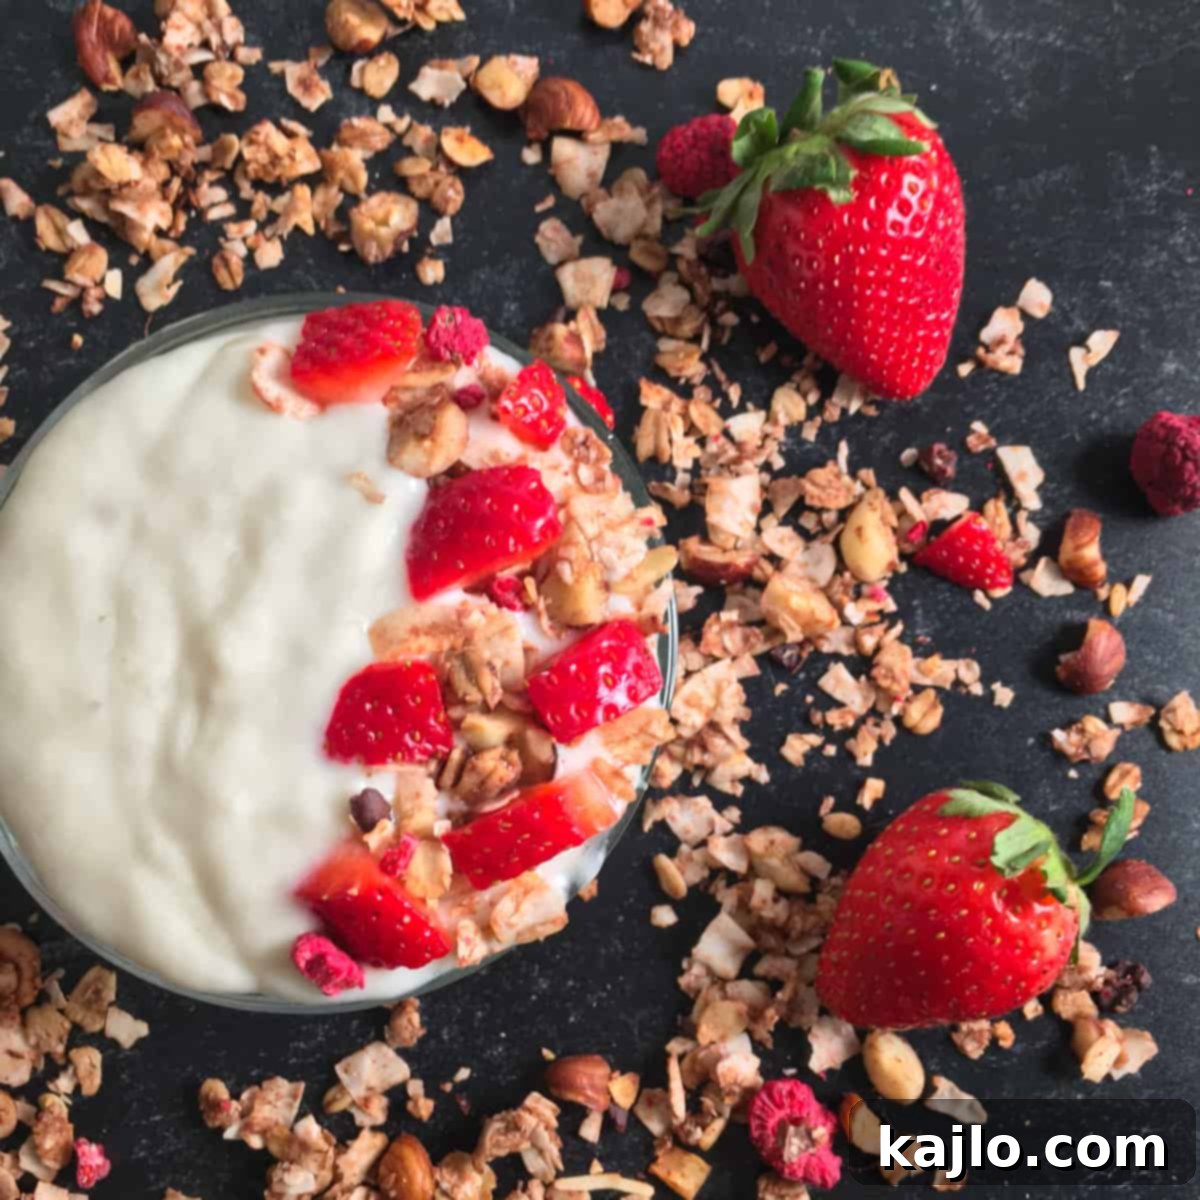
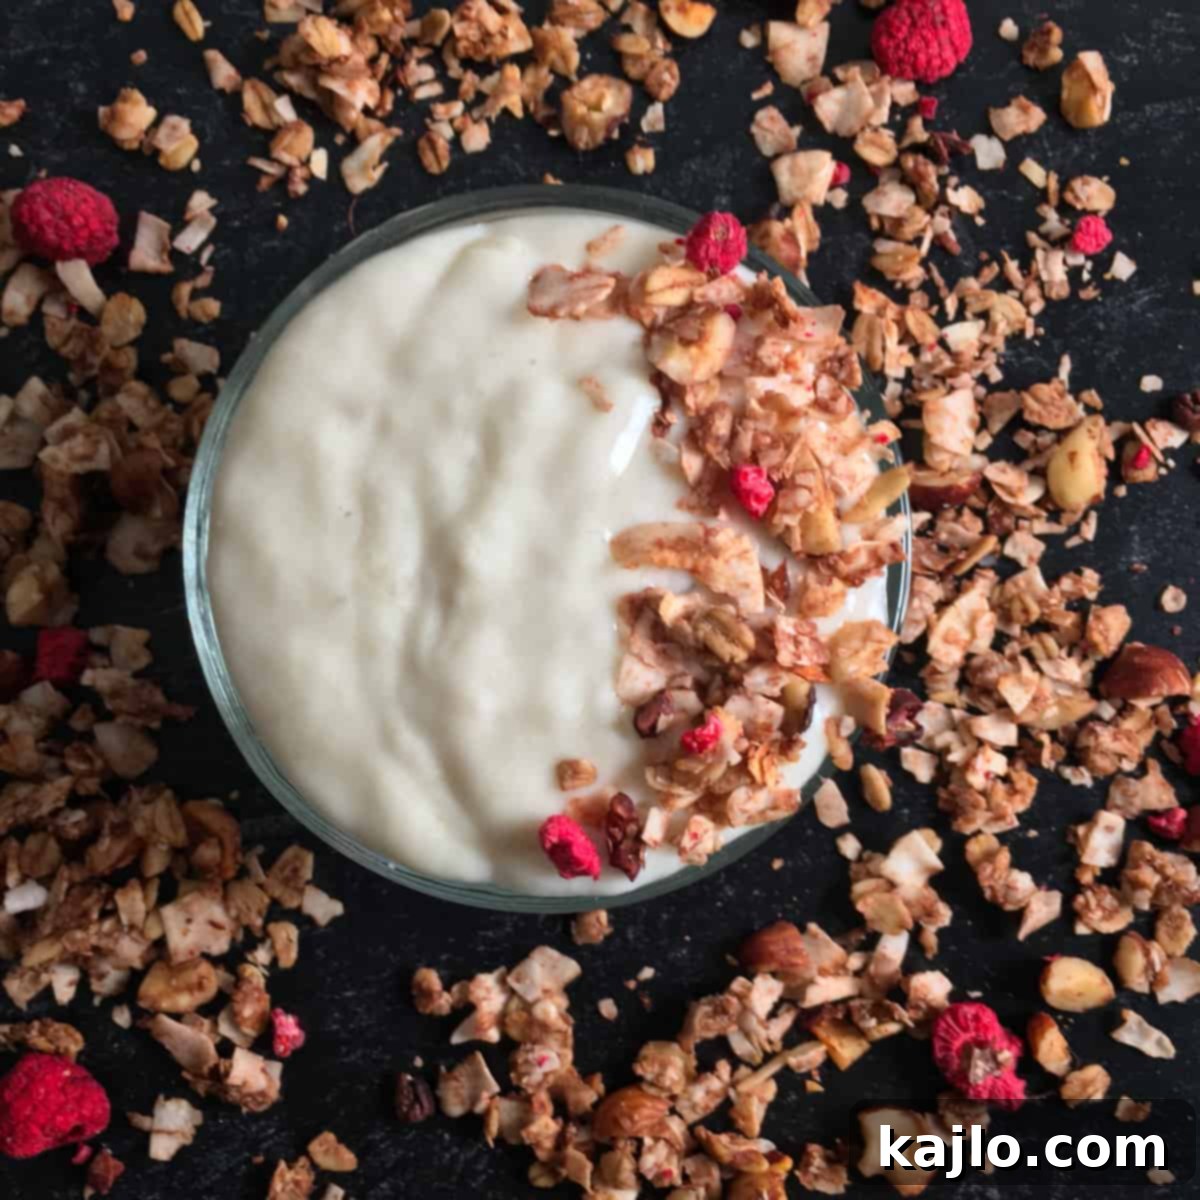
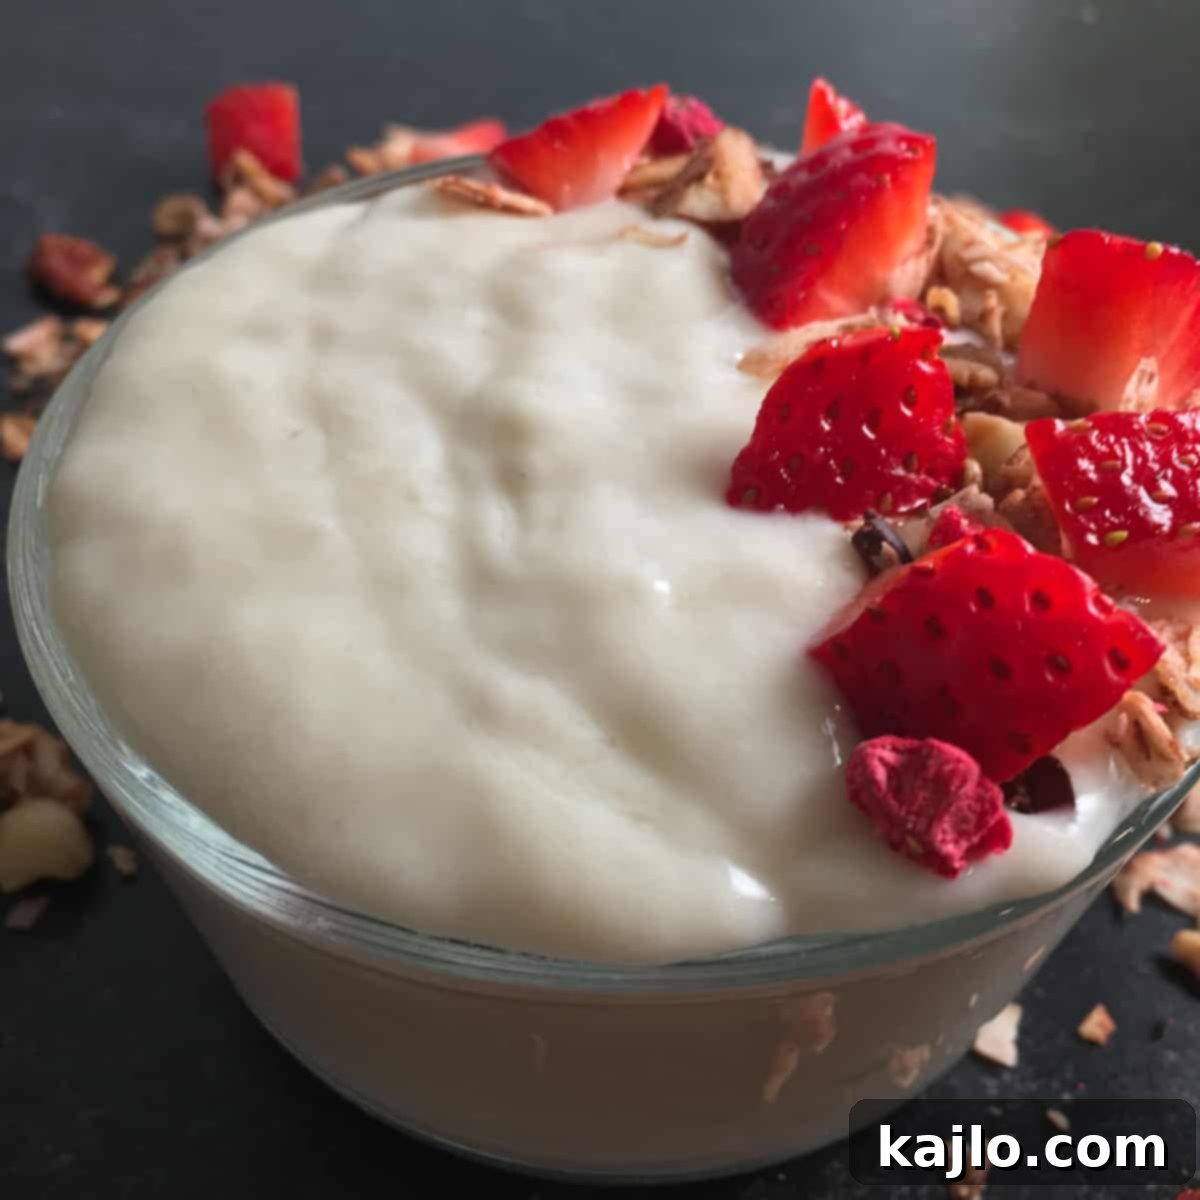
Now that you’ve mastered how to make oat yogurt, the possibilities for enjoying it are endless! What pairs wonderfully with this mild, creamy vegan yogurt? In the accompanying photos, I’ve savored this delicious yogurt with fresh strawberries and a generous sprinkle of granola. The granola featured in the images is my own High Calorie Granola for Weight Gain, which conveniently happens to be a fantastic vegan recipe as well.
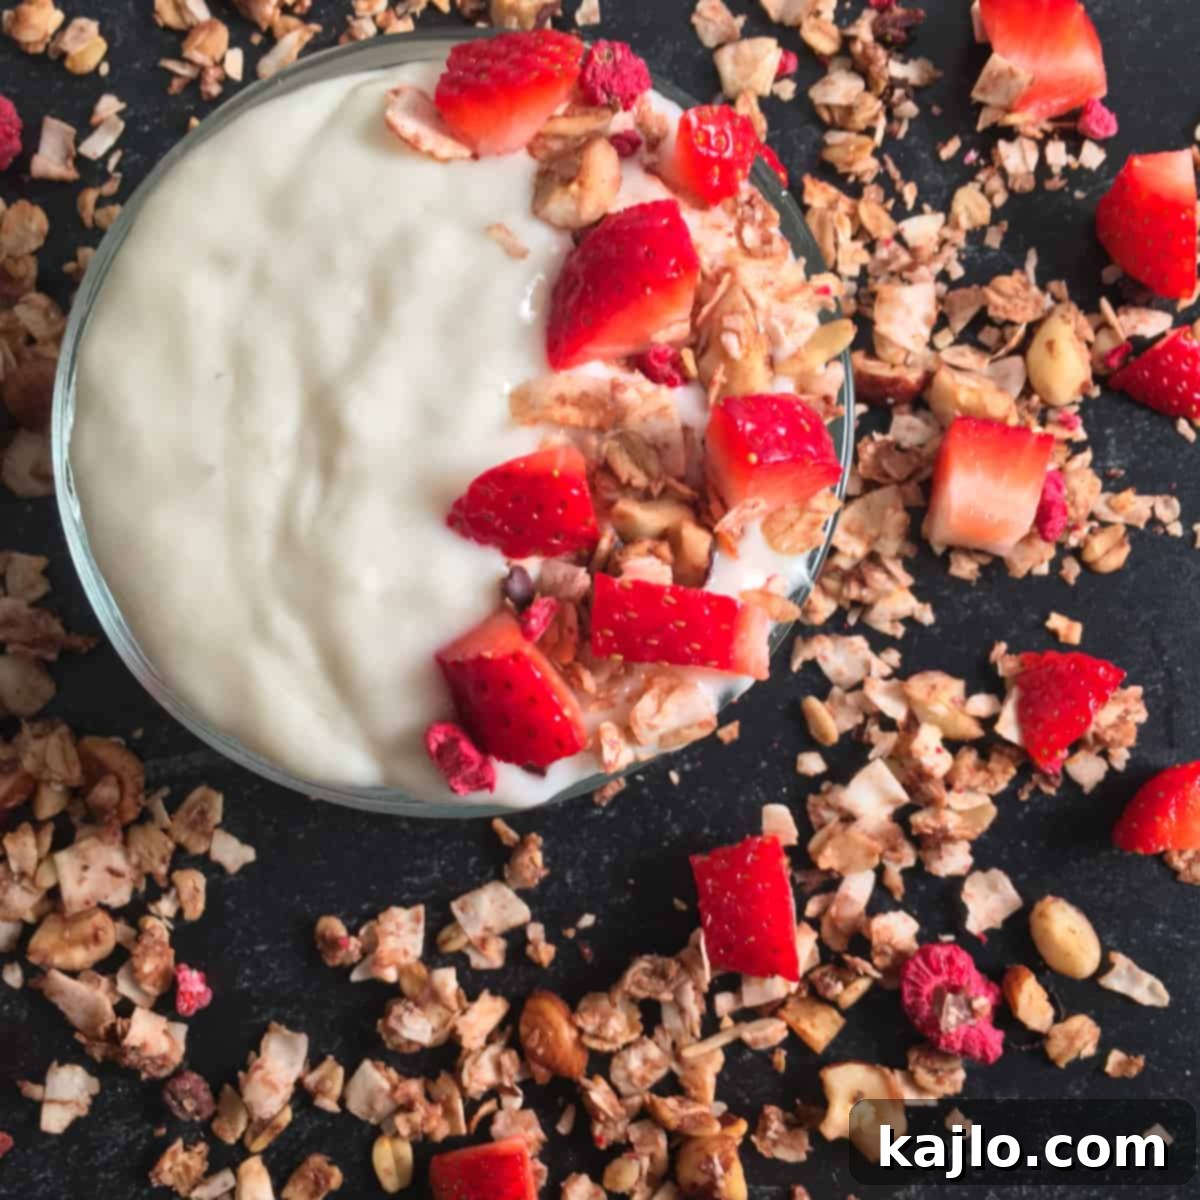
Beyond this, you can customize your oat milk yogurt to suit any craving. Sweeten it naturally with an array of fresh fruits, a drizzle of maple syrup, or a touch of agave nectar. For an extra burst of flavor, consider adding a few drops of vanilla extract, lemon extract, or other creative flavorings you enjoy. It makes an excellent, satisfying post-workout snack to aid in recovery or a wholesome side dish for breakfast, much like its dairy counterparts.
Don’t be afraid to experiment! This versatile plant-based yogurt can also be incorporated into savory dishes, used as a base for creamy dressings, or even blended into smoothies for an added probiotic boost. The mild flavor of oat yogurt makes it an incredibly adaptable ingredient in both sweet and savory culinary applications.
Watch How to Make It!
Oat Milk Yogurt Recipe (How to Make Oat Yogurt)
Summer Yule
Print Recipe
Pin Recipe
Ingredients
- 3½ cups oat milk (plain, preferably fortified for best nutrition)
- 3 tablespoons plain oat yogurt with live, active cultures (ensure it contains active cultures)
- 2 teaspoons xanthan gum (essential for thickening and stabilization)
Instructions
To Make Oat Milk Yogurt without a Yogurt Maker (Stovetop & Heating Pad):
- For stovetop preparation, proper sterilization of equipment is key. Place a 4-cup wide-mouth canning jar (including its lid and rim) upright on a rack inside a tall pot. Add any other equipment that will come into contact with your food, such as a metal whisk or measuring spoons.
Fill the pot with water, ensuring all equipment is completely submerged. The canning jar itself should be filled with water, free of any trapped air bubbles. The water level must be at least one inch (2.54 cm) above the top of the jar.
- Bring the pot to a rolling boil. For lower altitudes, boil the equipment for a full 10 minutes. If you are at higher elevations, extend the boiling time by one additional minute for every 1,000 feet (approximately 305 meters) above sea level. Once boiled, carefully remove all equipment from the pot using clean tongs and allow everything to cool completely to room temperature.
Warning: It is absolutely critical to allow the sterilized equipment to cool sufficiently. Failure to do so will introduce heat that can kill the delicate yogurt cultures, resulting in a failed batch of yogurt! For more sterilization information, refer to this source.
- In a small pot, gently heat the oat milk. Continuously whisk the milk as it heats to prevent scorching, until its temperature reaches 180°F (82°C). While heating, gradually sprinkle 1 teaspoon of xanthan gum at a time over the milk, whisking it in thoroughly to ensure a smooth, lump-free consistency, free from any tapioca-like texture.
- Use your candy thermometer to keep a vigilant eye on the milk’s temperature. Once it hits precisely 180°F (82°C), immediately remove the pot from the heat. At this point, the oat milk mixture will appear bubbly and have visibly thickened.
Remember, this is the approximate maximum thickness your oat yogurt will achieve. Ensure it is thickened to your satisfaction before proceeding with the remaining steps of the recipe.
- Allow the heated and thickened oat milk to cool down to the optimal temperature range of 100-110°F (37.8-43.3°C), whisking occasionally to prevent skin formation. Keep a careful watch on your candy thermometer to ensure the milk does not cool too much, which could hinder the yogurt cultures. To expedite the cooling process, you can submerge the base of your pot in a shallow bowl of ice water, stirring consistently until the target temperature is reached.
- From the pot of warm oat milk, remove exactly 1 cup. In a separate bowl, whisk the oat yogurt starter into this single cup of milk until you achieve a completely smooth, uniform consistency. This method helps to evenly disperse the cultures. Once smooth, whisk this inoculated cup of milk back into the main pot of oat milk, ensuring thorough incorporation.
- Carefully pour your perfectly prepared oat milk and yogurt mixture into your sterilized 4-cup wide-mouth canning jar. Confirm that the milk is still within the crucial temperature range of 100-110°F (37.8-43.3°C). Securely attach the lid and rim to the jar, ensuring a tight seal for incubation.
- Wrap the jar completely in a heating pad, which should be set to maintain a consistent temperature of 110°F (43.3°C). If necessary, consult your heating pad’s manual or online resources to identify the correct setting for this temperature. It is absolutely vital to ensure that any automatic shut-off features on the heating pad are disabled, as the yogurt requires continuous, uninterrupted warmth for the entire incubation period.
- Allow the oat yogurt to incubate undisturbed for a minimum of 9 hours. Throughout this time, the temperature inside the jar should ideally remain stable within the 100-110°F (37.8-43.3°C) range. This prolonged, consistent warmth is essential for the live cultures to ferment the oat milk effectively, transforming it into yogurt.
- After the incubation period is complete, immediately transfer the jar of homemade oat yogurt into the refrigerator. This critical cooling step stops the fermentation process and allows the yogurt to continue chilling and thickening overnight, ideally for 8-12 hours. The extended refrigeration will result in a firmer, creamier texture and enhance the overall flavor of your finished plant-based yogurt.
To Make Oat Milk Yogurt with an Instant Pot:
- To make oat yogurt in an Instant Pot, pour the oat milk directly into the Instant Pot’s inner pot. With the lid off, select the “yogurt, high temperature” setting on your Instant Pot. Gradually and slowly whisk in the xanthan gum, ensuring it dissolves completely to create a smooth, thickened mixture without any lumps.
- Allow the oat milk to heat until it reaches a temperature of 180°F (82°C). Throughout this heating process, whisk the milk frequently to prevent the formation of a skin on its surface. Once the correct temperature is achieved, carefully remove the inner pot from the Instant Pot base to begin the cooling stage.
- Let the oat milk cool naturally on the counter until its temperature drops to between 105-110°F (40.6-43.3°C), whisking occasionally to aid cooling and prevent skin from forming. After it has cooled, remove one cup of the milk and whisk in the yogurt starter until it’s completely smooth. Then, return this smaller yogurt-milk mixture to the larger pot of milk, whisking well. Finally, place the inner pot back into the Instant Pot base.
- Securely place the lid on the Instant Pot, but ensure the steam release vent is set to the “venting” (open) position. Now, incubate the oat yogurt for a full 9 hours using the “low yogurt” setting on your Instant Pot. (If you’re using a Ninja Foodi, this corresponds to the “ferment” setting.) This long, low-temperature incubation is crucial for developing the proper tangy flavor and thick texture of your vegan yogurt.
- After the 9-hour incubation period, carefully transfer the freshly made yogurt into a clean glass mason jar with a lid. Refrigerate the oat yogurt overnight. This chilling process allows the yogurt to set completely and thicken further, resulting in a perfectly creamy consistency ready to enjoy.
- You’ll find that homemade oat yogurt is wonderfully mild, with only a subtle tang. If you observe any liquid separation after fermentation, simply stir it back into the yogurt. The xanthan gum added earlier in the recipe is highly effective at stabilizing the mixture, significantly helping to prevent excessive separation and ensuring a smooth, consistent texture.
Save this RecipeSaved!
Equipment
- Kitchen Thermometer
- Whisk
- Wide-Mouth Quart Jar
- Instant Pot
Notes
💭 Expert Tips from Dietitian Summer Yule
This is a level 1 recipe (may help support fat loss). Plain oat yogurt is incredibly versatile, making it ideal as a standalone snack or a valuable component in a larger meal. If your goal is to keep your snack under 100 calories, a ½ cup portion is a great choice. For an even lighter option, you could opt for a low-calorie oat milk, though be aware this might alter the final consistency compared to using full-fat oat milk.
Is oat milk yogurt good for you? The nutritional value of your homemade oat milk yogurt is directly influenced by the specific brand of oat milk and the yogurt starter you select. This recipe empowers you to create a plain, unsweetened oat yogurt that is robustly protein-packed. Much like high-protein dairy yogurt, this protein-rich oat milk yogurt can be an excellent inclusion for weight management strategies.
Plain yogurt is one of the most adaptable ingredients in the kitchen, excelling in both sweet and savory culinary applications. Consider using it as a direct substitute for sour cream or mayonnaise in recipes, or simply enjoy it with fresh fruit and a tablespoon or two of nuts for a satisfying treat. Yum!
Crafting your own oat yogurt at home provides a unique opportunity to create products that perfectly align with your dietary preferences, especially if specific options aren’t available in stores. If you struggle to find plain, calcium-fortified, and high-protein oat yogurt in your local market, taking the DIY route is a smart and rewarding solution!
Nutrition information provided is for one serving of oat yogurt made with Califia Farms protein oat milk (original) and Oatly plain oatgurt. The actual nutrition information for your homemade oat yogurt will depend on the specific ingredients you choose and their respective nutritional values.
nutrition info disclaimer
All recipes on this website may or may not be appropriate for you, depending on your medical needs and personal preferences. Consult with a registered dietitian or your physician if you need help determining the dietary pattern that may be best for you.
The nutrition information is an estimate provided as a courtesy. It will differ depending on the specific brands and ingredients that you use. Calorie information on food labels may be inaccurate, so please don’t sweat the numbers too much.
“To taste” means to your preferences, which may have to be visual to follow food safety rules. Please don’t eat undercooked food x
Nutrition
📋 Calories, Net Carbs, Protein (Estimate for 2-Ingredient Almond Milk Yogurt)
While this article focuses on oat milk yogurt, for reference, one cup of Instant Pot almond milk yogurt (made with only two ingredients as per my specific recipe) typically contains approximately 139 calories, 3.4 grams of net carbohydrates, and a robust 10.3 grams of protein. Furthermore, this type of almond yogurt is often an excellent source of calcium, contributing significantly to daily nutritional needs.
🤔 What’s the Healthiest Yogurt to Eat? A Comparative Look
When it comes to choosing the healthiest yogurt, my top recommendation remains plain, unsweetened Greek dairy yogurt. This is due to its naturally comprehensive nutritional profile, offering high-quality protein, essential calcium, vitamin B12, and a spectrum of other vital nutrients within its natural food matrix. Much like certain plant-based yogurts, dairy yogurt contains very low levels of lactose after fermentation, making it an enjoyable option even for some individuals with limited lactose tolerance.
Among plant-based options, calcium-fortified plain soy yogurt typically comes closest to matching the nutritional density of dairy yogurt. In contrast, many conventional oat yogurts often fall short, lacking sufficient protein, calcium, vitamin B12, or a combination of these crucial nutrients. Additionally, a significant number of commercial oat yogurt brands primarily offer flavored varieties that are unfortunately high in added sugars, diminishing their overall health benefits.
Driven by increasing consumer demand, the market is steadily seeing an emergence of more sophisticated and nutritionally complete soy-free, dairy-free yogurt alternatives. However, the development of these dairy-free yogurt options often lags behind the innovation seen in dairy-free milk alternatives. In essence, you can frequently find superior dairy-free milk options with better fortification and nutritional profiles before their corresponding yogurt versions become widely available.
This trend is particularly evident when comparing oat milk and oat yogurt. It’s now quite easy to find oat milk products that are expertly fortified with both protein and calcium, offering a significant nutritional boost. For those adhering to a vegan diet or otherwise avoiding dairy, it becomes even more critical to consciously replace the essential nutrients typically found in dairy, rather than solely focusing on “eating clean” without considering nutrient density.
It’s important to acknowledge that food labels, even for whole foods, don’t always paint a complete picture of the bioavailable vitamins and minerals you’re consuming. For instance, while spinach appears rich in iron and calcium, these minerals are not highly bioavailable from spinach due to the presence of oxalates. This isn’t to say we should avoid nutrient-dense grains and greens because they contain anti-nutrients. Instead, it underscores the importance of paying even closer attention to achieving adequate nutrition, including through fortification, when following dairy-free and vegan dietary patterns. Therefore, never hesitate to thoroughly read the labels of your chosen oat milk and oat yogurt to fully understand the nutritional value you’re investing in!
FAQs: Your Oat Yogurt Questions Answered
How to make oat milk yogurt with probiotics?
To ensure your homemade oat milk yogurt is rich in beneficial probiotics, you must use a starter that contains live, active cultures. The easiest method is to use a store-bought plain oat yogurt (or another vegan yogurt) that explicitly states “live, active cultures” on its label. Alternatively, you can use the contents of probiotic capsules as a starter. A general guideline is to use the contents of one probiotic capsule per 4 cups of oat milk to kickstart the fermentation process.
Can I make oat milk yogurt with dairy yogurt starter?
Yes, absolutely! If your dietary preferences are not strictly 100% plant-based, you can successfully use a traditional dairy yogurt starter in this recipe. Just make sure to properly thicken your oat milk with xanthan gum as instructed, and then allow it to cool to the specified temperature before adding the dairy yogurt culture. The principles of fermentation remain the same, regardless of the starter’s origin.
How to make oat milk Greek yogurt recipe?
Achieving a Greek-style oat milk yogurt is entirely possible, provided your initial batch is adequately thickened. To create a thicker, Greek-style texture, you will need to strain your fermented oat yogurt. Place it in a colander that has been lined with several layers of cheesecloth, and then set this colander over a bowl to catch the liquid whey. Allow it to drain in the refrigerator for approximately 24 hours. The longer you let it drain, the thicker your Greek-style vegan oat yogurt will become.
Why is oat milk creamy?
Oat milk derives its natural creaminess from the fact that blended oats absorb water exceptionally well, creating a smooth and somewhat viscous liquid. Furthermore, many commercial oat milk brands often incorporate canola oil or other highly processed added oils. These oils contribute significantly to that rich, fatty mouthfeel that consumers associate with creamy milk, enhancing the overall texture and indulgence of the product.
Is oat milk yogurt gluten-free?
Naturally, oats are a gluten-free grain. However, during various stages of processing and harvesting, oats can sometimes become cross-contaminated with gluten-containing grains like wheat, barley, or rye. To ensure your oat milk yogurt is truly gluten-free, it’s essential to use certified gluten-free oat milk and oat yogurt starter. For example, Oatly oat milk and Oatly oat yogurt are both explicitly certified gluten-free. Always check the product labels for the most current and accurate gluten-free certifications and nutrition information.
Is making homemade oat yogurt safe?
Yes, making homemade yogurt, including oat yogurt, is generally safe when proper food safety guidelines are meticulously followed. It’s critical to understand that oat milk, if kept within the food safety “danger zone” of 41-140°F (5-60°C) for more than 1-2 hours without proper fermentation, should not be consumed as it can harbor harmful bacteria. However, yogurt itself, due to the beneficial bacteria transforming the milk and increasing its acidity, may be safely consumed after a prolonged incubation period at these temperatures. The resulting acidity in yogurt acts as a natural barrier against the growth of unwanted, spoilage-causing bacteria, making the fermented product safe.
👩🏻🍳 Delicious Recipes Using Your Homemade Oat Yogurt
Looking for even more creative and delicious ways to incorporate your freshly made oat yogurt into your meals? This versatile plant-based yogurt can be a fantastic addition to many recipes. Try substituting it for dairy yogurt in some of these delightful recipes:
- Sugar Free Mango Lassi Smoothie: A refreshing and tropical beverage that’s naturally sweet and packed with flavor.
- Fruits that Start with B Bowls: A vibrant and nutritious breakfast or snack, combining various fruits with your creamy oat yogurt.
- Applesauce Overnight Oats: Prepare a wholesome and convenient breakfast the night before, perfect for busy mornings.
- Creamy Salad Dressings: Use plain oat yogurt as a healthy base for creamy dressings, adding herbs, spices, and a touch of lemon juice.
- Savory Dips: Blend it with garlic, herbs, and a squeeze of lime for a delicious, dairy-free dip for vegetables or crackers.
Join our community! Subscribe for all of the latest and greatest recipes, and follow me on Facebook, Pinterest, Instagram, and YouTube!
